Working with Workspace Files
12
NetLinx Studio - Instruction Manual
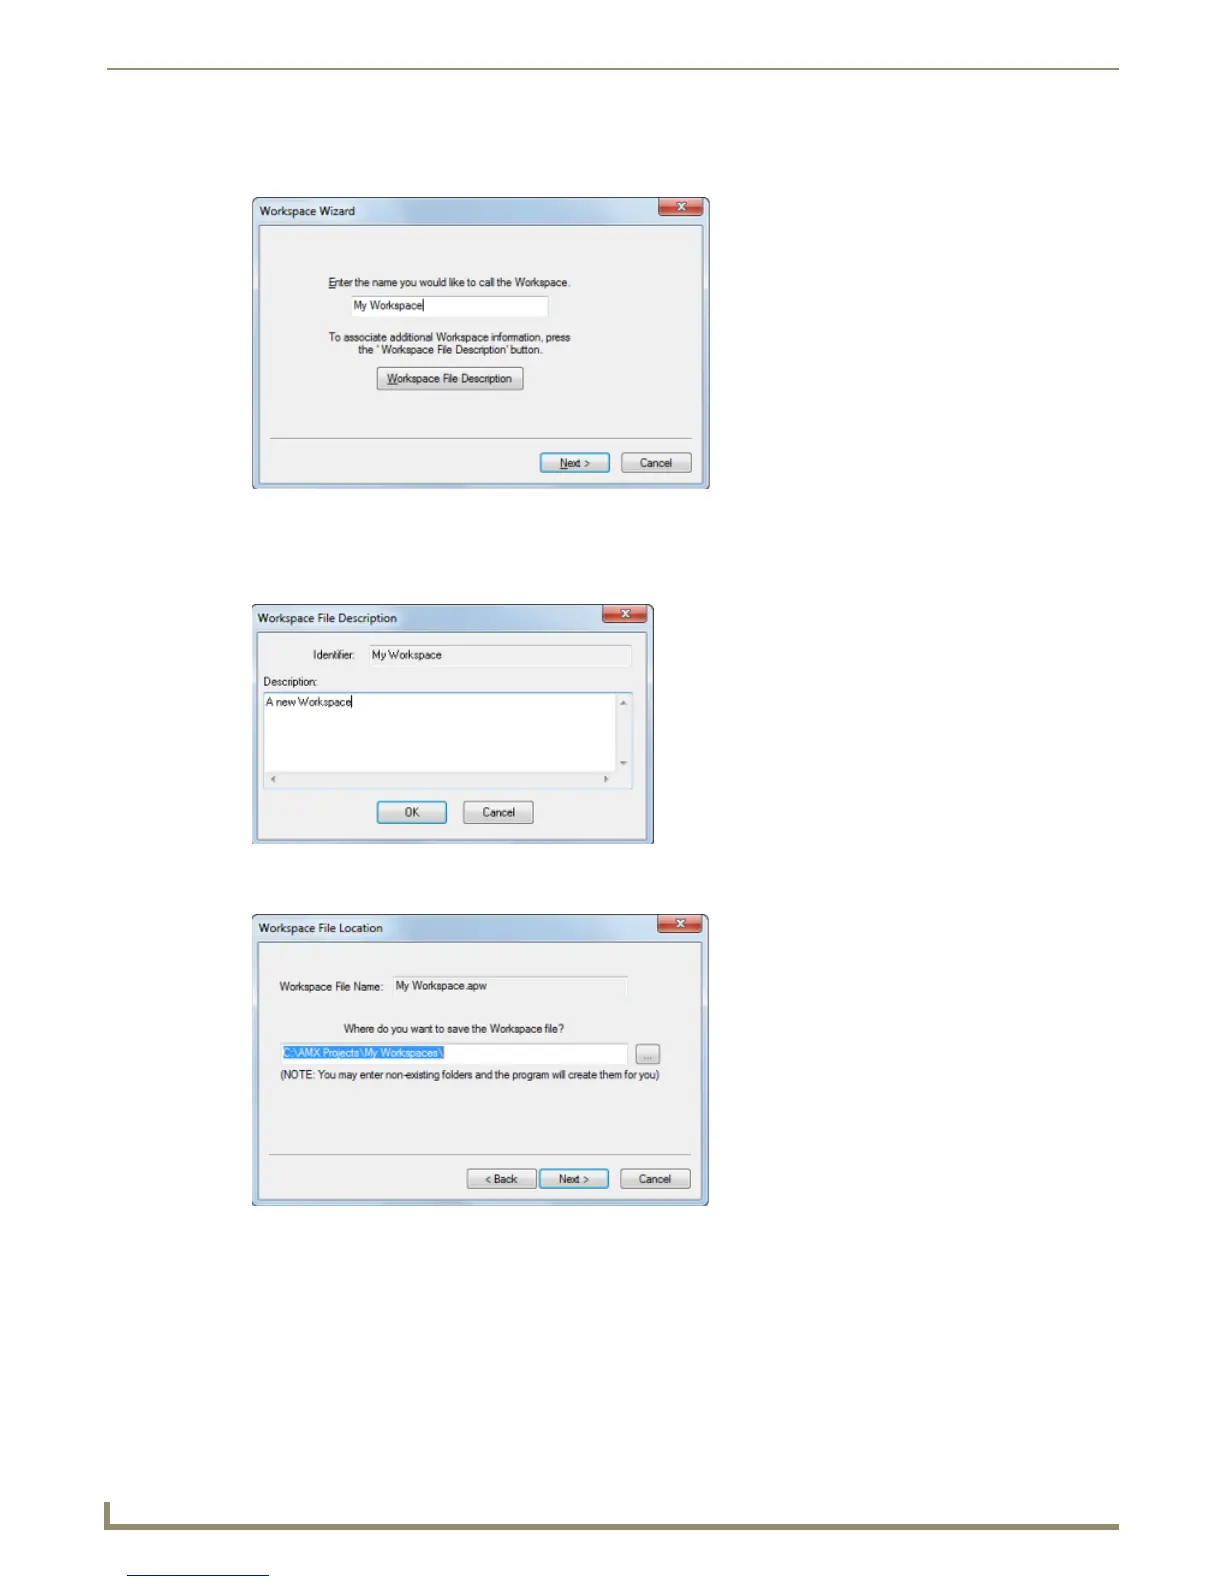
3. In the Workspace Wizard dialog (FIG. 18), enter a name (up to 128 characters) for the new Workspace file in the text
box (required).
To enter an optional text description (2000 characters max) for the new Workspace, click Workspace File
Description, and enter the description in the Workspace File Description dialog (FIG. 19). Click OK to return to
the Workspace Wizard.
4. Click Next to proceed to the Workspace File Location dialog (FIG. 20).
5. Specify the target location for the Workspace file in the text box, or click the Browse (...) button (to the right of the
text box) to locate and select a target directory via the Browse For Folder dialog. Click Next to proceed to the
Project Identifier dialog (FIG. 21).
FIG. 18 Workspace Wizard dialog
FIG. 19 Workspace File Description dialog
FIG. 20 Workspace File Location dialog