Working with Workspace Files
13
NetLinx Studio - Instruction Manual
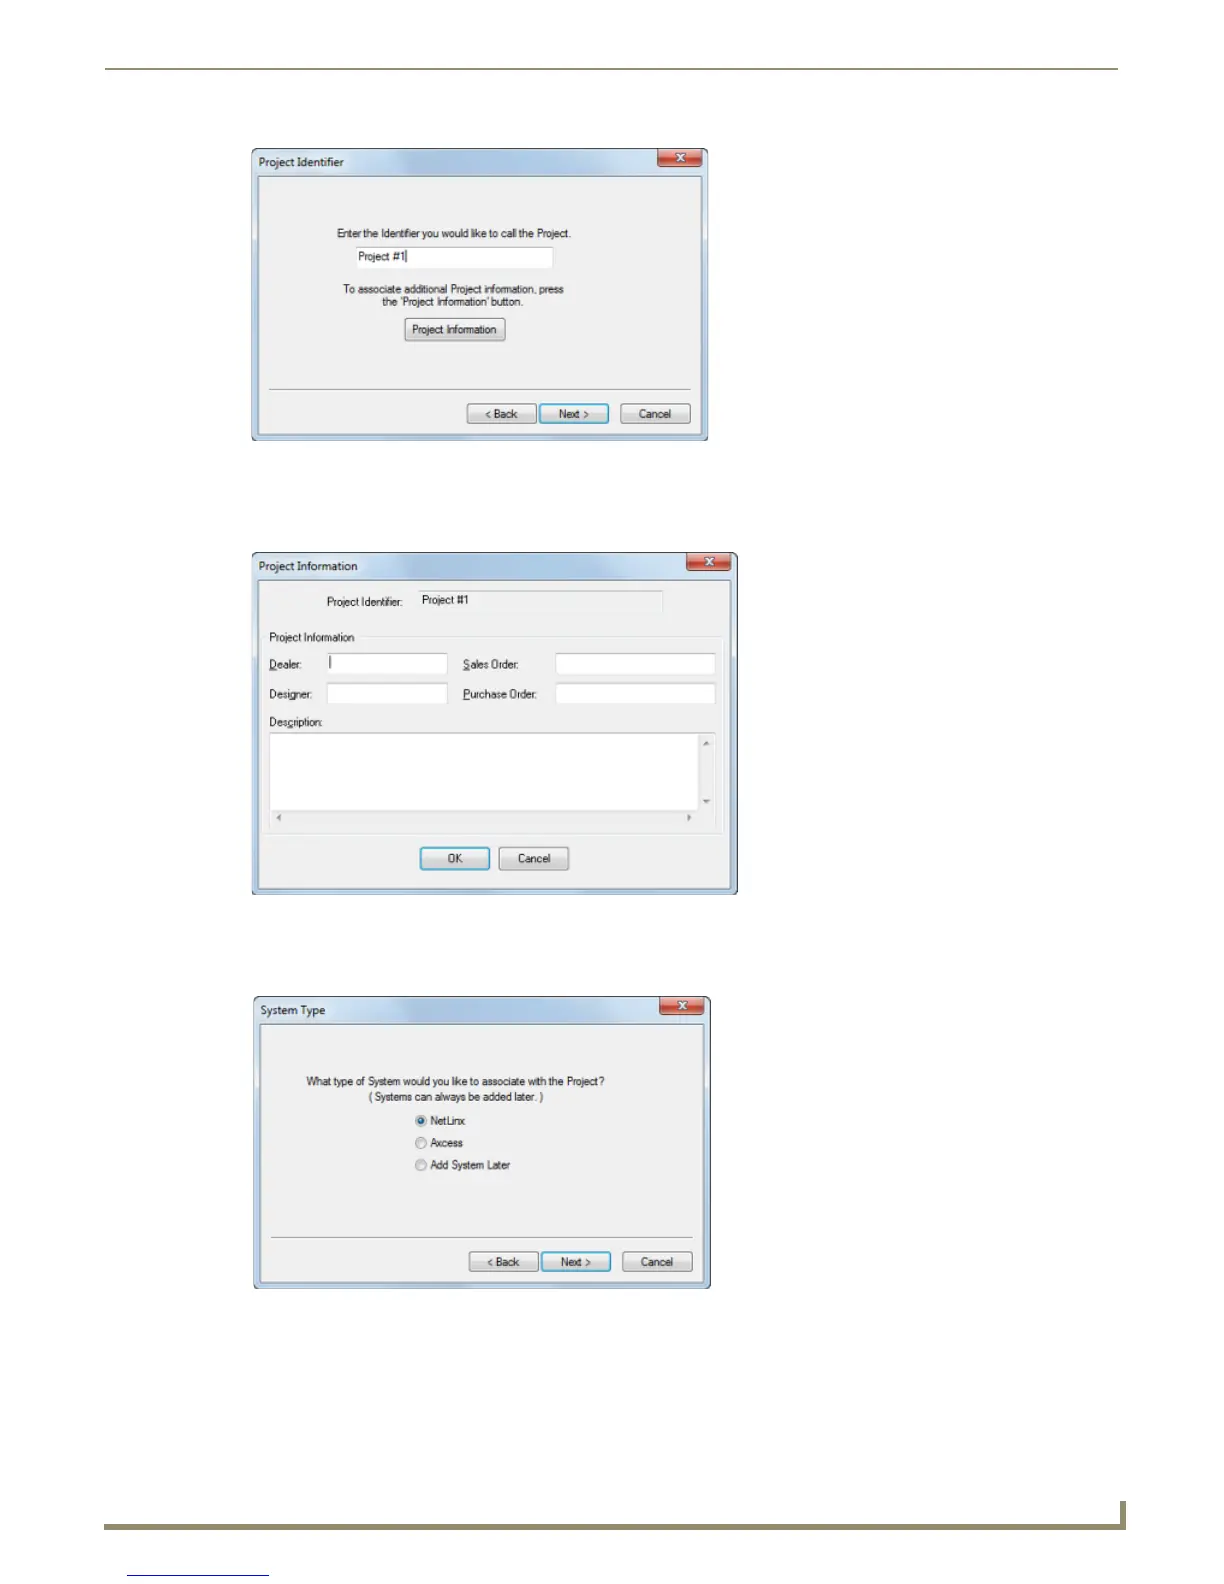
6. Enter an identifier (name) for the new Project in the text box. To enter additional information for the new Project,
click Project Information and fill in the Project Information (up to 128 characters) and Description (up to 2,000
characters) text fields in the Project Information dialog (FIG. 22). All fields in this dialog are optional).
Click OK to return to the Project Identifier dialog.
7. Click Next to proceed to the System Type dialog (FIG. 23).
8. Use the option buttons to select which type of System to add to the Project (NetLinx or Axcess). This dialog also
includes the option to add the System later, in which case the Workspace Wizard is complete. Select either NetLinx
or Axcess, and click Next to proceed to the System Information dialog (FIG. 24).
FIG. 21 Project Identifier dialog
FIG. 22 Project Information dialog
FIG. 23 System Type dialog