286
Exhaust Housing & Adapter
Exhaust Housing Service
Exhaust Housing Service
Exhaust Housing Removal
Before removing the exhaust housing, remove
the:
• Gearcase. Refer to Gearcase Removal starting
on p. 361.
• Powerhead. Refer to Powerhead Removal
starting on p. 239.
• Oil tank assembly. Refer to Oil Tank Removal
starting on p. 205.
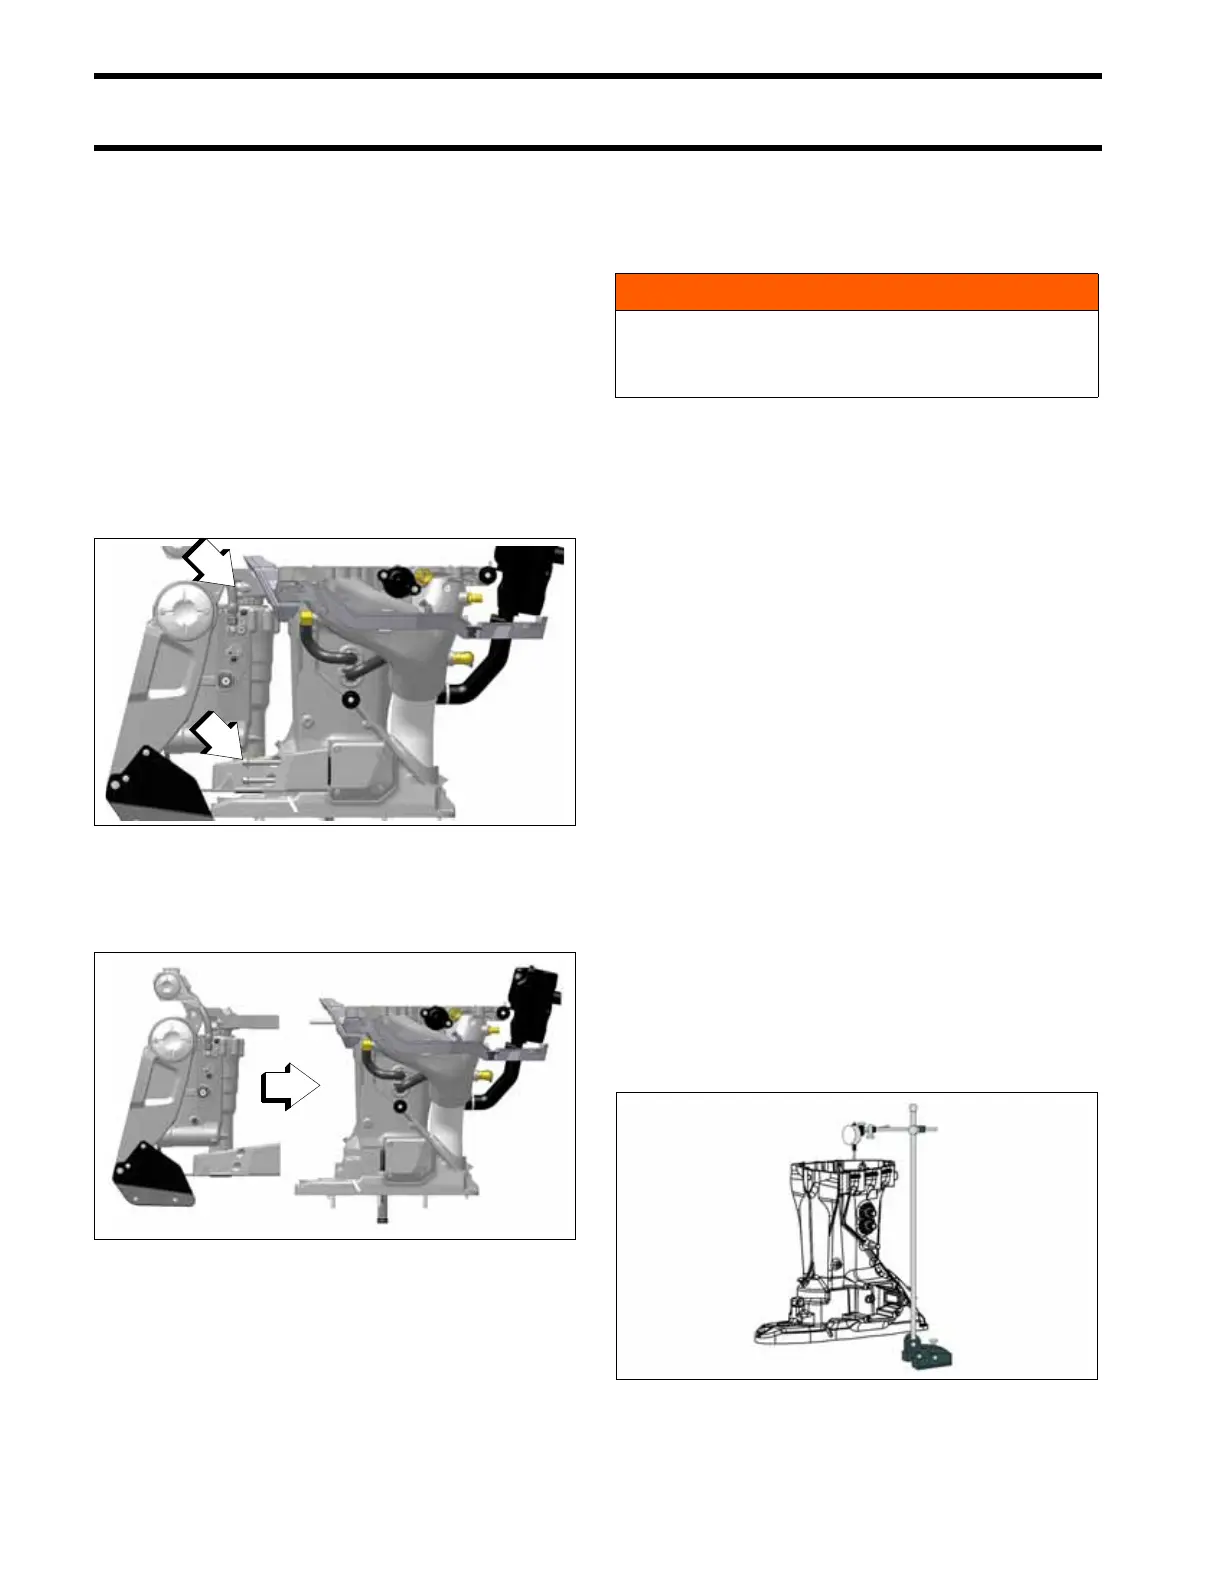
Remove and discard four lower mount screws.
Remove the two upper mount nuts and washers.
Remove the exhaust housing and adapter from
the swivel bracket assembly.
Cleaning and Inspection
Clean all parts with parts cleaning solvent and dry
with compressed air. All nut and screw threads
coated with thread locking material must be thor-
oughly cleaned before assembly.
Examine the upper and lower mounts, and
replace if deteriorated or damaged.
Before checking the exhaust housing for distor-
tion:
• Remove the exhaust adapter.
• Remove the gearcase retaining studs.
• Thoroughly clean the top and bottom mating
surfaces and remove all sealer and corrosion.
Check the exhaust housing for distortion. Place
the housing on a surface plate. Using a dial indi-
cator, check flatness by measuring the run-out on
the top edge of housing. The maximum allowable
run-out is 0.009 in. (0.228 mm). If you do not have
access to a dial indicator and surface plate, seek
the services of a machine shop. Do NOT attempt
to straighten a distorted housing. Replace it.
IMPORTANT: A distorted exhaust housing will
cause the upper driveshaft splines to wear exces-
sively and will damage the crankshaft splines.
1. Four lower mount screws
2. Two upper mount nuts and washers
009341
009342
WARNING
Wear safety glasses to avoid personal injury,
and set compressed air to less than 25 psi
(172 kPa).
009352