254
Powerhead
Powerhead Assembly
Powerhead Assembly
IMPORTANT: Proceed slowly. Make no forced
assemblies unless a pressing operation is called
for. All internal components must be perfectly
clean and lightly coated with outboard lubricant.
IMPORTANT: Use new wrist pin retaining rings,
gaskets, seals, and O-rings during assembly.
Crankshaft Assembly
Oil the end of the crankshaft. Use Crankshaft
Bearing/Sleeve Installer, P/N 338649, and place a
new lower main bearing onto crankshaft with let-
tered side facing the tool. Install bearing until it
seats on the crankshaft.
Oil the end of the crankshaft. Use Crankshaft
Bearing/Sleeve Installer, P/N 338649, to drive a
new sleeve onto the crankshaft until the installer
contacts the lower main bearing.
If the installer sticks on the sleeve after installa-
tion, thread Slide Hammer, P/N 391008, into
installer and pull it off.
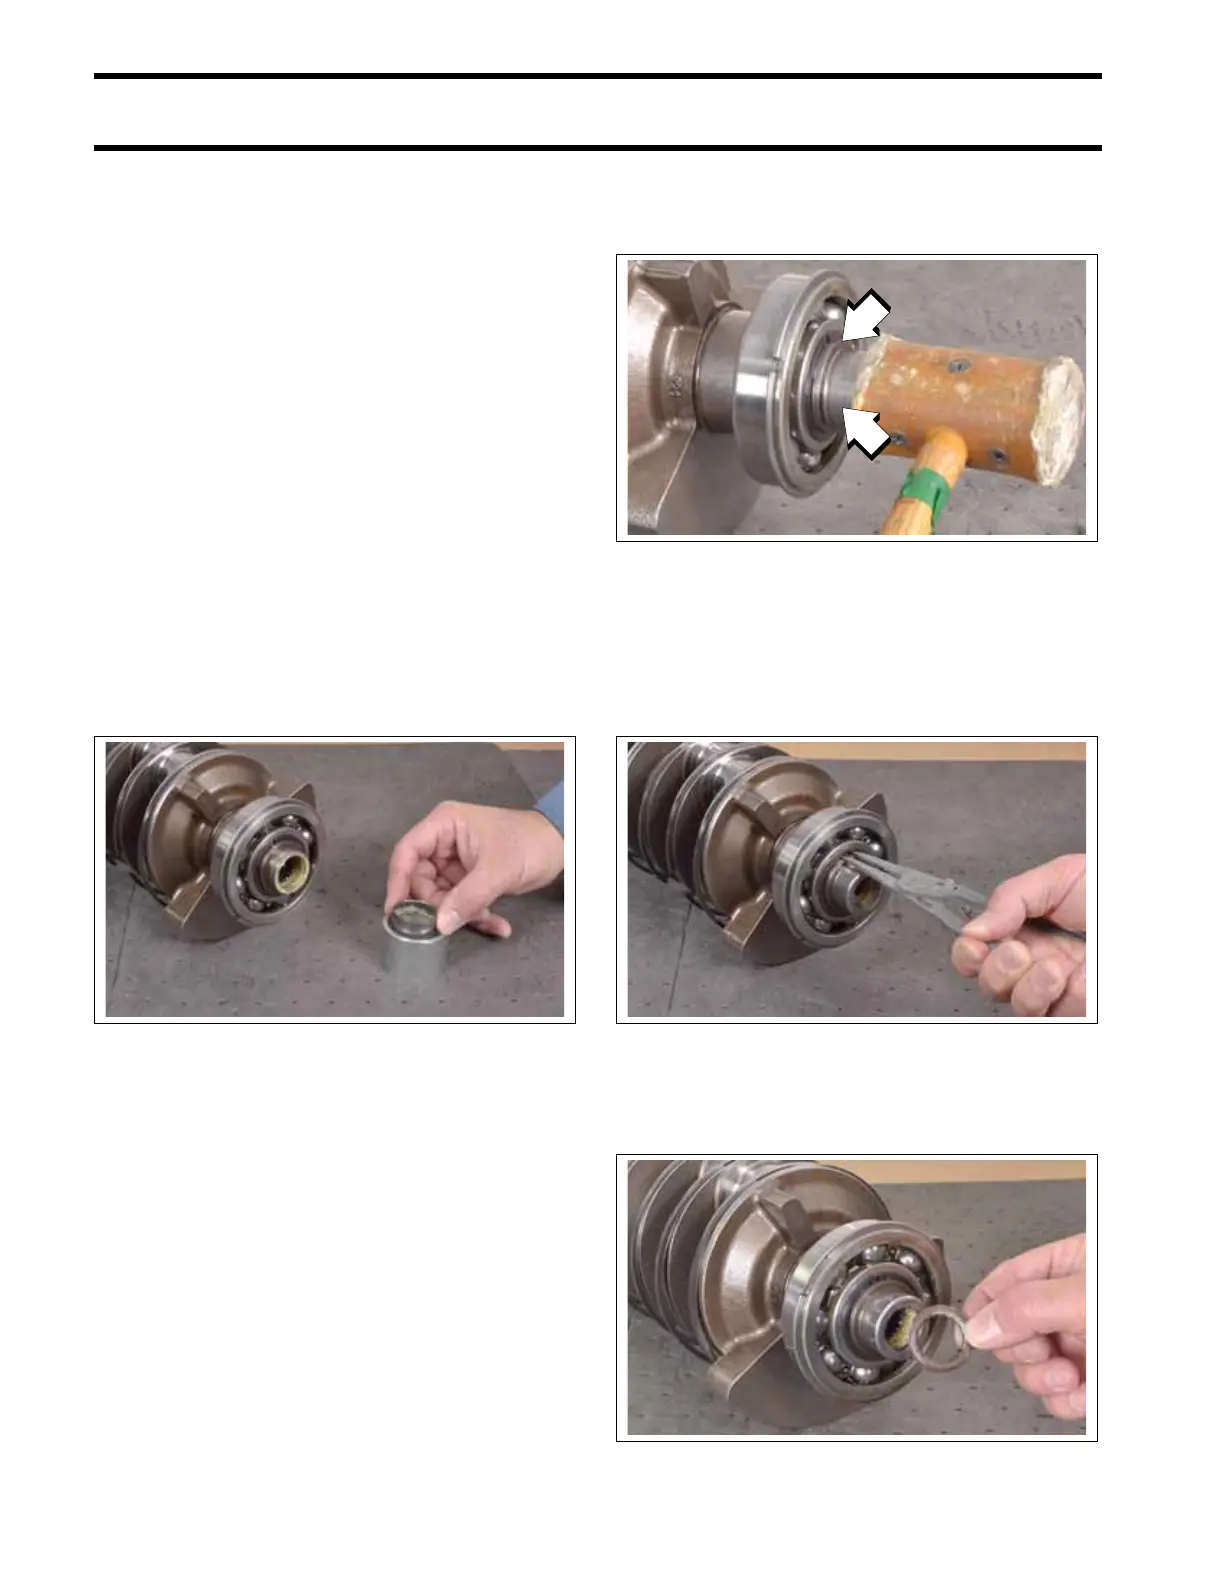
The sleeve must contact the flange on the bottom
of the crankshaft. Use a small soft-faced mallet to
gently tap the sleeve into place.
IMPORTANT: Inspect sleeve after installation.
Sleeve must not be used if surface is damaged.
Use retaining ring pliers to install bearing retaining
ring with sharp edge facing away from bearing.
Lubricate a new driveshaft O-ring and lightly lubri-
cate crankshaft splines with Moly Lube. Install
O-ring in sleeve.
009679
1. Flange
2. Sleeve
009720
009680
009710