259
Powerhead
Powerhead Assembly
11
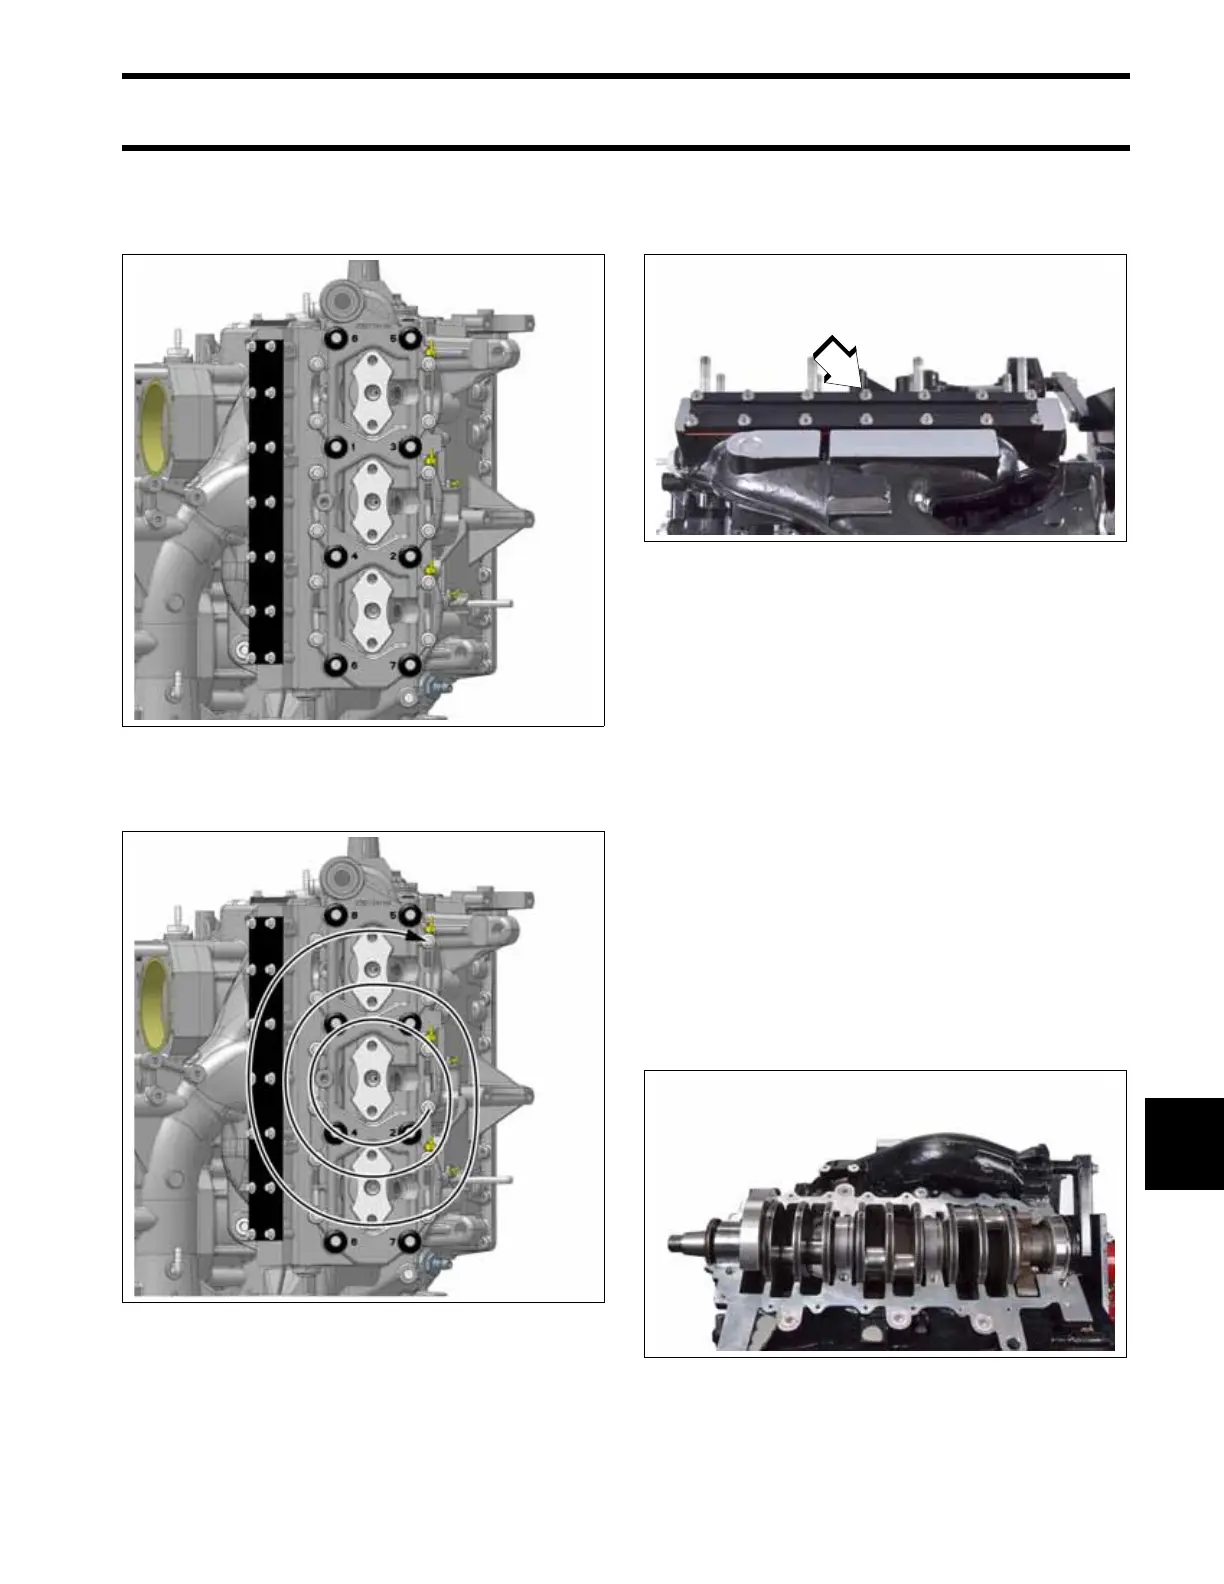
Following the sequence stamped on the cylinder
head, tighten all 8 nuts in stages to a torque of 47
to 49 ft. lbs. (64 to 66 N·m).
Tighten all 12 screws in a spiral pattern to a torque
of 15 to 17 ft. lbs. (21 to 23N·m).
Deck Cover Installation
Install a new deck cover gasket, then install the
deck cover. Install 14 deck cover screws. Start in
the center and work outward in a spiral pattern
and tighten to a torque of 84 to 106 in. lbs.
(10 to 12 N·m).
Crankshaft and Connecting
Rods
Check that main bearing alignment dowel pins are
seated in the block.
Push all pistons to the top of cylinders. Remove
the numbered connecting rod caps and hold the
connecting rods to the outside with rubber bands.
Gently lower crankshaft into place.
• Turn all crankcase seal ring gaps to face up.
• Locate each main bearing on its dowel pin. A
mark placed on the bearing race opposite the
dowel pin hole will help in the alignment pro-
cess.
• Tap the crankshaft upward with a rawhide mallet
to seat crankshaft and lower crankcase head.
IMPORTANT: Evinrude E-TEC G2 models use
connecting rod bearing halves containing 9 needle
009725
009726
1. Deck cover screws
009733
009714