139
Electrical and Ignition
Connector Servicing
6
Starter Installation
Install the ground cable to the starter housing.
Tighten the screw to a torque of 60 to 84 in. lbs.
(7 to 10 N·m).
Apply Locquic Primer and Nut Lock to the threads
of the four starter mounting screws. Position the
starter and install the screws and lock washers.
First, tighten the top two screws, then the bottom
two screws. Tighten screws to a torque of
15 to 17 ft. lbs. (20 to 23 N·m).
Attach the positive (+) cable to the “B” terminal on
the solenoid with lock washer and nut; tighten
securely.
Attach the red/tan wire to the “S” terminal on the
solenoid with lock washer and nut; tighten
securely.
Coat the terminal connections with No-Ox
Grease, P/N 768230.
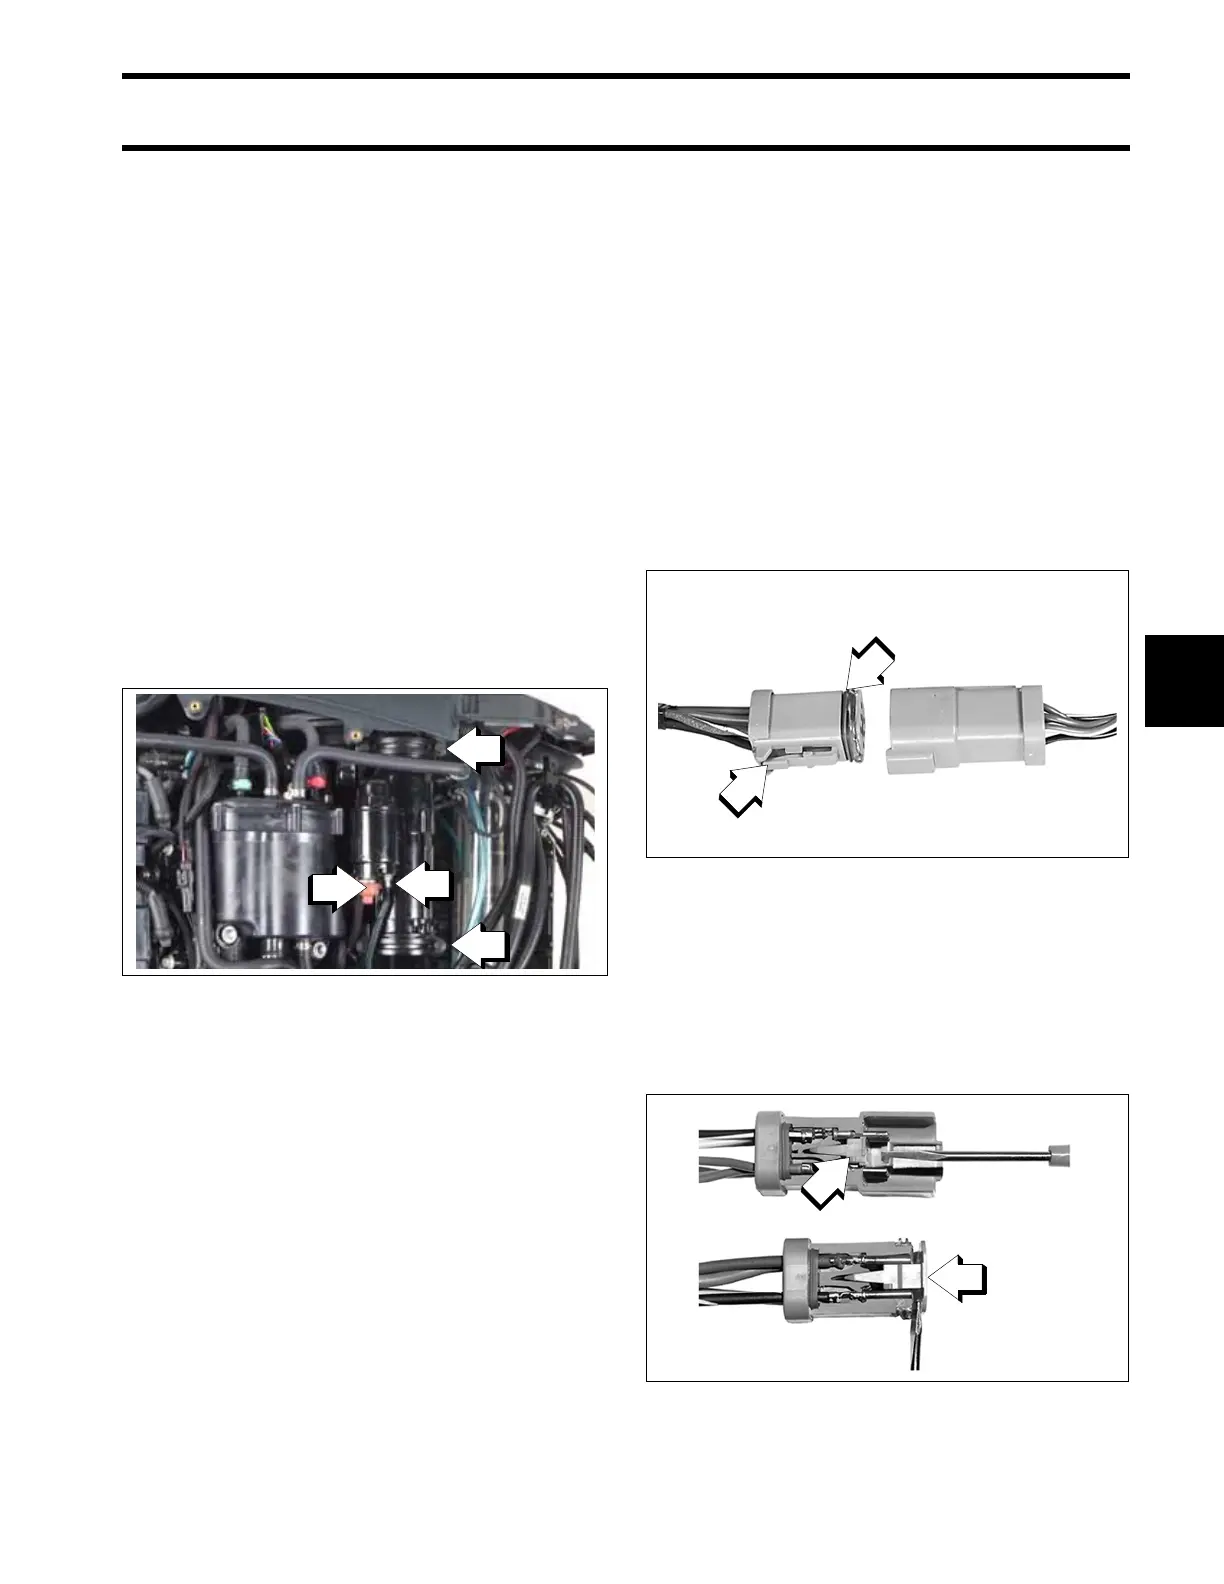
Connector Servicing
DEUTSCH Connectors
IMPORTANT: Dielectric Grease, P/N 503243 is
recommended. Incorrect grease application can
cause electrical or warning system problems.
To disconnect the connector, press the latch and
pull the connectors apart.
To connect the connector, confirm that the seal is
in place. Clean off any old grease and dirt from
connectors. Apply a light coat of Dielectric
Grease, P/N 503243, to the seal only. Push con-
nectors together until latched.
Terminal Removal
Use hook-end of Connector Service Tool,
P/N 342667, to pull out the lock-wedge from the
receptacle. Use other end of the tool to pry out the
lock-wedge from the plug. Use needle-nose pliers
to the remove lock-wedge from 3-pin receptacle.
1. Upper mounting screws
2. Lower mounting screws
3. “B” terminal
4. “S” terminal
009175
1. Latch
2. Seal
42079A
1. Wedge
42327