397
Gearcase
Gearcase Disassembly (Counter Rotation)
14
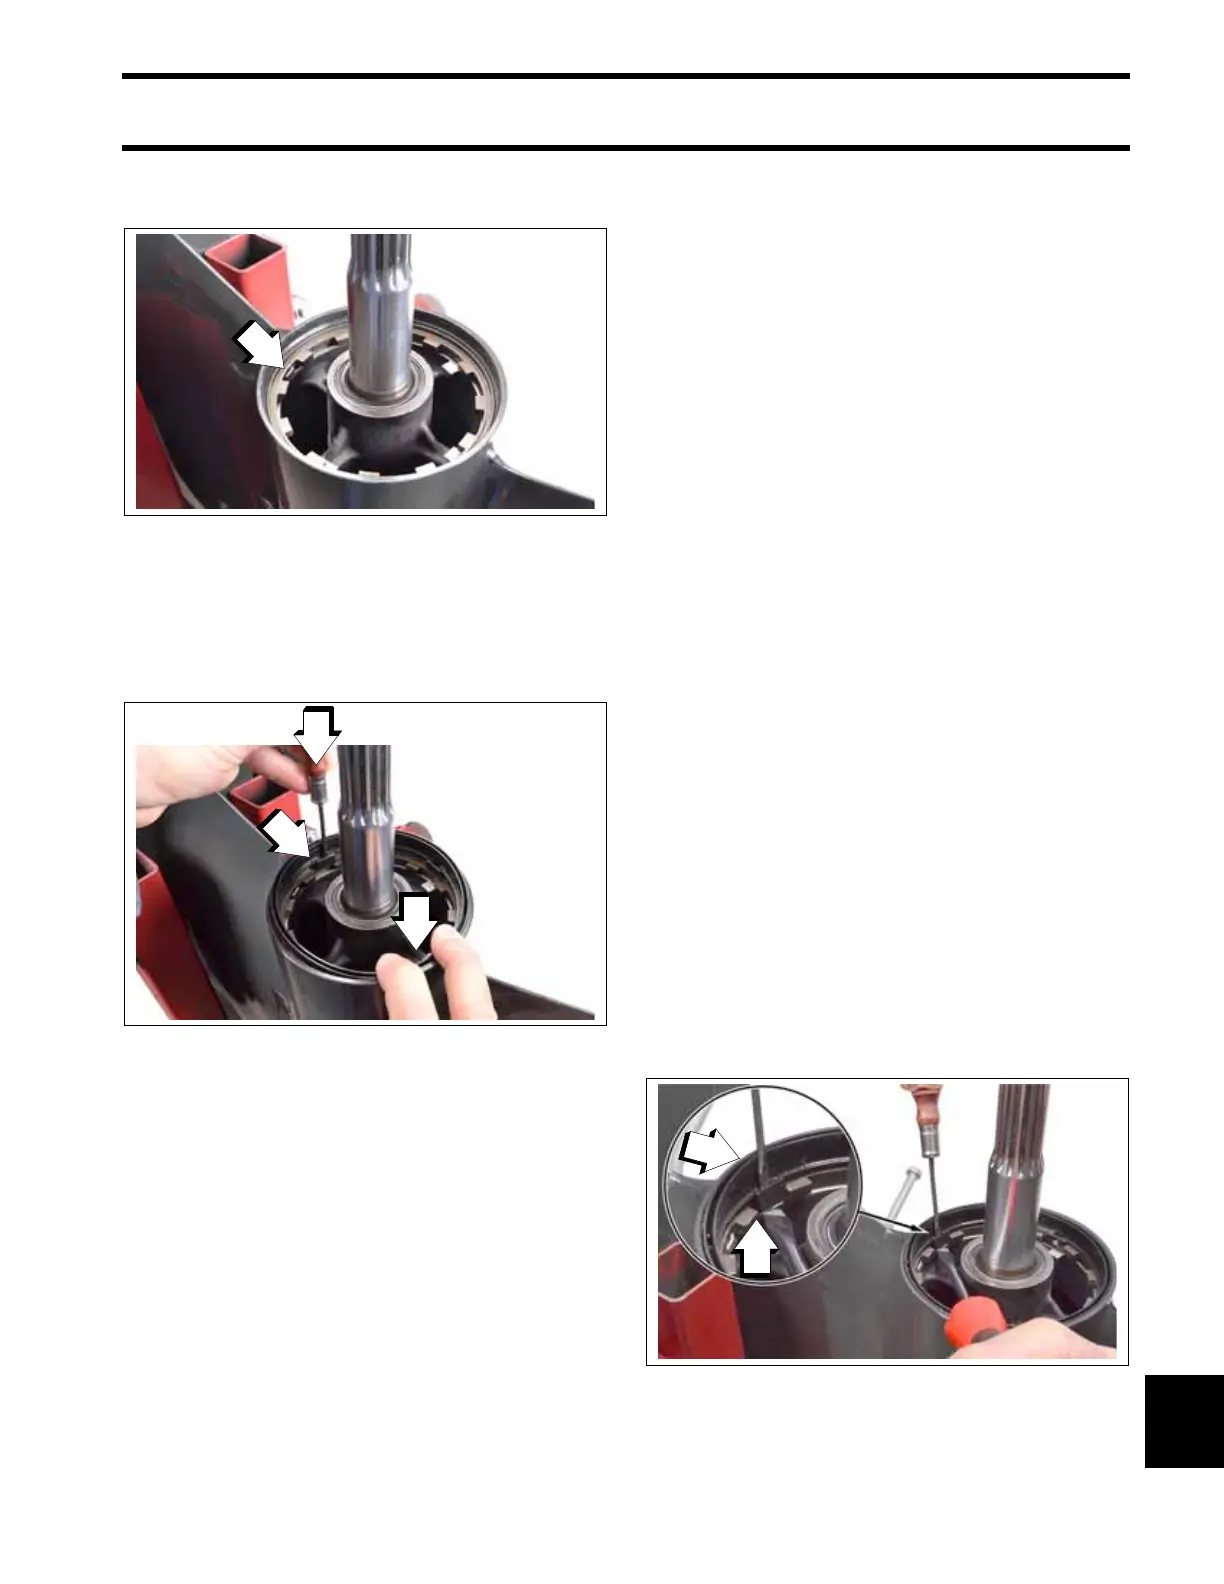
Use an appropriate tool to bend one locking tab
into the spanner nut.
Install the ventilation ring. Hold down on the venti-
lation ring. Insert a small flat-blade screwdriver
into the slot of the ventilation ring. Carefully push
the slot toward the propeller shaft, then push
down to snap the ventilation ring into place.
Final Assembly and Adjustment
To complete gearcase assembly, refer to:
• Gearcase Leak Test on p. 361
• Water Pump Service on p. 365
• Shift Rod Adjustment on p. 368
• Shift Actuator Installation on p. 370
• Gearcase Lubricant on p. 20
• Propeller Hardware Installation on p. 360
During break-in period of a reassembled gear-
case, change the gearcase lubricant between 10
to 20 hours of operation.
Gearcase Disassembly
(Counter Rotation)
IMPORTANT: Counter rotation (CR) gearcases
use unique components and require different ser-
vice procedures. Use care when working on count-
er rotation gearcases. DO NOT interchange parts
between standard and counter rotation models.
Identify gearcase type prior to disassembly. Make
sure the “CR” marking is on the end of the propeller
shaft.
Pre-Disassembly Inspection
Refer to Pre-Disassembly Inspection on p. 373.
Propeller Shaft, Propeller Shaft
Bearing Housing and Forward
Gear Removal
IMPORTANT: The propeller shaft bearing hous-
ing on the SLX-Type gearcase is PRESSED into
gearcase housing.
Use two flat-blade screwdrivers to remove the
ventilation ring from the gearcase. Insert the blade
of a small screwdriver into one of the tabs of the
ventilation ring. Carefully pry inward, toward the
propeller shaft. Use a larger screwdriver to pry the
ventilation ring up, then remove the ventilation
ring.
1. Tab
009590
1. Hold ventilation ring down
2. Ventilation ring slot
009591
1. Pry tab inward
2. Pry ventilation ring up
009529