4. Enable Use Microso network sharing.
5. Set each item if necessary.
6. Click Next.
7. Conrm the settings, and then click OK.
Related Information
& “Default Value of the Administrator Password” on page 19
Solving Problems for a Shared Network Folder
Cannot Save Scanned Images to the Shared Folder
Messages are Displayed on the Control Panel when Scanning to a Network Folder
When error messages are displayed on the control panel, check the message itself or the following list to solve the
problems.
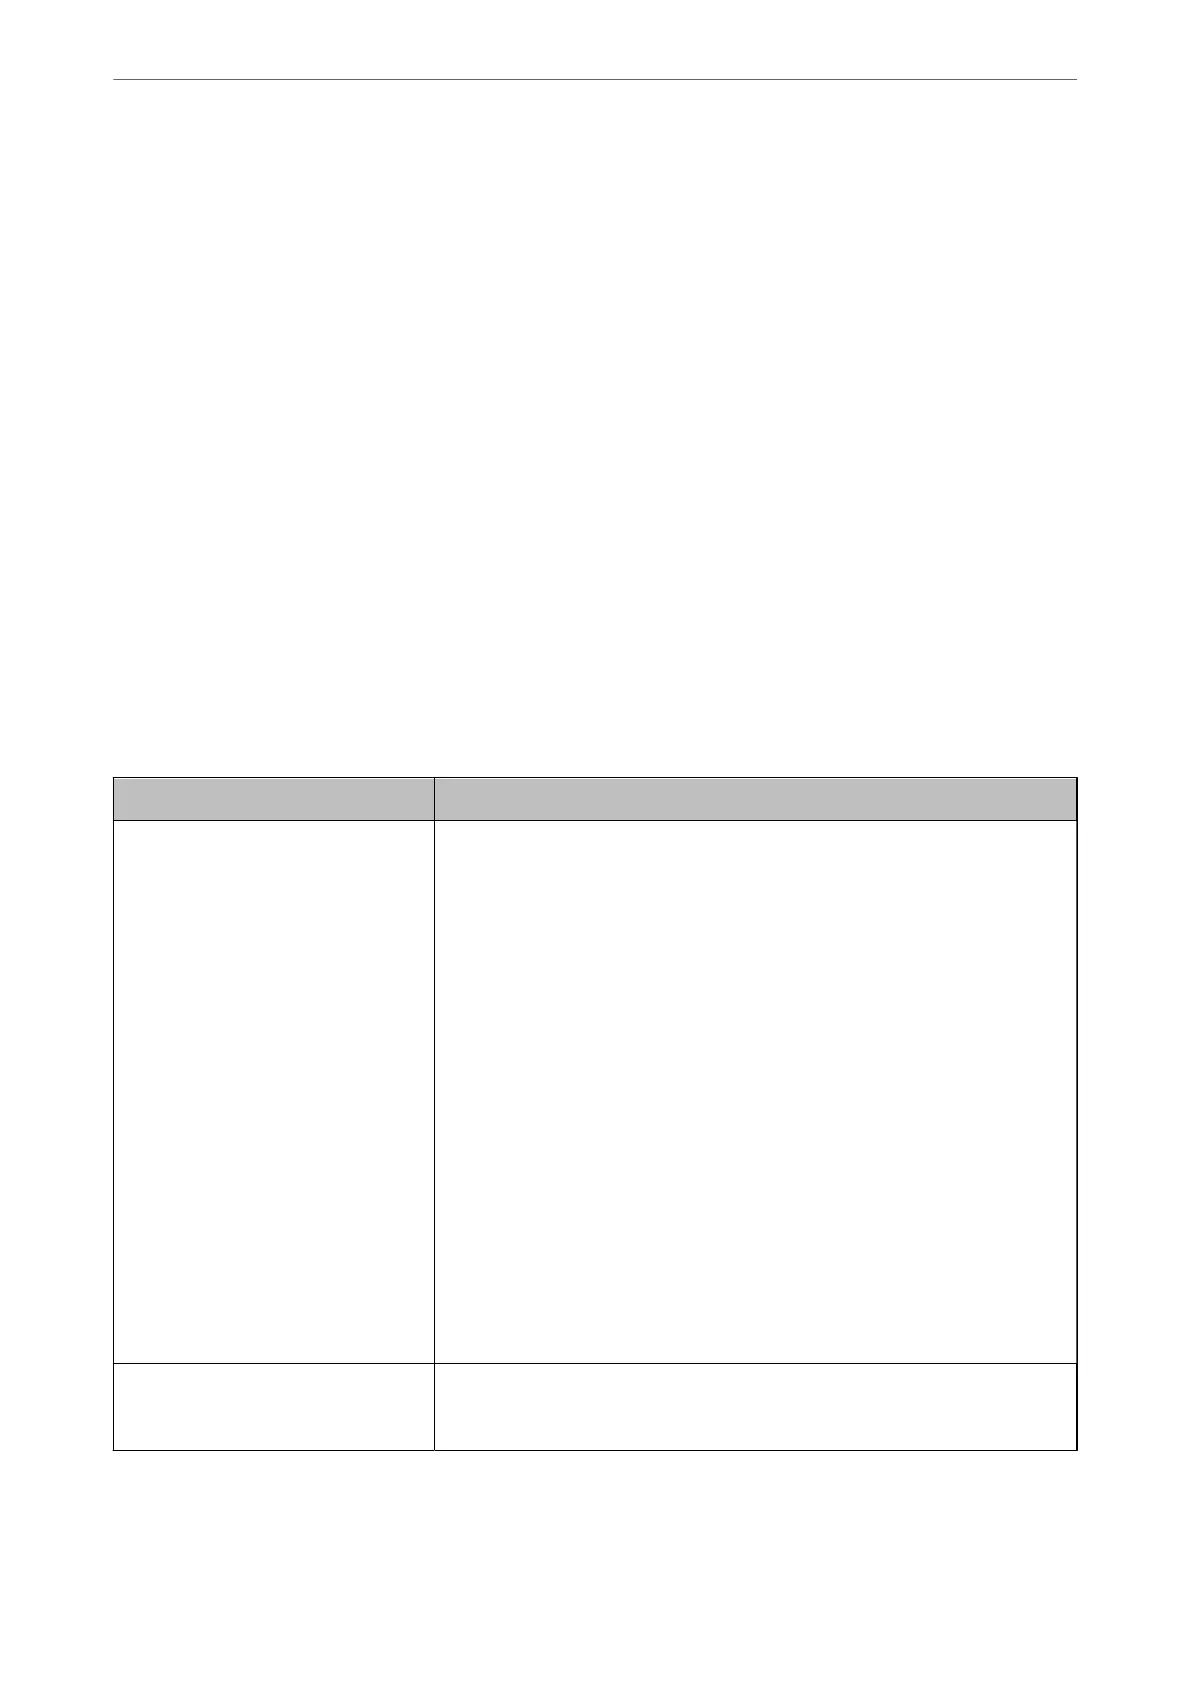
Messages Solutions
DNS error. Check DNS settings. Cannot connect to the computer. Check the following.
❏ Make sure that the address in the contacts list on the printer and the address
of the shared folder are the same.
❏ If the IP address of the computer is static and is set manually, change the
computer name in the network path to the IP address.
Example: \\EPSON02\SCAN to \\192.168.xxx.xxx\SCAN
❏ Make sure that the computer is turned on and does not sleep. If the computer
sleeps, you cannot save scanned images to the shared folder.
❏ Temporarily disable the computer's Firewall and security software. If this clears
the error, check the settings in the security software.
❏ If Public network is selected as the network place, you cannot save the
scanned images to the shared folder. Set the forward settings for each port.
❏ If you are using a laptop computer and the IP address is set as DHCP, the IP
address may change when reconnecting to the network. Obtain the IP address
again.
❏ Make sure the DNS setting is correct. Contact your network administrator
about the DNS settings.
❏ The computer name and the IP address may dier when the management
table of the DNS server is not updated. Contact your DNS server administrator.
Authentication error. Check the
authentication method, authenticated
account, and authenticated password.
Make sure the user name and the password are correct on the computer and the
contacts on the printer. Also, make sure that the password has not expired.
Preparing the Printer and Making Initial Settings
>
Preparing and Setting Up the Printer Accordin
…
86

 Loading...


