13. Route Planning
13-3
Copy from Monitored:
Copy monitored route to plan route.
Backup and Restore:
You can make a backup of a route to a floppy disk or restore a route from a floppy disk. See Chapter 17 Backup
Operations.
Report:
Generate report of planned route.
Full WP Report:
Generate detailed report of planned route.
Passage Plan Report:
Generate a combined report from active planned route and active pilot data.
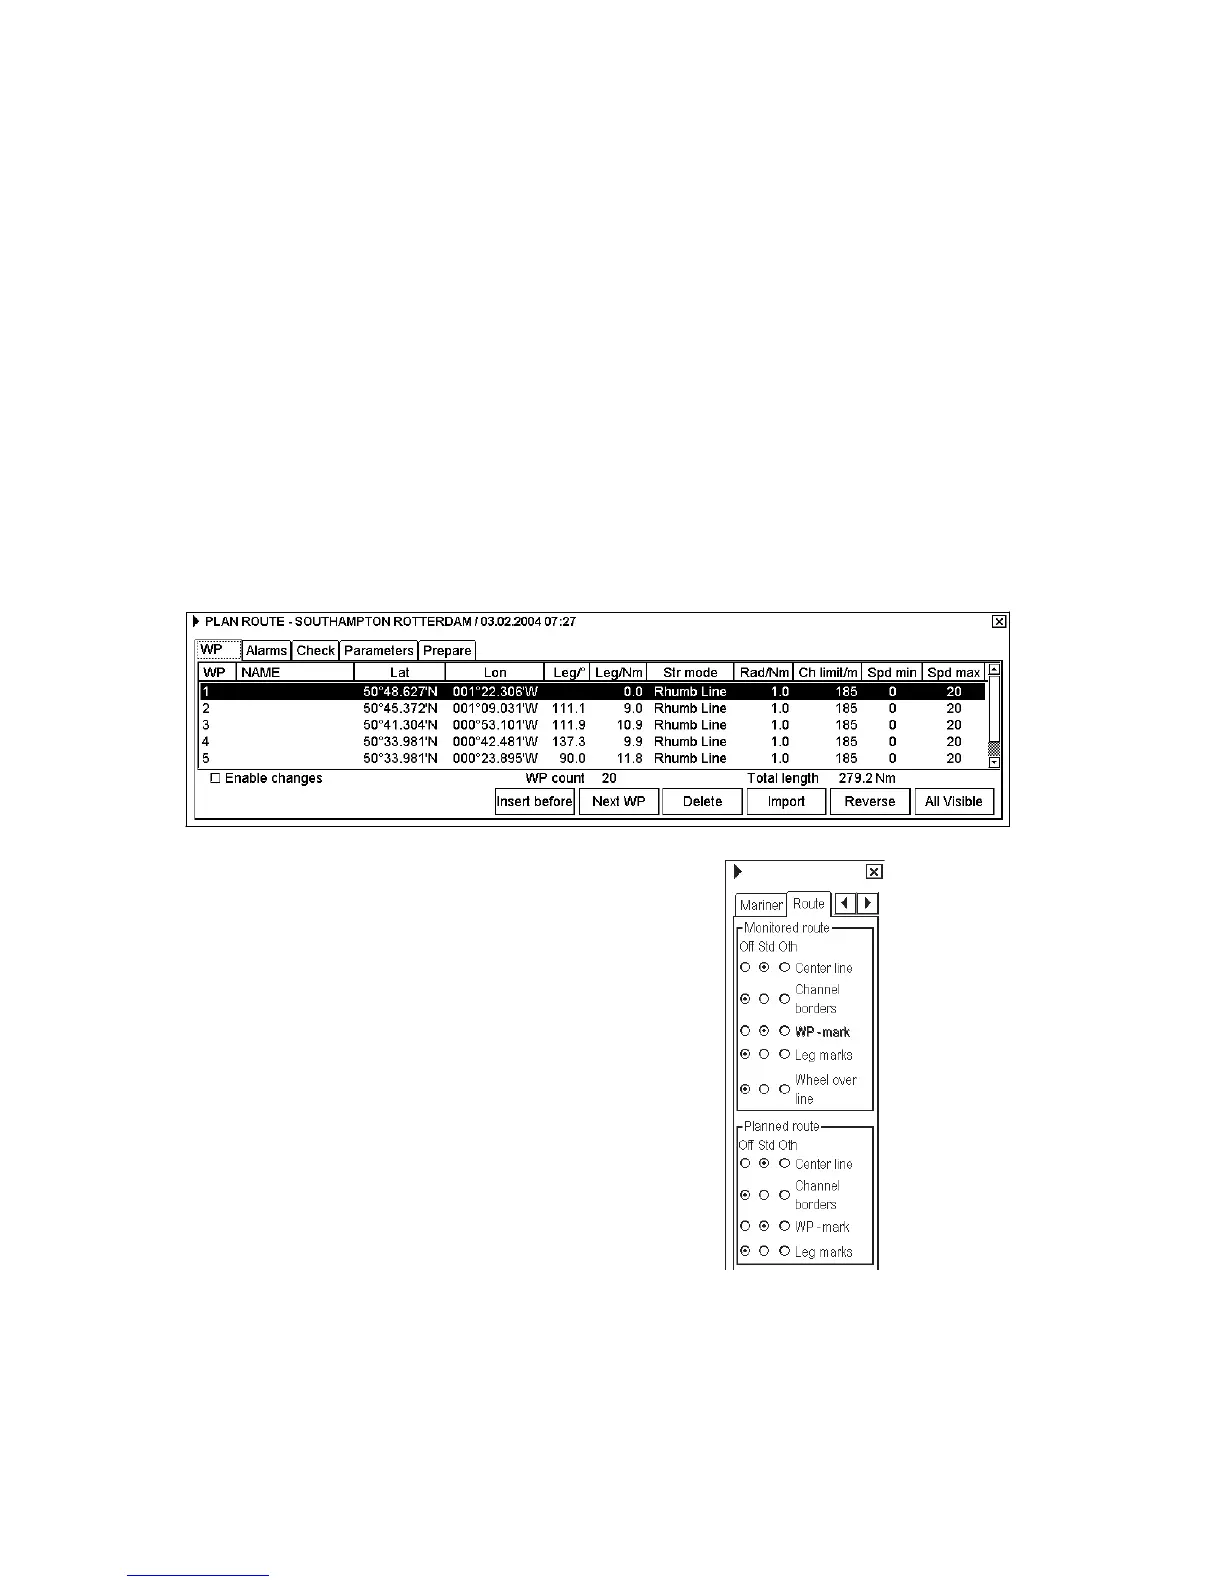
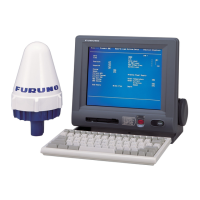
Note: To display a planned route, make sure that desired options of the planned route (Center line, Channel borders,
WP marks, Leg marks, etc.) are chosen to either Std or Other on the Route page in the Chart Display dialog box. For
the procedure, see below.
Spin the scrollwheel to display Chart Display/Info/Standard
Display in the mouse functions area then click the left mouse
button to open the Chart Display dialog box. Click the arrow tabs
or right mouse button (or NEXT key on the keyboard-equipped
control unit) to choose the Route page.
*ALL-ON
13.3 Choosing Datum
Selection of datum is very important, especially if you manually enter latitude-longitude positions or if you use a
digitizer. If you use the cursor to add and to modify waypoint locations, then you could use any datum, although it is
recommended to use native datum of the chart. For more information to choose datum, see section 15.3 Choosing
Datum.