304
Programming examples - Timer conrmation with control or switch
SEL
0%
0%
0%
C1
C2
C3
–––
C4
CONTROL SWITCH
Cnt. 1
free
–85%
STO
–––
–––
–––
SEL
C1
C2
C3
C4
free
free
Note:
Do not, however, set a switching point at a
transmitter control’s travel end-point, since
this makes reliable switching impossible.
Towards “full throttle” should now G1 be used here as
example, “closed” and again “open” under setpoint.
However, should this be the other way around the
case, go to the column on the right-hand SEL and
correct this by changing the shifting direction of “=>”
in “<=”.
To assign the newly created control switch the de-
sired timer now, you have to change a timer program-
ming according to example 4 and possibly according
to example 5 in the menu ...
»Phase timers« (page 168)
..., And select by the selection keys, the line of the
selected clock to, in this example “timer 1”:
SEL
0:00
0:00
0:00
Timer 1
Timer 2
Timer 3
–––
Lap cnt./timetab
0:00
STO
–––
–––
–––
SEL
0s
0s
0s
0s
Lap display
–––
Note:
In the case described in these two examples,
“switchable” use of the C1 stick flight phase
timers for the separate measurement of the
motor run and possibly gliding times must be used.
Otherwise, each operation of the C1 stick would have
only one common time table stop described below
as result. The assignment of the selected transmitter
switch is as described below in »Timers (general.)”.
Otherwise, go to the menu ...
»Timers (general)« (page 164)
… and select the line "Top" with the selection keys.
This is the standard line assigned to the stopwatch.
In this line, move the marker frame over the "Timer"
column to the right, to the column above the switch
symbol, using the appropriate selection key of the left
or right touch pad. Now tap twice on the centre SET
key of the right touch pad: The first tap will activate
the “Switch assignment”, the second tap will call up
the list of "expanded switches":
Model time
Batt. time
Timer
–––12:34h
1:23h
0:00
0:00
0s
0s
–––
–––
Alarm
Timer
Top :Stoppuhr
Centr.Mitte :Flugzeit
Movwünschten Schalter
to die EIN Position
(erw. Schalter: SET)
Control/Logic/fix switch
C2 C4 C5 C6
C7
C8
FX FXi L1 L2
C3C1
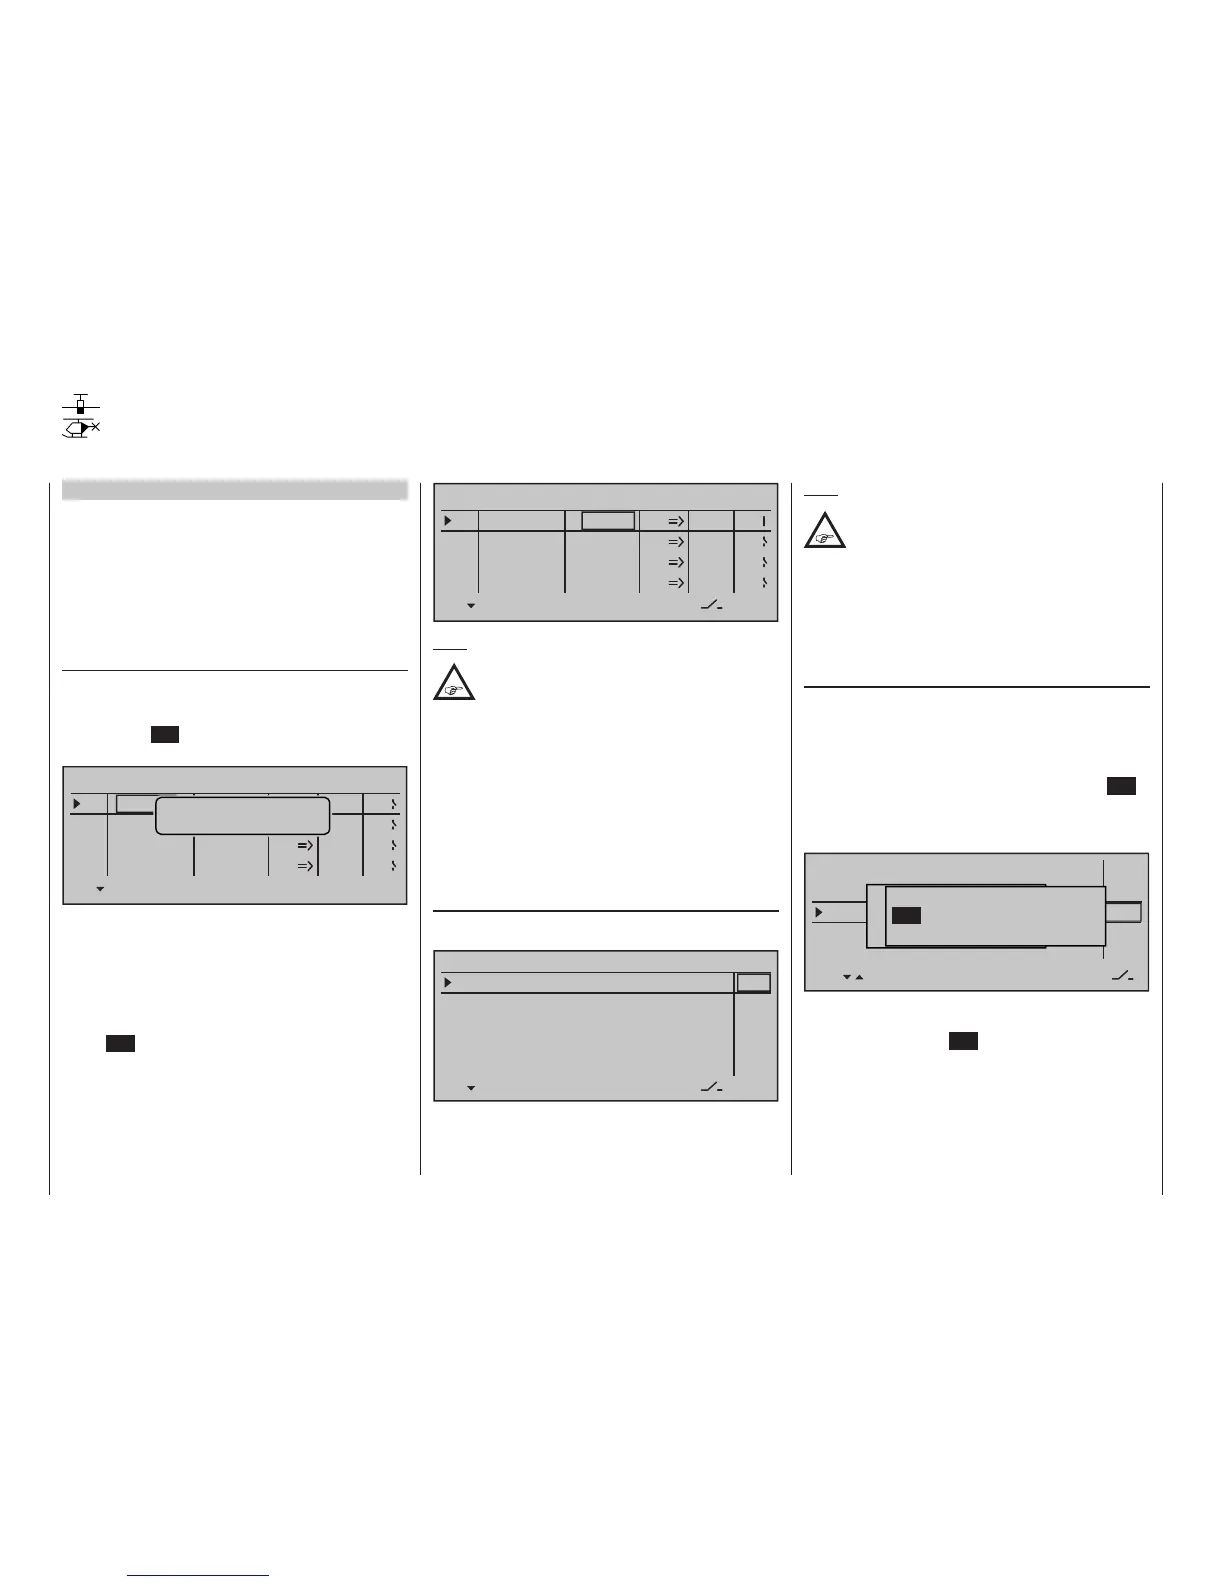
Now select the previously programmed control switch,
C1 in the example, and assign it to the timer with a
brief tap on the centre SET key of the right touch pad:
Examples 4 and 5 of the preceding pages
If model programming is to be continued for Ex-
ample 4 (page 300) or Example 5 (page 303) as
described on previous pages or, completely inde-
pendent of this example programming, the C1 stick
(throttle/brake stick) is to be used for power regula-
tion, then a control switch can be used to automati-
cally start and stop the stopwatch. For this purpose,
first switch to the menu …
»Control switch« (page 146)
… and select the line of a control switch which has
not been assigned yet with the selection keys. After
activation of the control assignment with a brief tap
on the centre SET key of the right touch pad, the fol-
lowing window will appear:
SEL
0%
0%
0%
C1
C2
C3
–––
C4
CONTROL SWITCH
Geb. 1
0%
STO
–––
–––
–––
SEL
C1
C2
C3
C4
frei
free
free
frei
Move desired
control adj.
Now simply move the C1 stick (throttle/brake stick)
from the motor "OFF" position in the motor "ON"
direction.
Thereafter, change to the column above STO by us-
ing the appropriate selection key, move the C1 stick
close to its motor "OFF" position then set the switch-
point at the selected position with a brief tap on the
centre SET key of the right touch pad. The switch's
state will be displayed at the right of the control num-
ber, e. g.:
Timer conrmation with control or switch