IconMaster Installation and Configuration Manual 63
Chapter 2: Installation
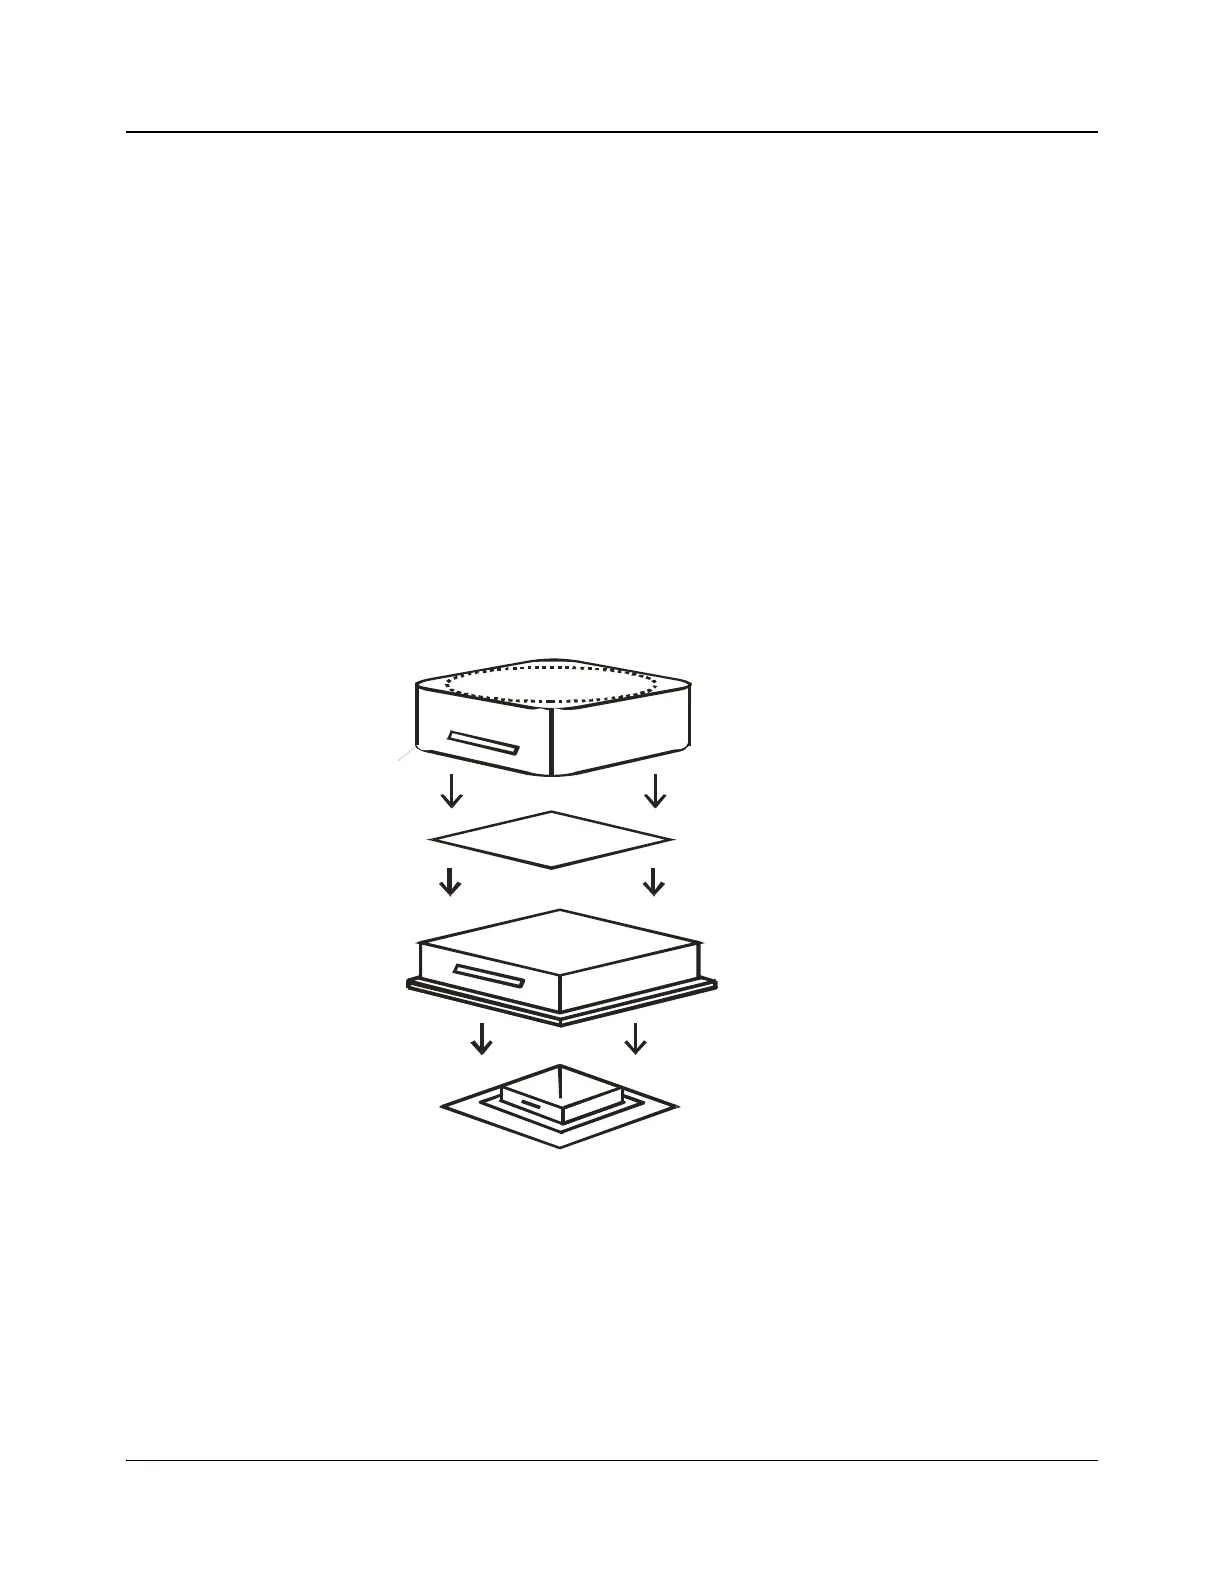
Customizing Pushbuttons
The IconMaster control panel uses pushbuttons that you can customize. To
customize a pushbutton, follow these steps:
1. Remove the lens assembly by grasping the switch tightly and pulling the
lens off the switch.
Once the lens assembly is released from the switch, the lens and pushbutton
can be separated.
2. Remove the appropriate text film from the “Optional Control Panel Labels”
plastic sheet included in this manual.
3. Separate the lens and the pushbutton and then place the text film inside the
lens cap.
4. After aligning the notches in the lens with the tabs in the pushbutton, join
the pieces together.
5. Firmly press the lens assembly onto the plunger by applying pressure from
the top to the bottom until both are snapped together.
Figure 2-48. Removable Parts of a Pushbutton