66 IconMaster Installation and Configuration Manual
Chapter 2: Installation
7. Reinstall the access cover, being careful to avoid pinching the cable.
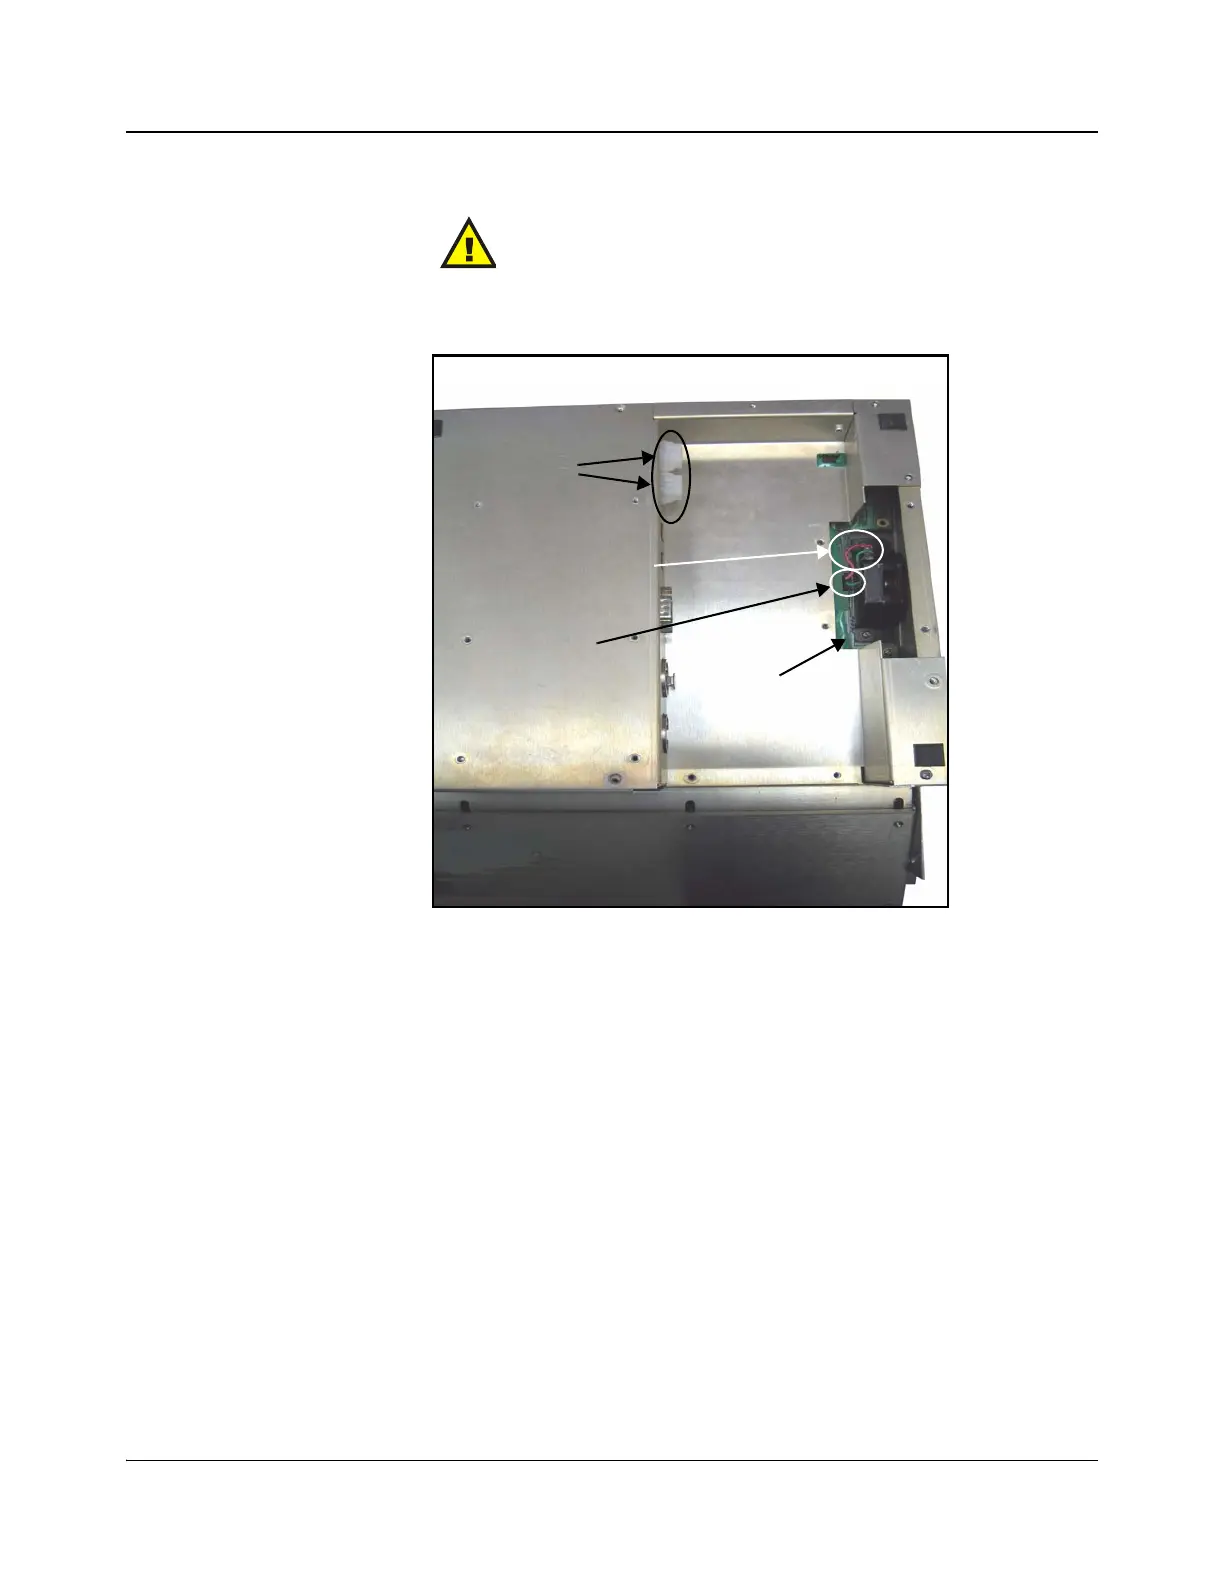
Figure 2-51. Fader Bar Installation and Connection
Assembling the Handle
1. Turn the control panel right side up.
2. Align the two opposing caps of the handle on the fader bar arm, and then
insert the provided screw and nut.
3. Tighten the screw, and then snap on the two end caps.
4. Reinstall the IconMaster control panel into its desktop/tabletop or mounting
rack location.
5. Reconnect any Ethernet and/or serial connectors.
6. Reconnect the power supply.
CAUTION
The locking cable connector will only fit one way. Do
not force the connector if it does not snap into place
easily.
Jumper removed;
3-pin connector
attached
Fader bar
assembly
installed
Plastic power
supply
connectors
Rear of main control panel
(next to Audio Control Panel)
Wires facing
front of main
control panel
Front of main control panel