IconMaster Installation and Configuration Manual 65
Chapter 2: Installation
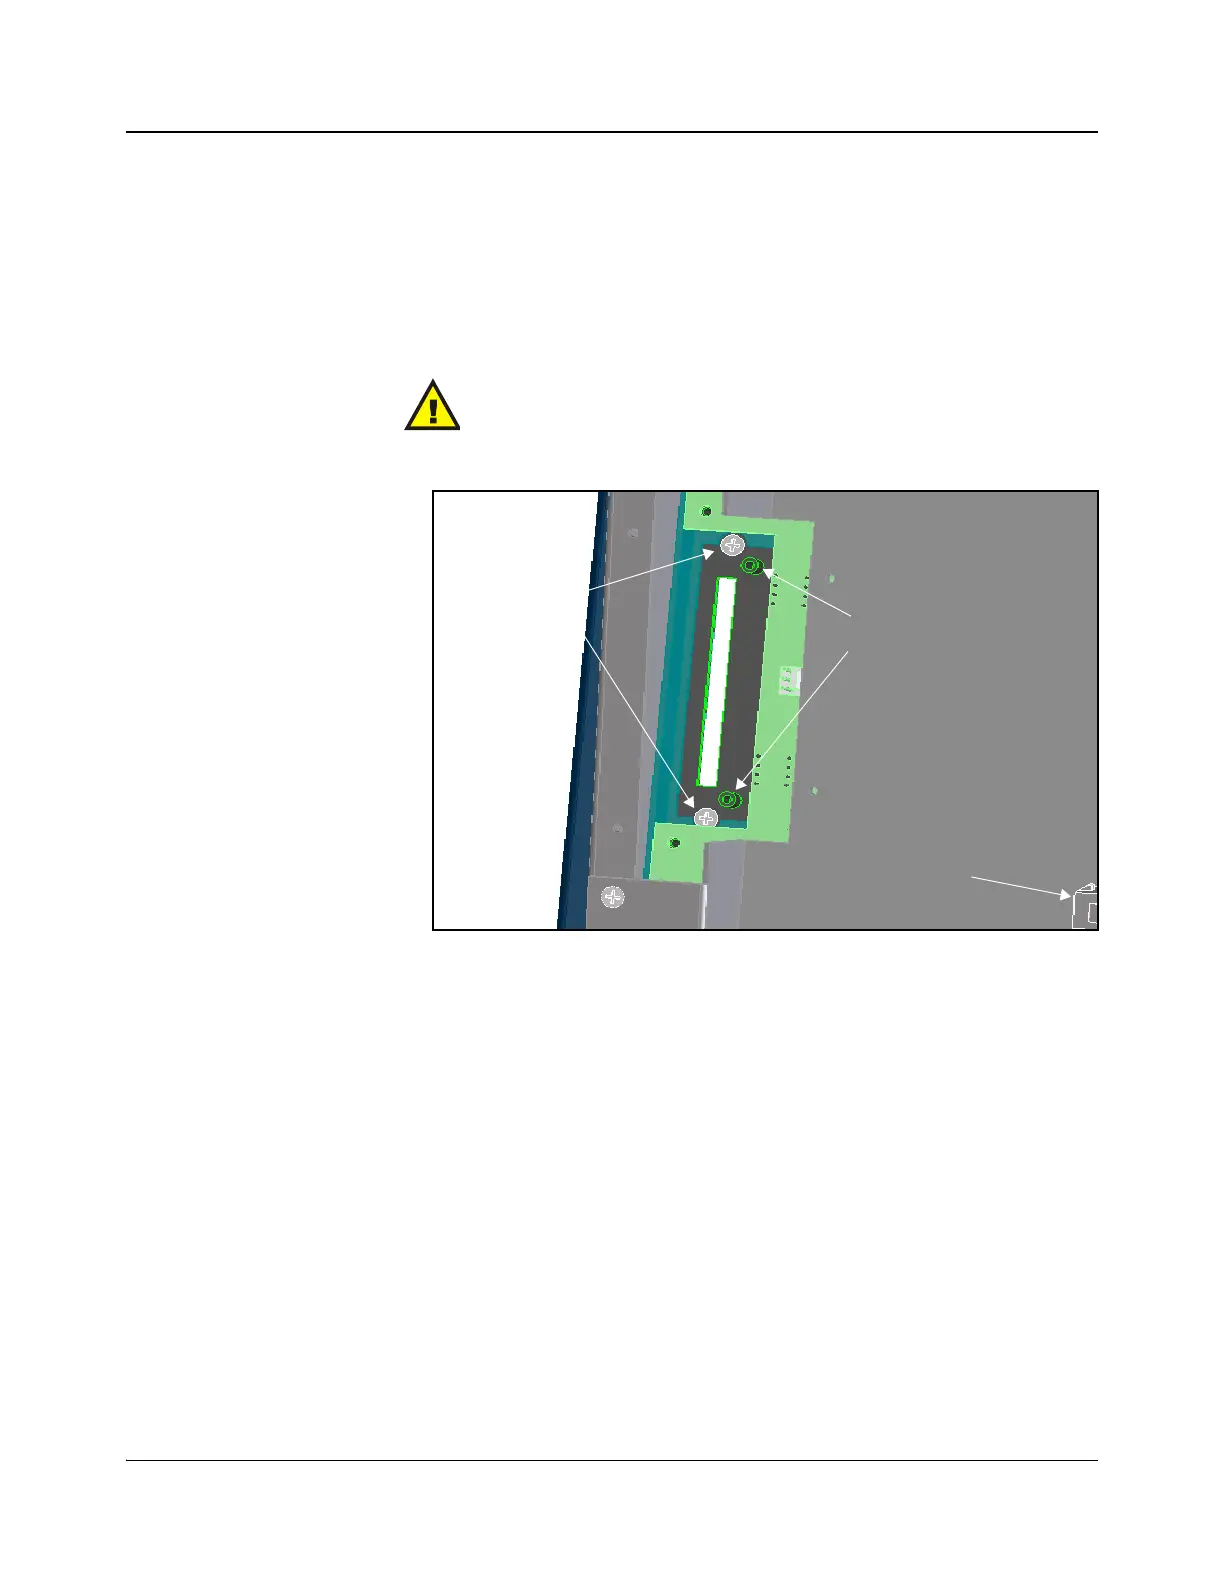
Installing the Fader Bar Assembly
1. On the front of the panel, position the new fader bar bezel over the fader bar
slot, ensuring that you align the two square holes with the up and down
arrow LEDs.
2. Turn the panel back over to reveal its underside, and then, using the original
bezel screws, secure the new fader bar bezel (see Figure 2-50).
Figure 2-50. Securing the New Bezel
3. Slide the fader bar arm through the slot, so that the assembly fits over the
two standoffs (see Figure 2-51).
4. Mount the fader bar assembly onto the standoffs using the two provided
screws.
Ensure the connector cable side of the fader bar assembly is facing the
shallow end of the control panel (nearest to the plastic power supply
connector).
5. Remove the jumper located on the header next to the fader bar assembly.
6. Attach the fader cable to the header connector.
CAUTION
Do not overtighten the fader bar mounting screws. A snug
fit is sufficient.
Bezel screws
Standoffs for mounting
fader bar assembly
Plastic power
supply
connector