iZ Technology Corporation
RADAR AS THE SLAVE
Since RADAR will be chasing an external timecode source, RADAR should be clocked to the same clock
reference (Sync) as the timecode generator.
RADAR to chase external timecode
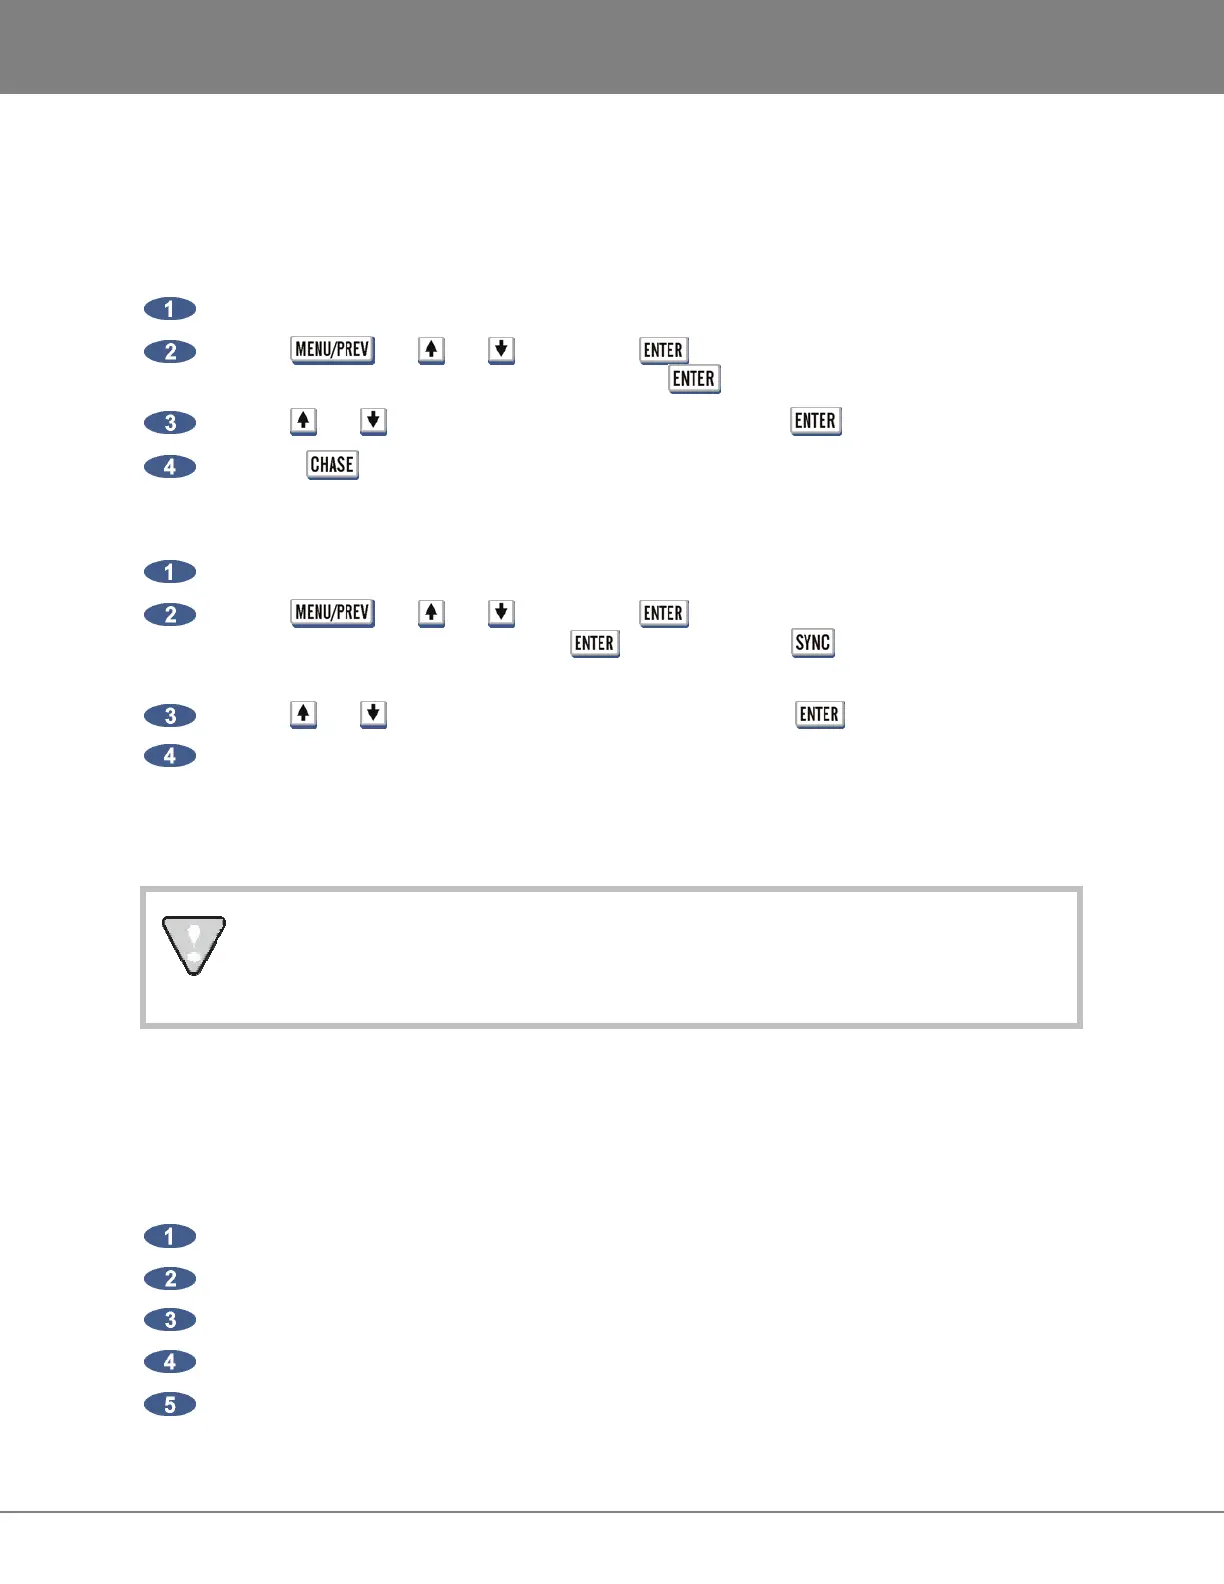
Connect SMPTE or MTC cable to the input of RADAR.
Use the , the and keys and the key to go to the MAIN MENU / SYNC
MENU / TC SETTINGS / TC FORMAT press the key.
Use the and keys to select SMPTE or MTC and press the key
Press the key on the Session Controller to go into chase.
RADAR to slave to an external clock source
Connect a clock reference format input on RADAR.
Use the , the and keys and the key to go to the MAIN MENU / SYNC
MENU / SYNC REFERENCE press the key. (Pressing the key on the session
controller will go to the same menu.)
Use the and keys to select the clock source and press the key.
The Sync light on the Session Controller and RADARView
TM
screen will flash while awaiting
incoming clock, and stay solid when locked to an external sync source.
Now the RADAR will follow the other device’s location and RADAR’s position can be controlled using the
other device’s transport.
For externally clocking a RADARLink
TM
system, only the master machine needs to be
synced to an external clock source as all slave machines are clocked to the master
machine via the Rlink cable.
VOCAL COMPS
Audio data can be freely copied and pasted between projects without using extra disk space. This opens
up a lot of creative possibilities, for example, a powerful implementation of virtual or comp tracks:
To create project based virtual tracks:
Create a stereo or mono sub-mix of the tracks in a project.
Copy and paste the sub-mixed tracks into a new project.
Record multiple takes of an instrument or vocal, using the sub-mix as a reference.
Edit together a comp (composite track) of all the best overdub performances.
Copy the composite track or tracks back into the original project.