Page 100 of 237
Version: 5.1.6 – June 4
th
, 2019
15. Importing certificates in Windows XP
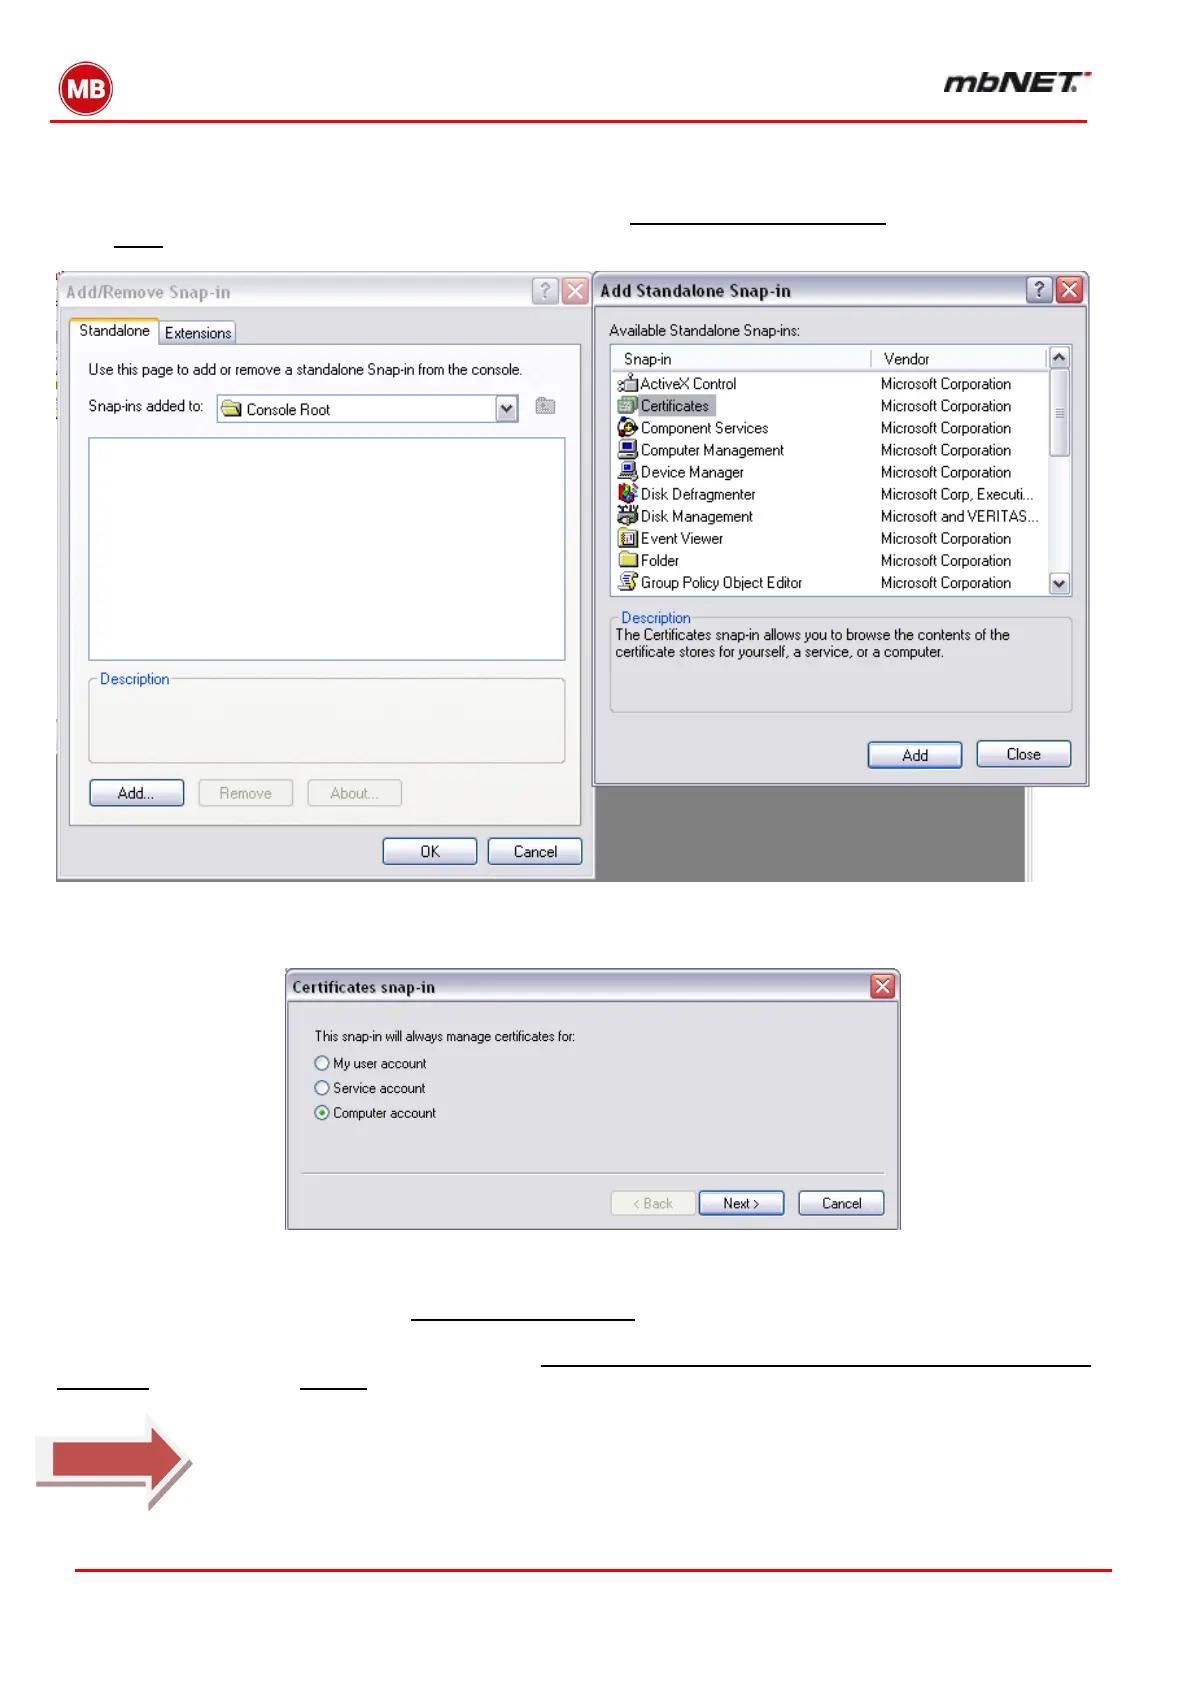
To import finished certificates, you need to set up what is known as a Certificate Management Console.
To do this, click “Start” -> “Run” and type in “MMC”. Then click on “File – Add/Remove Snap-in” and in the next screen,
select “Add”. You can then select Certificates from the list of available snap-ins.
In the next window, select “Computer account”
In the next screen, ensure that you select “This Snap-in will always manage” ... “Local computer (computer running
this console).
Once you have created the certificate console as described, you can import a certificate.
First, open the folder and right-click on “Personal -> Certificates” as shown in the screenshot below, and import the
certificate that will be used to identify the client. Be sure to select the “.p12” file for this. Enter the password for the
p12 file and then click Next. In the next screen, select “Automatically select the certificate store based on the type of
certificate”. When you click “Finish” the relevant certificates will import.
No further certificate imports are required. The CA certificate is automatically imported. Nor
is it necessary to save the console
 Loading...