Switch Services 5-11
4. Click the Edit button to modify the properties displayed on an existing DHCP pool. For more information,
see Editing the Properties of an Existing DHCP Pool on page 5-5.
5. To delete an existing DHCP pool from the list of those available, highlight the pool from within the Pool
Name field and click the Delete button.
6. Click the Add button to create a new DHCP pool. For more information, see Adding a New DHCP Pool on
page 5-6.
7. Click the Options button to insert a global pool name into the list of available pools. For more
information, see Configuring DHCP Global Options on page 5-8.
8. Click the DDNS button to configure a DDNS domain and server address that can be used with the list of
available pools. For more information, see Configuring DHCP Server DDNS Values on page 5-9.
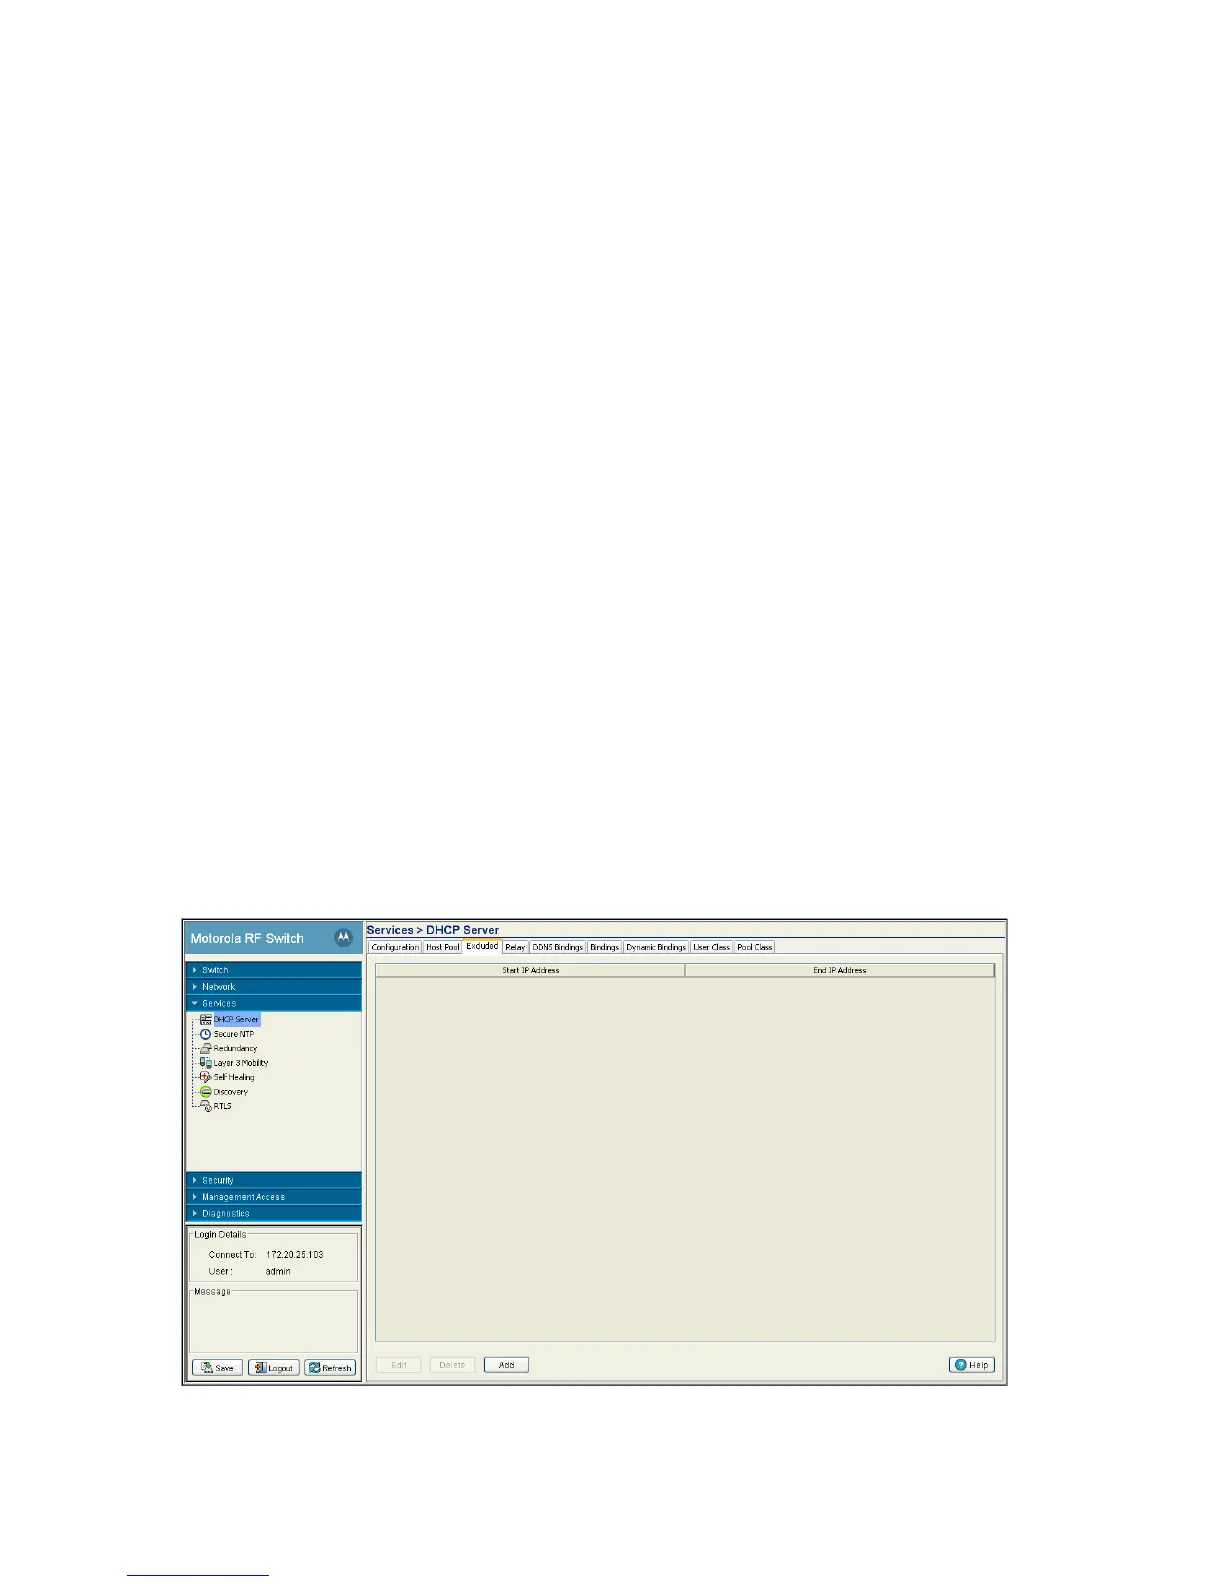
5.2.3 Configuring Excluded IP Address Information
The DHCP Server may have some IP addresses unavailable when assigning IP address ranges for a pool. If
IP addresses have been manually assigned and fixed, they need to be made available for the administrator
to exclude from possible selection.
To view excluded IP address ranges:
1. Select Services > DHCP Server from the main menu tree.
2. Click the Excluded tab.
The Excluded tab displays “fixed” IP addresses statically assigned and unavailable for assignment with
a pool.
Client Name Displays the name of the client requesting DHCP Server support over this
interface. This name is ready only cannot be modified using the host pool edit
option.
Client ID Displays the client Identifier, based on this identifier static IP is assigned.
Hardware address and Client Identifier should not be configured on a same host
pool. A pool name cannot have both a client ID and MAC address.
 Loading...