5-28 Motorola RF Switch System Reference
6. Click the Add button to define a new peer or server configuration that can be added to the existing
configurations displayed within the NTP Neighbor tab.For more information, see Adding an NTP Neighbor
on page 5-28.
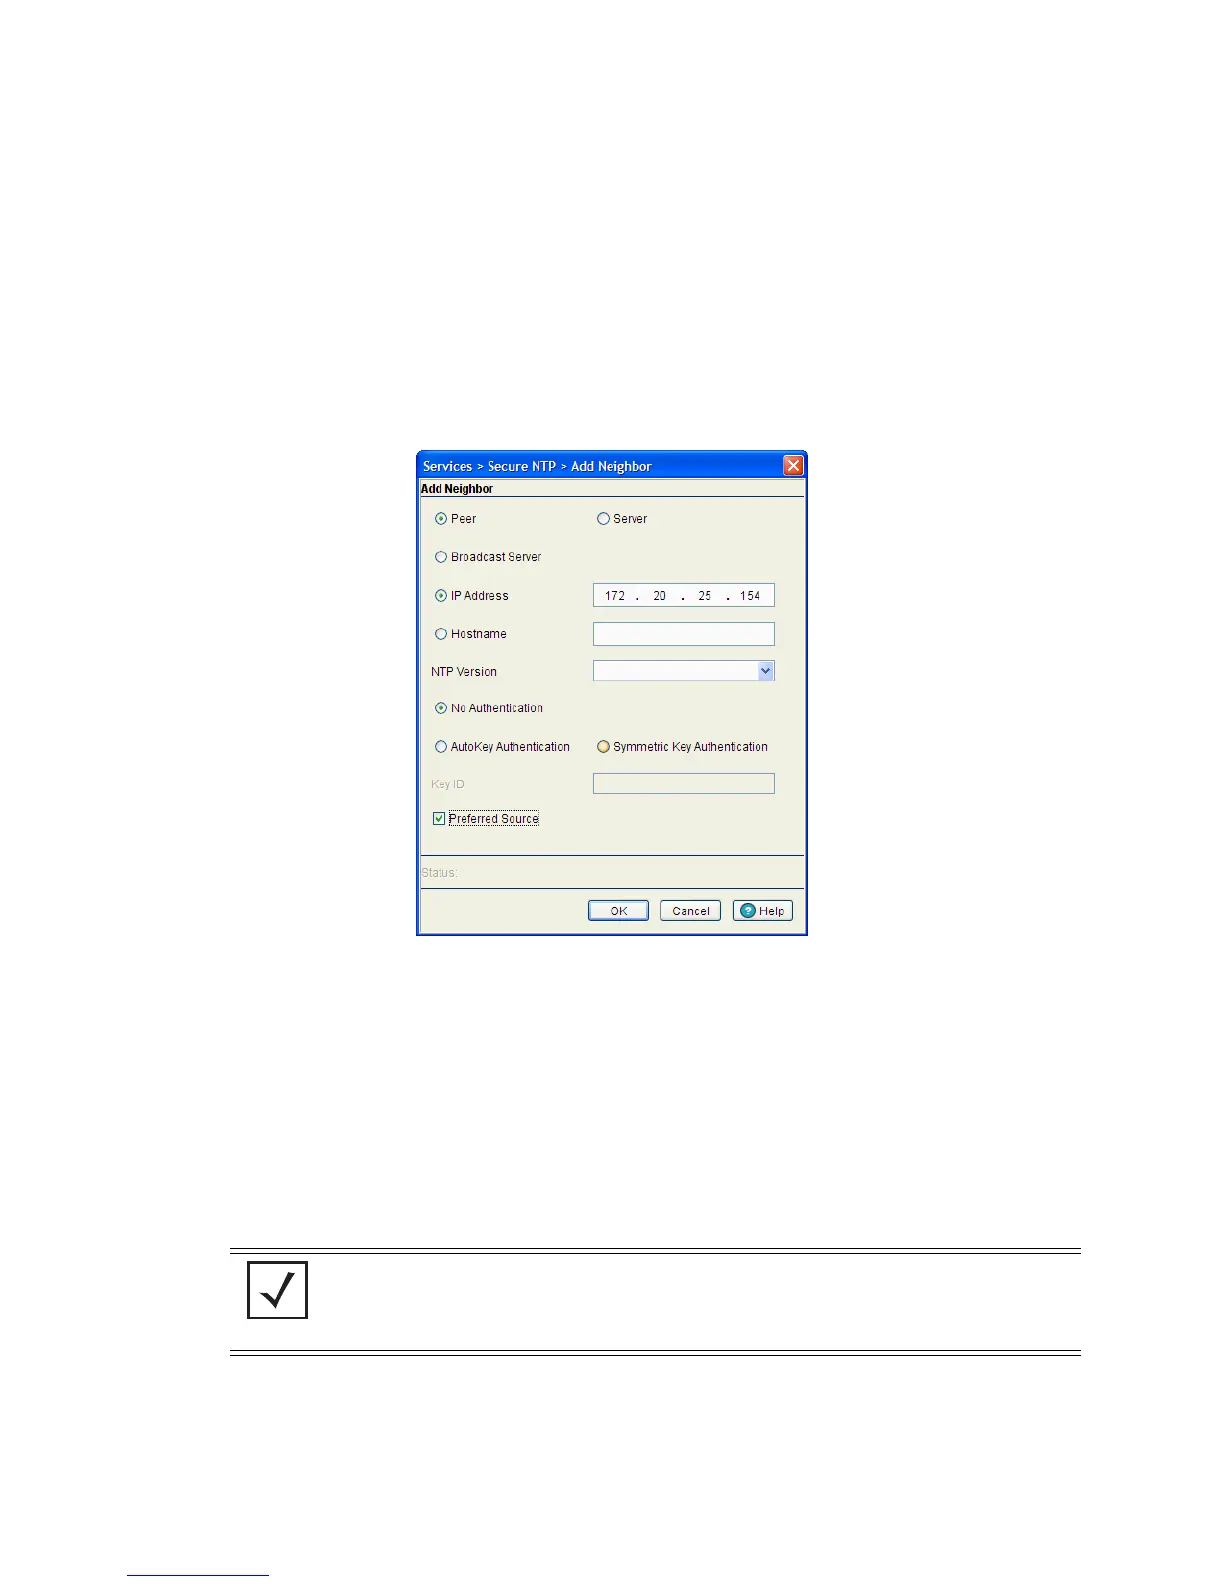
5.3.4 Adding an NTP Neighbor
To add a new NTP peer or server neighbor configuration to those available for synchronization:
1. Select Services > Secure NTP from the main menu tree.
2. Select the NTP Neighbor tab.
3. Click the Add button.
4. Select the Peer checkbox if the SNTP neighbor is a peer to the switch (non FTP server) within the switch’s
current subnet.
5. Select the Server checkbox if the neighbor is a server within the switch’s current subnet.
6. Select the Broadcast Server checkbox to allow the switch to listen over the network for NTP broadcast
traffic.
The switch’s NTP configuration can be defined to use broadcast messages instead of messaging between
fixed NTP synchronization resource addresses. Use a NTP broadcast to listen for NTP synchronization
packets within a network. To listen to NTP broadcast traffic, the broadcast server (and switch) must be
on the same subnet. NTP broadcasts reduce configuration complexity since both the switch and its NTP
resources can be configured to send and receive broadcast messages.
7. Enter the IP Address of the peer or server providing SNTP synchronization.
8. Select the Hostname checkbox to assign a hostname to the server or peer for further differentiation of
other devices with a similar configuration.
NOTE: If this checkbox is selected, the AutoKey Authentication checkbox is disabled, and
the switch is required to use Symmetric Key Authentication for credential verification with
its NTP resource. Additionally, if this option is selected, the broadcast server cannot be
selected as a preferred source.
 Loading...