Diagnostics 8-19
• None - no impact.
6. Select the message deployed when a bug is raised.
The What Kind of message should be seen field allows you to select a range of parameters for
returned messages while debugging. Move your mouse pointer over a message checkbox for a message
description.
a. Click the Advanced button to display the entire list of message categories when bugs are raised.
Select the checkboxes corresponding to the message types you would like to receive.
Each message category is enabled by default. Click the Simple button to minimize this area and hide
the available message categories.
b. Click the All Messages button to select all the message categories.
c. Click the No Messages button if you do not want to select any of the message categories.
7. Click the Apply button to save the changes you have applied within this screen.
8. Click the Revert button to revert back to the last saved configuration.
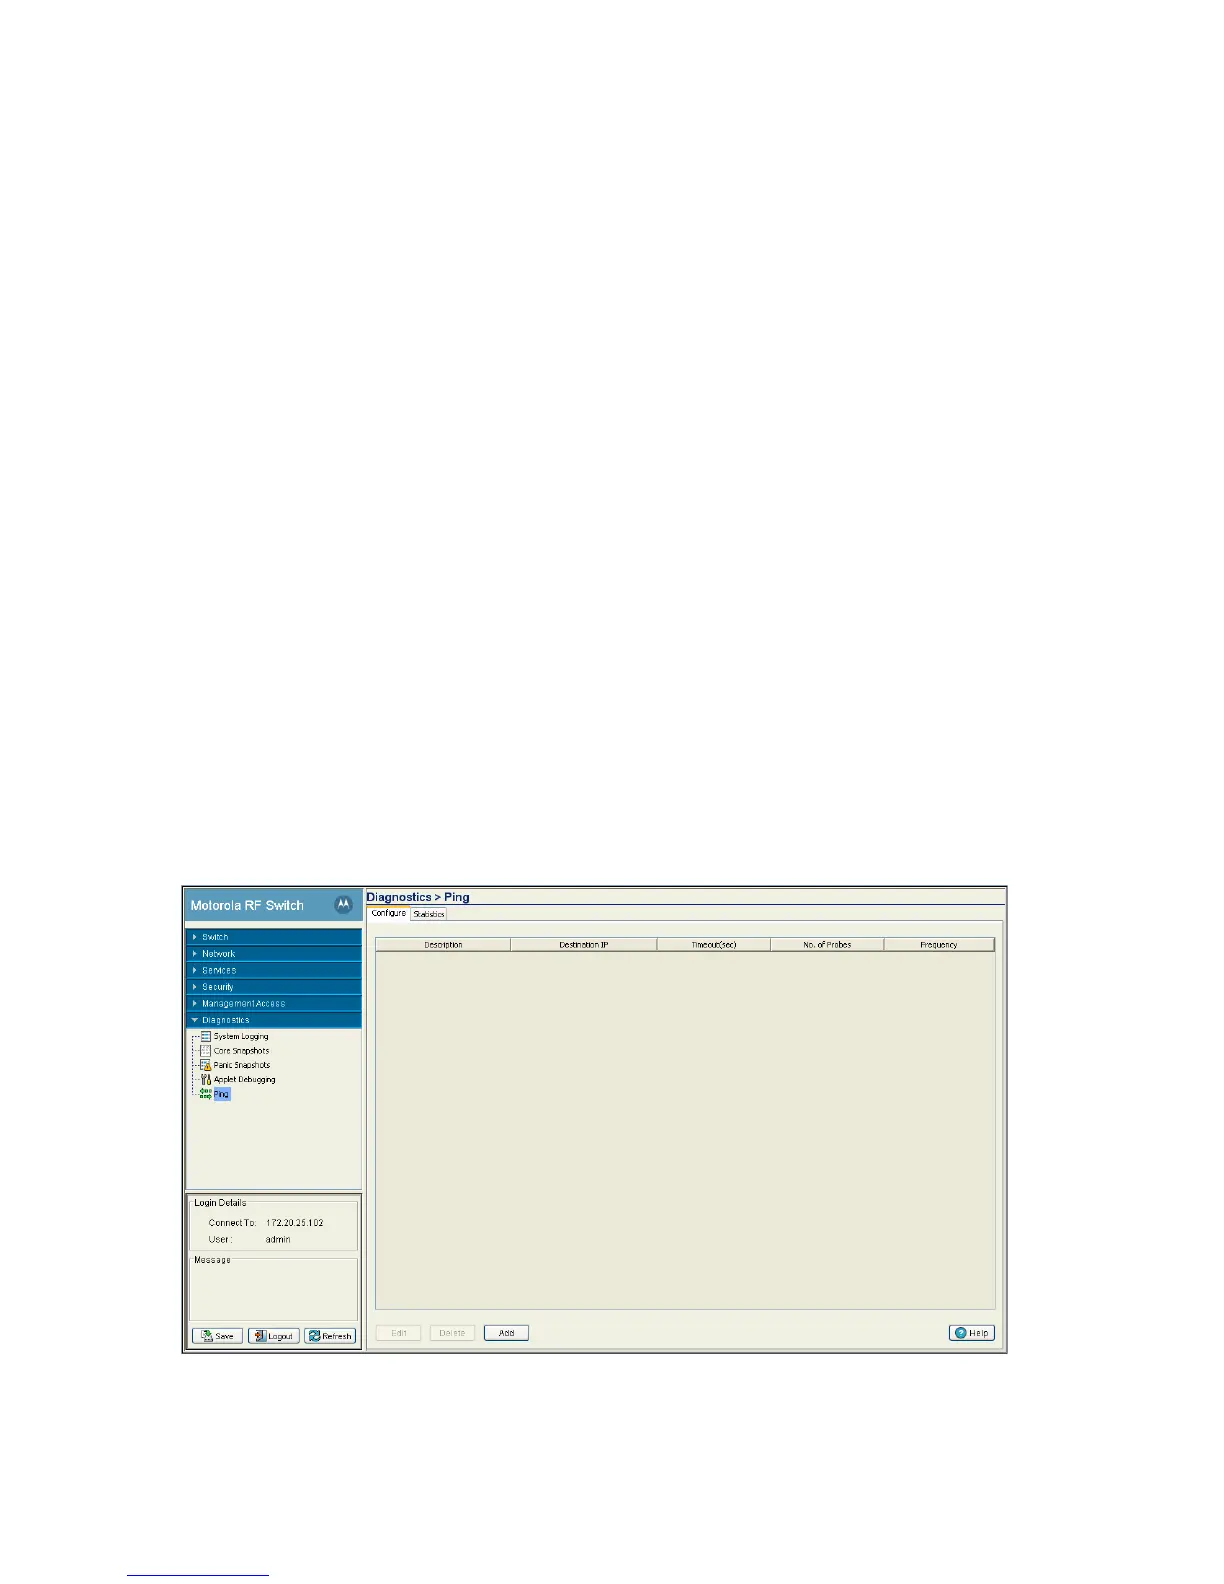
8.6 Configuring a Ping
The switch can verify its link with other switches and associated MUs by sending ping packets to the
associated device. Use a ping to test the connection between the switch and IP destinations you specify. For
each ping packet transmitted, statistics are gathered for the round-trip time (RTT) between the switch and
its destination. The RTT is the time (in milliseconds) for a ping packet to travel from the switch to its target
destination and back again. This number can vary significantly due to the random nature of packet routings
and random loads on the switch and its destination.
To view the switch’s existing ping configuration:
1. Select Diagnostics > Ping from the main menu.
 Loading...