Diagnostics 8-15
11.Specify the appropriate Path to the target directory on the local system disk or server as configured using
the To parameter. If the local disk option is selected, use the browse button to specify the location on the
local disk.
12.Refer to the Status field for the current state of the requests made from applet. This field displays error
messages if something goes wrong in the transaction between the applet and the switch.
13.Click the Transfer button when ready to move the target file to the specified location. Repeat the
process as necessary to move each desired log file to the specified location.
14.If a problem condition is discovered during the file transfer, click the Abort button to terminate the
transfer.
15.Click the Close button to exit the screen after a transfer. There are no changes to save or apply.
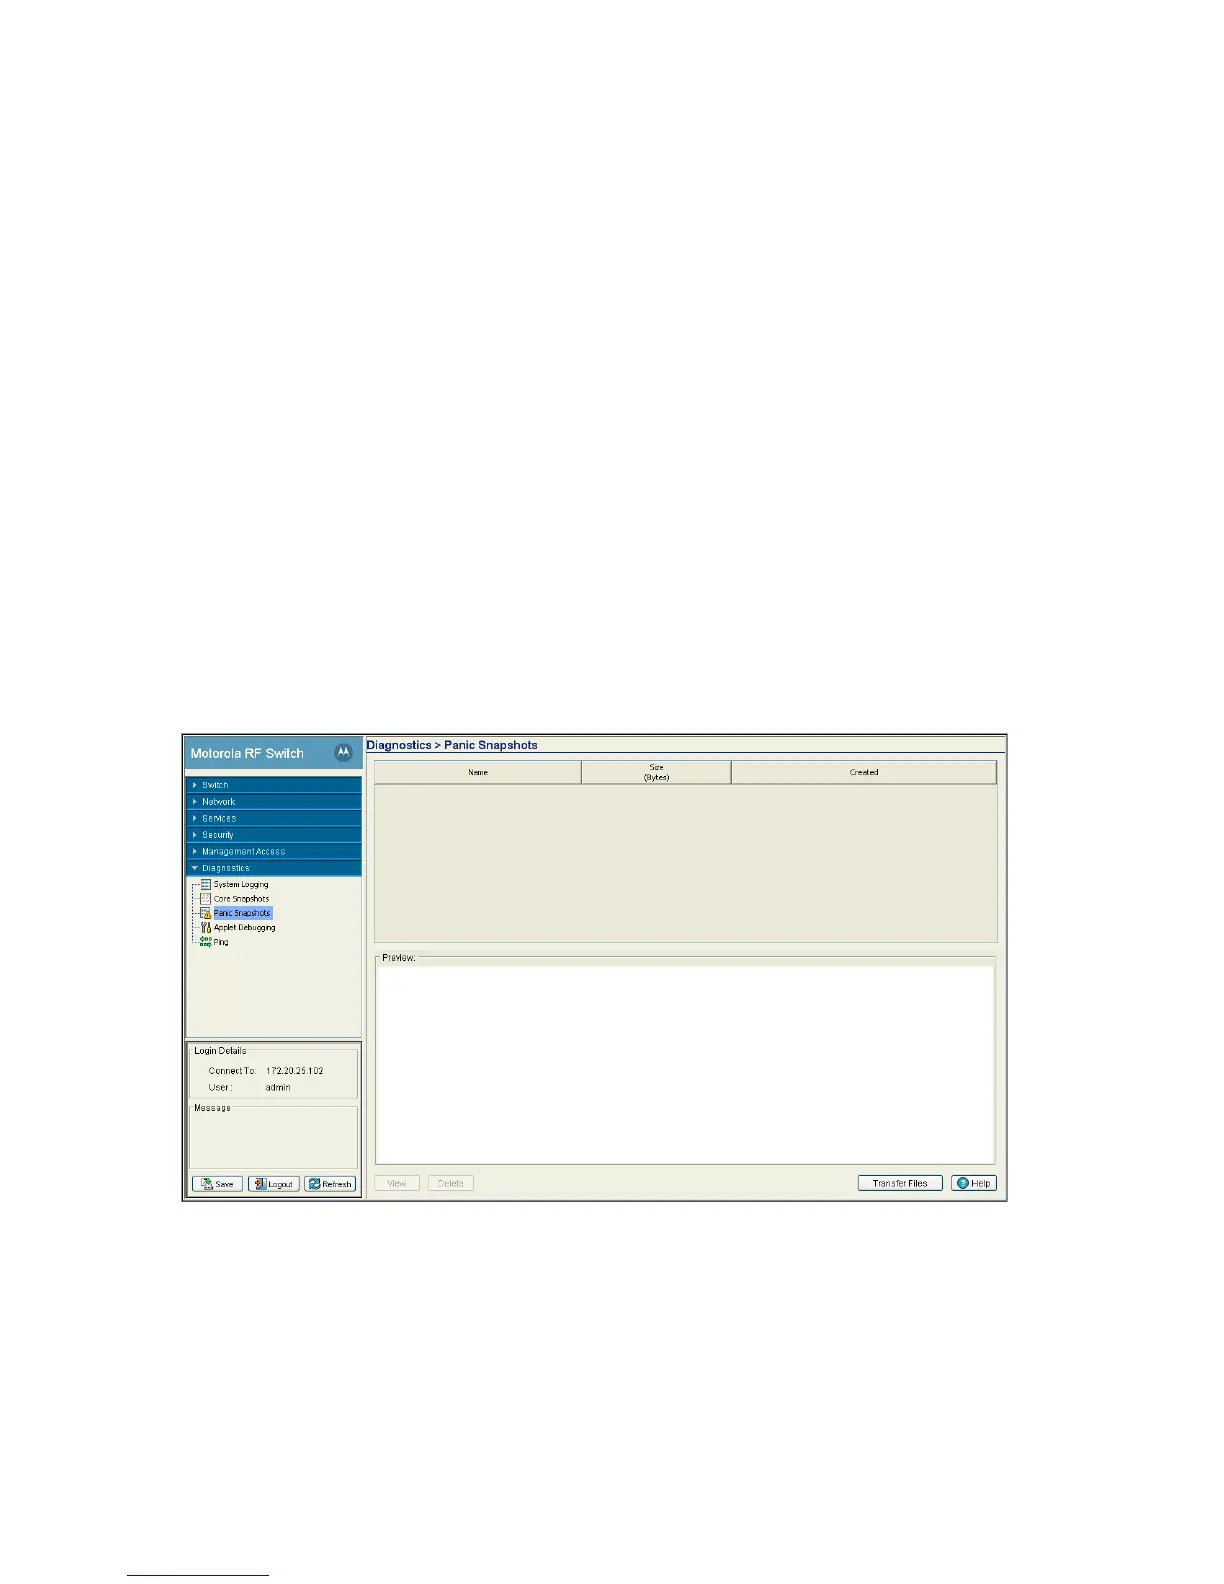
8.4 Reviewing Panic Snapshots
Refer to the Panic Snapshots screen for an overview of the panic files available. Typically, panic files refer
to switch events interpreted as critical conditions (and thus requiring prompt attention). Use the information
displayed within the screen to make informed decisions whether a target file should be discarded or
transferred to a secure location for permanent archive.
To review the current panic snapshots on the switch:
1. Select Diagnostics > Panic Snapshots from the main menu.
2. Refer to the following table headings within the Panic Snapshots screen:
Name Displays the title of the panic file. Panic files are named n.panic where n is in the
range 0-9. 0 is always the oldest saved panic file and the highest number is the
most recent. If the system experiences a panic, there are ten existing panics, the
oldest is deleted and the remaining nine are renamed so the newest can be saved
as 9.

 Loading...