Network Setup 4-105
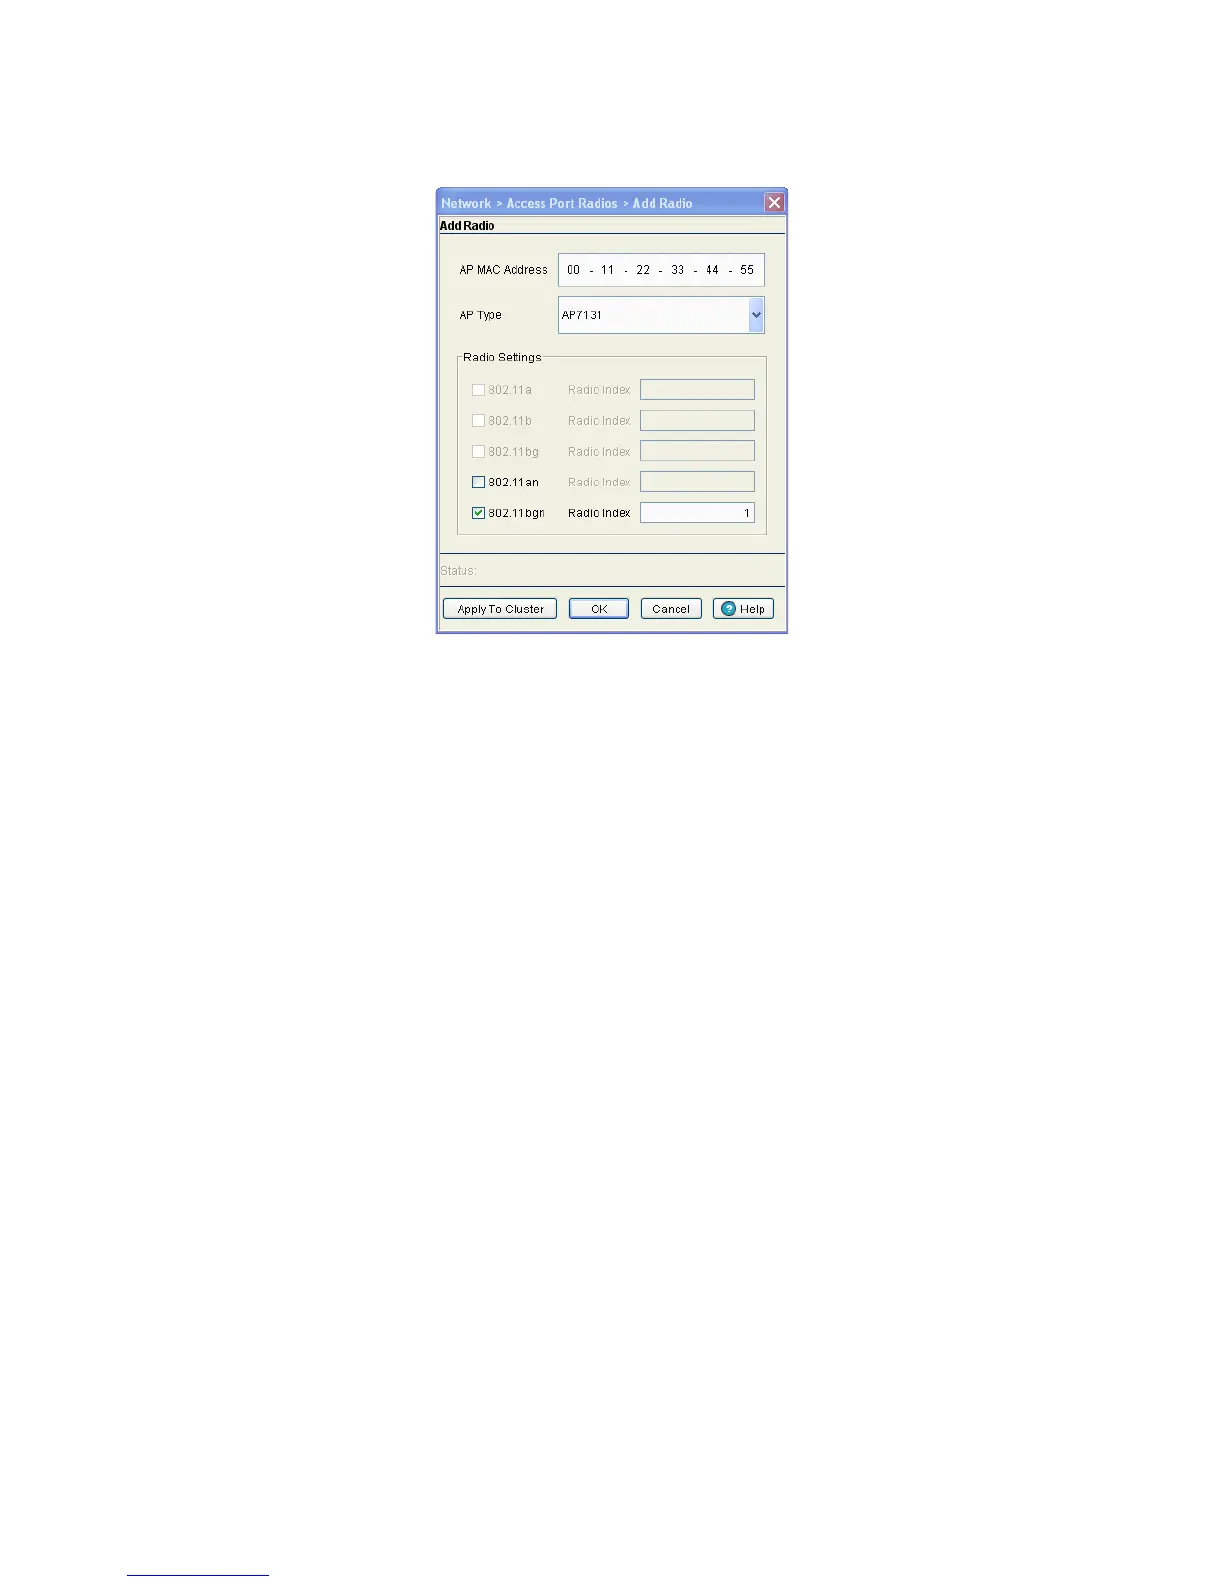
3. Click the Add button to display a screen containing settings for adding a radio
4. Enter the device MAC Address (the physical MAC address of the radio). Ensure that this address is the
actual hard-coded MAC address of the device.
5. Use the AP Type drop-down menu to define the radio type you would like to add. If adding an AP-4131,
AP-5131, or AP-7131 model Access Point, the Access Port conversion will render the Access Point a
“thin” Access Port.
6. From the Radio Settings section, select the radio type checkboxes corresponding to the type of AP radio
used.Available radio types are dependant on the AP Type selected above.
7. Enter a numerical value in the Radio Index field for each selected radio.
The Radio Index is a numerical value assigned to the radio as a unique identifier. For example: 1, 2, or 3.
The index is helpful for differentiating radios of similar type and configuration.
8. Refer to the Status field for the current state of the requests made from applet. This field displays error
messages if something goes wrong in the transaction between the applet and the switch.
9. If clustering is configured and the Cluster GUI feature is enabled, the Apply to Cluster feature will be
available. Click the Apply to Cluster button to apply the AP radio settings to all members in the cluster.
10.Click OK to use the changes to the running configuration and close the dialog.
11.Click Cancel to close the dialog without committing updates to the running configuration.
4.7.2 Viewing AP Statistics
Refer to the Statistics tab for information and high-level performance data for individual radios.
Performance information can be reviewed for either a 30 second or one hour interval. Use the Details button
to display additional information for an individual radio.
To view Radio Statistics:
1. Select Network > Access Port Radios from the main menu tree.
 Loading...