Switch Security 6-97
6.8.3 Defining the Radius Configuration
To configure Radius support on the switch:
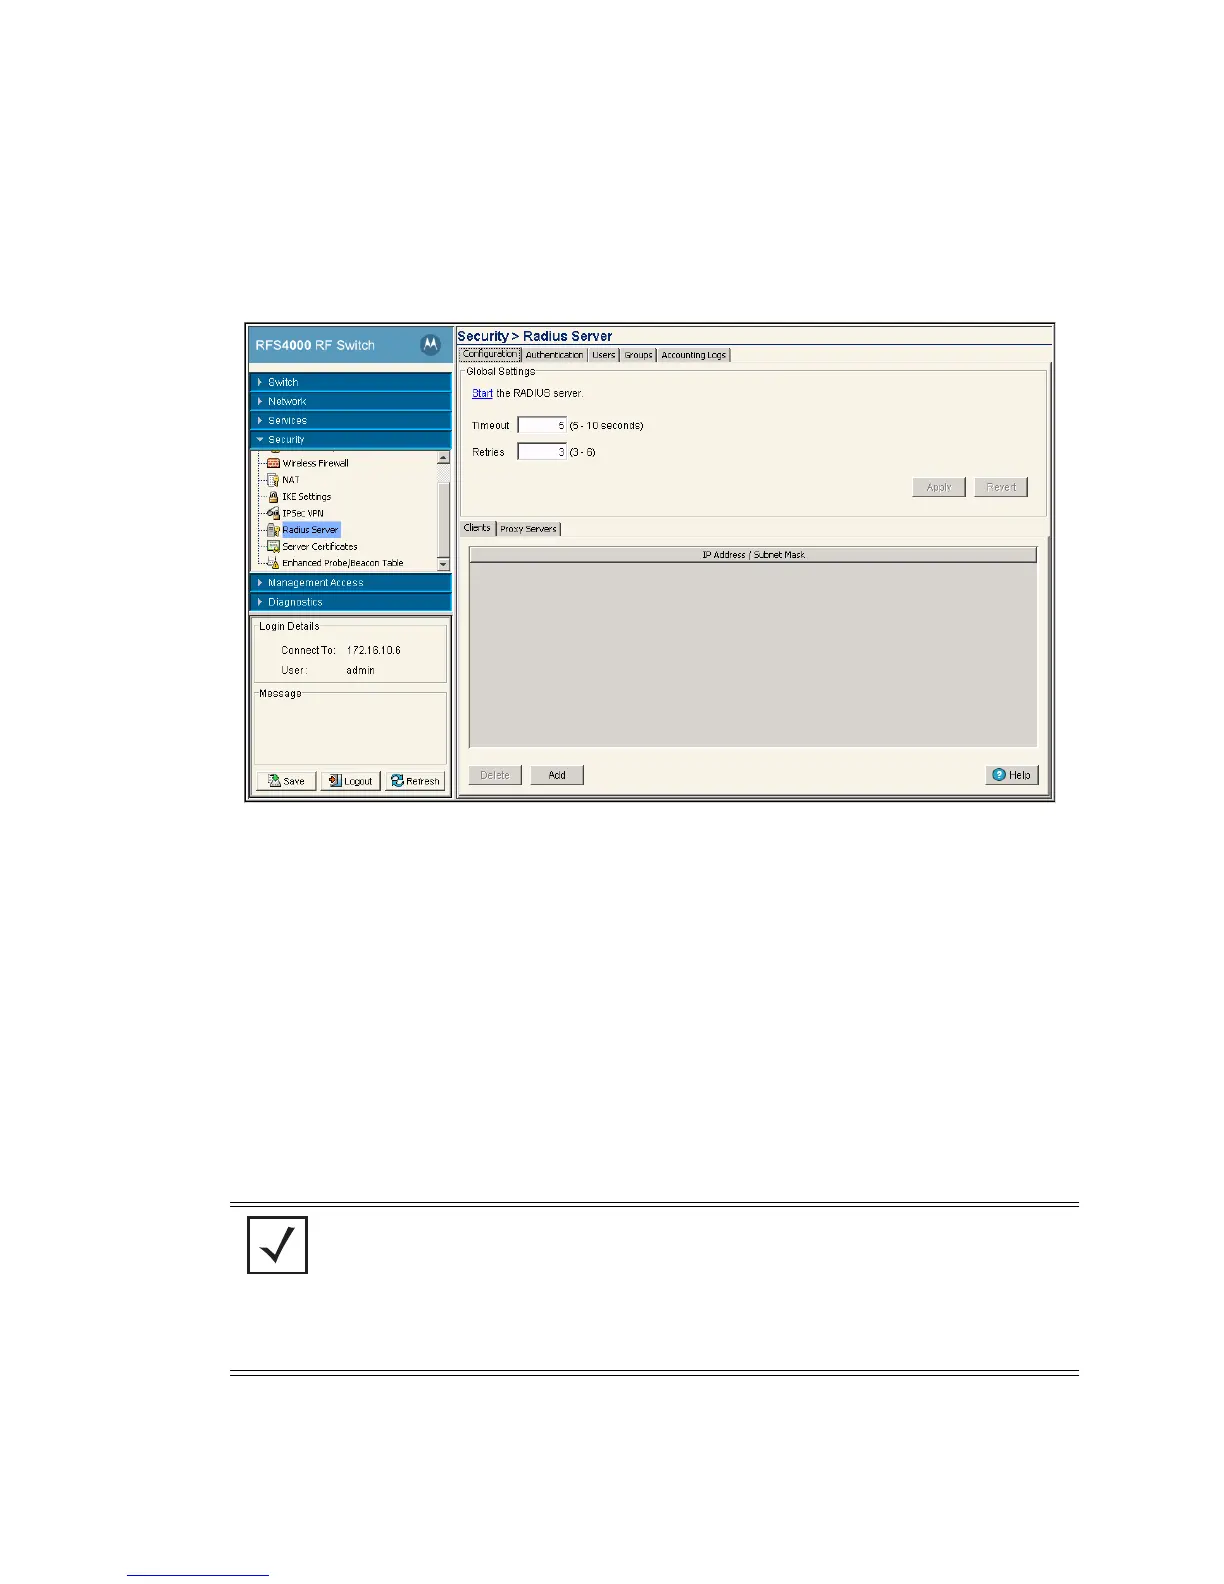
1. Select Security > Radius Server from the main menu.
2. Ensure the Configuration tab is selected.
3. Click the Start the RADIUS server link to use the switch’s own Radius server to authenticate users
accessing the switch managed network. Again, this is recommended as the secondary means of
authenticating users.
4. Set a Timeout interval (between 5 and 10 seconds) to define how long the switch waits for a reply to a
Radius request before retransmitting the request. The default value is 5.
Ensure the value is set long enough to compensate for the heaviest periods of data traffic within the
switch managed network.
5. Set a Retires value (between 3and 6) to define the number of times the switch transmits each Radius
request to the server before giving up. The default value is 3.
6. Click the Apply button to save the changes made to within the Global Settings field.
7. Click the Revert button to cancel any changes made within the Global Settings field and revert back to
the last saved configuration.
NOTE: The appearance of the bottom portion of the Configuration tab differs depending
on whether Clients or Proxy Servers is selected. Select the Clients tab to display the
IP Address and Subnet Mask of existing Radius clients. Existing clients can be modified or
new clients added. Select the Proxy Servers tab to display the ID suffix, IP address and
Port Number of existing Radius proxy servers. Existing servers can be modified or new
proxy servers added. For more information, see Radius Proxy Server Configuration on
page 6-98.
 Loading...