6-60 Motorola RF Switch System Reference Guide
5. Select an existing NAT configuration and click the Delete button to remove it from the list of available
configurations.
6. Click the Add button to display a screen to create a new NAT configuration and add it to the list of
available configurations. For more information, see
Adding a New Dynamic NAT Configuration on page 6-60.
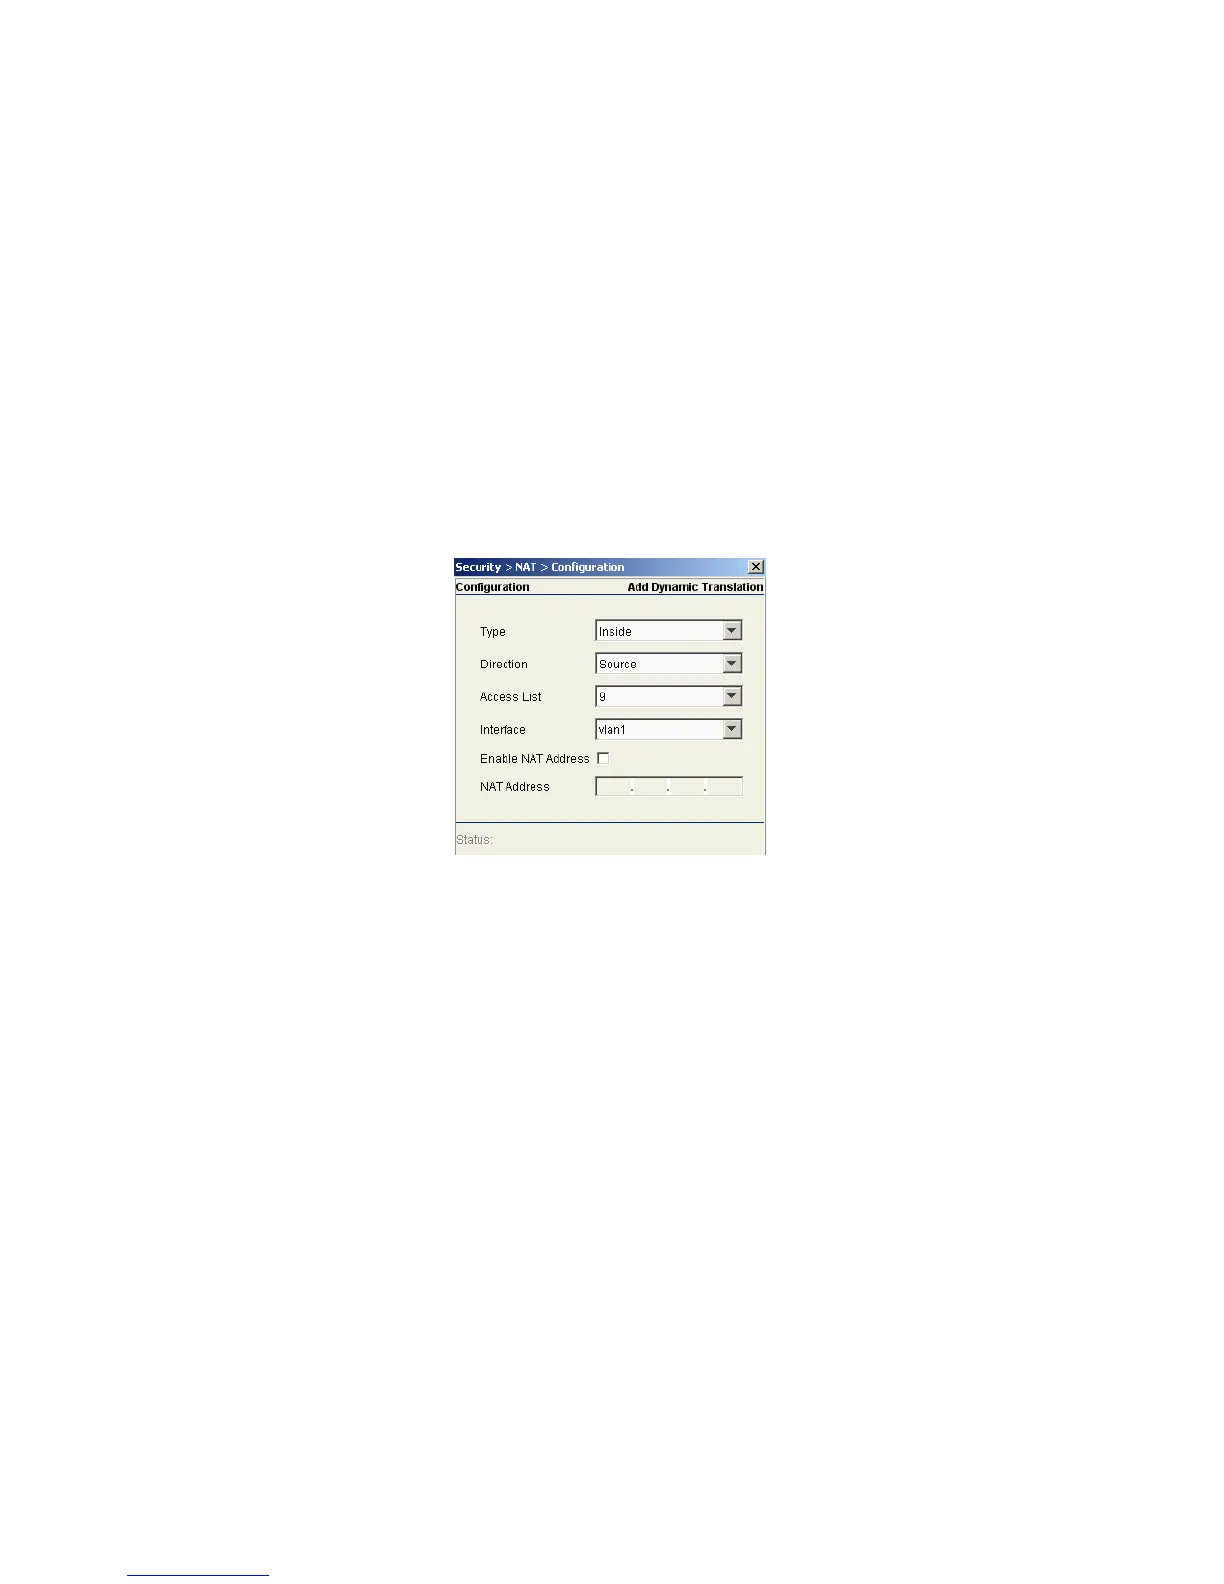
6.5.1.1 Adding a New Dynamic NAT Configuration
If the existing NAT configurations displayed with the Configuration prove unsuitable for translation, consider
creating a new one.
To define a new NAT configuration:
1. Select Security > NAT from the main menu tree.
2. Click on the Dynamic Translation tab.
3. Click the Add button.
4. Define the NAT Typ e from the drop-down menu. Options include:
• Inside - The set of networks subject to translation. These are the internal addresses you are trying
to prevent from being exposed to the outside world.
• Outside - All other addresses. Usually these are valid addresses located on the Internet. Outside
addresses pose no risk if exposed over a publicly accessible network.
5. Define the NAT Direction from the drop-down menu. Options include:
• Source - The inside network is transmitting data over the network its intended destination. On the
way out, the source IP address is changed in the header and replaced by the (public) IP address.
• Destination - Packets passing through the NAT on the way back to the switch managed LAN are
searched against to the records kept by the NAT engine. There the destination IP address is changed
back to the specific internal private class IP address in order to reach the LAN over the switch
managed network.
6. Use the Access List drop-down menu to select the list of addresses used during NAT translation. These
addresses (once translated) will not be exposed to the outside world when the translation address is
used to interact with the remote destination
7. Use the Interface drop-down menu to select the VLAN used as the communication medium between the
source and destination points within the NAT configuration. Ensure the VLAN selected represents the
intended network traffic within the NAT supported configuration. VLAN1 is available by default.
8. Use the Enable NAT Address option to configure an IP address to be used during NAT.
 Loading...