Chapter B: Preventive maintenance 2 Maintenance procedures
Technical manual Planmeca PlanMill 40 37
2. Touch YES to continue.
The tools are automatically placed in the tool changer and the bellows are moved out
of the way. You will hear and be able to feel air purging out of the left and right
spindles. The lid pops open when ready.
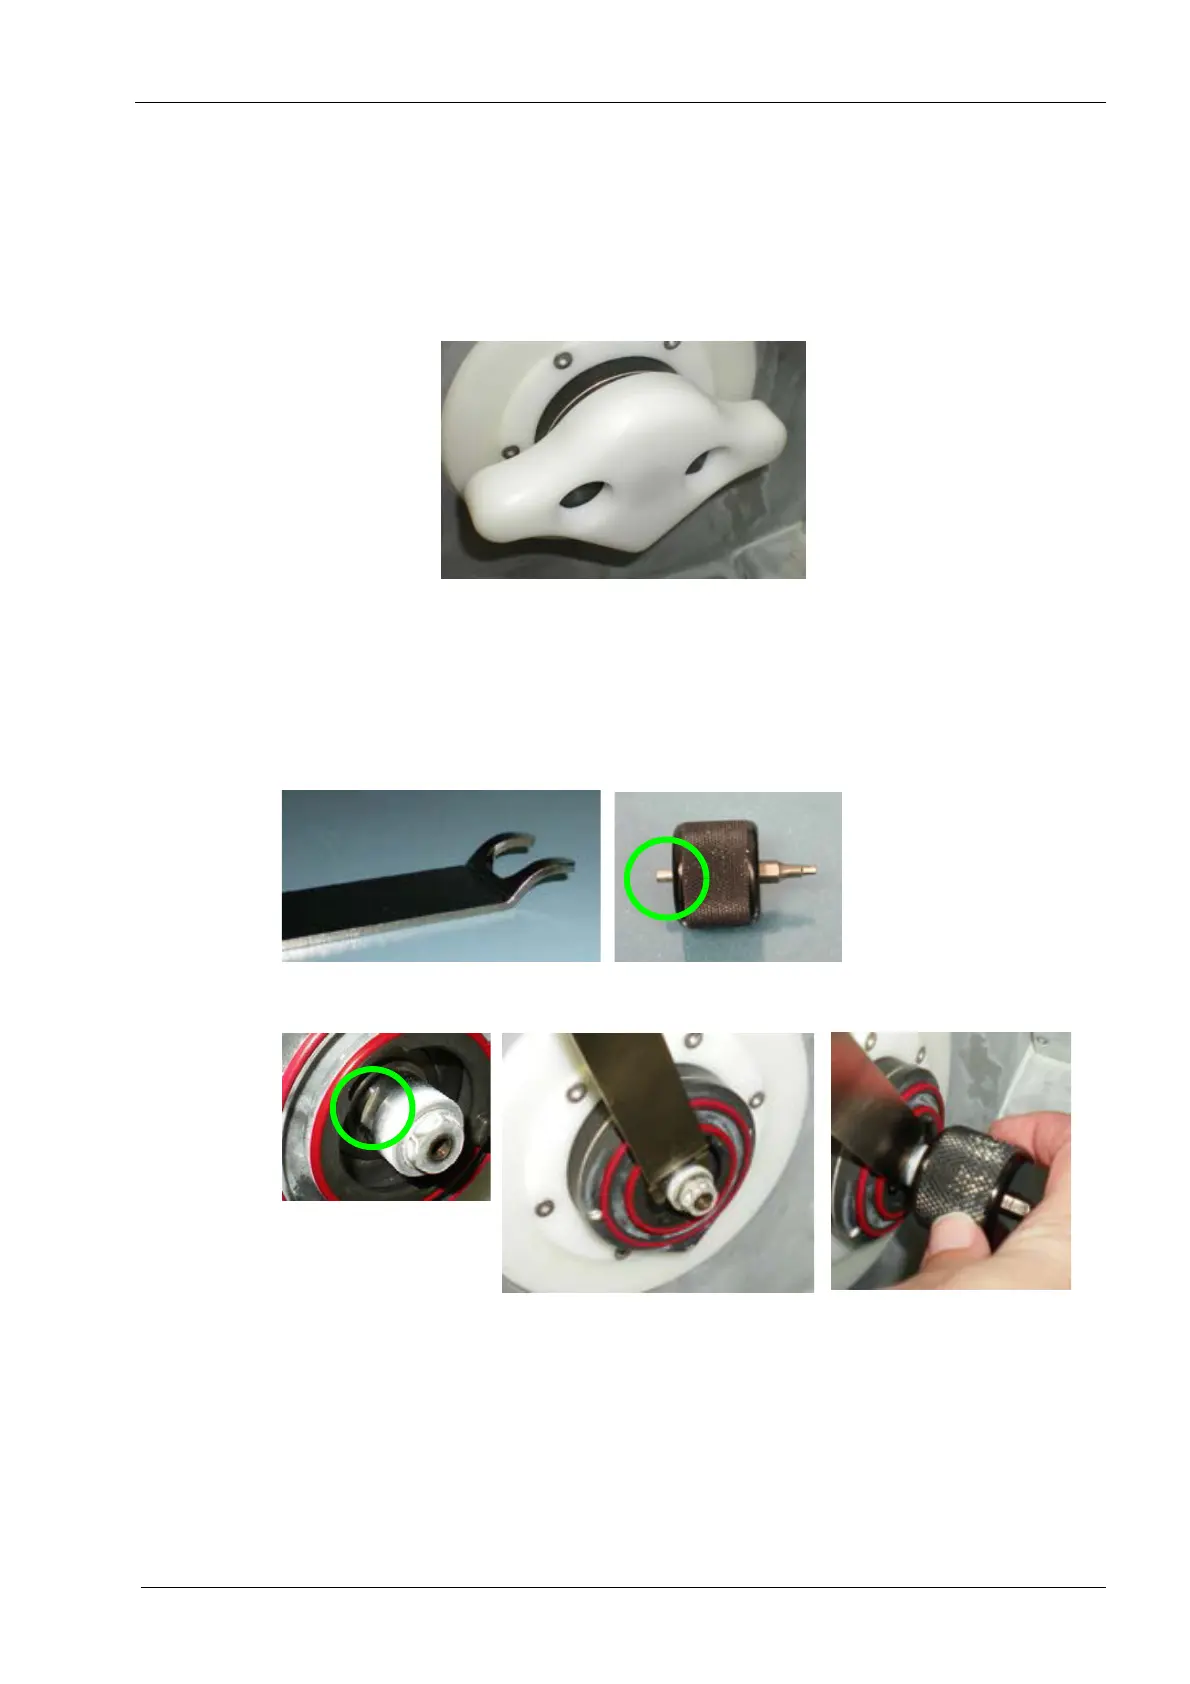
3. Use the Spindle Cap Tool to turn the spindle cap counter clockwise until the point of
the spindle is pointing approximately to the 1:00 position. Remove the spindle cap.
Figure 28: Spindle Cap Tool in locked position - point of the spindle cap pointing down
The spindle cap can be removed by hand, but it is often easier with the tool, especially when
the spindle cap is wet.
4. Remove the collet using the shorter side of the collet tool. If the spindle is turning
instead of the collet, use the curved collet wrench to hold the spindle in place while
you loosen the collet.
Curved Collet Wrench
Curved Collet Wrench - the curve
to reach the grooves on the spindle
of the collet wrench enables you
Use the wrench to hold
collet tool turns the collet.
the spindle in place while the
Collet Tool