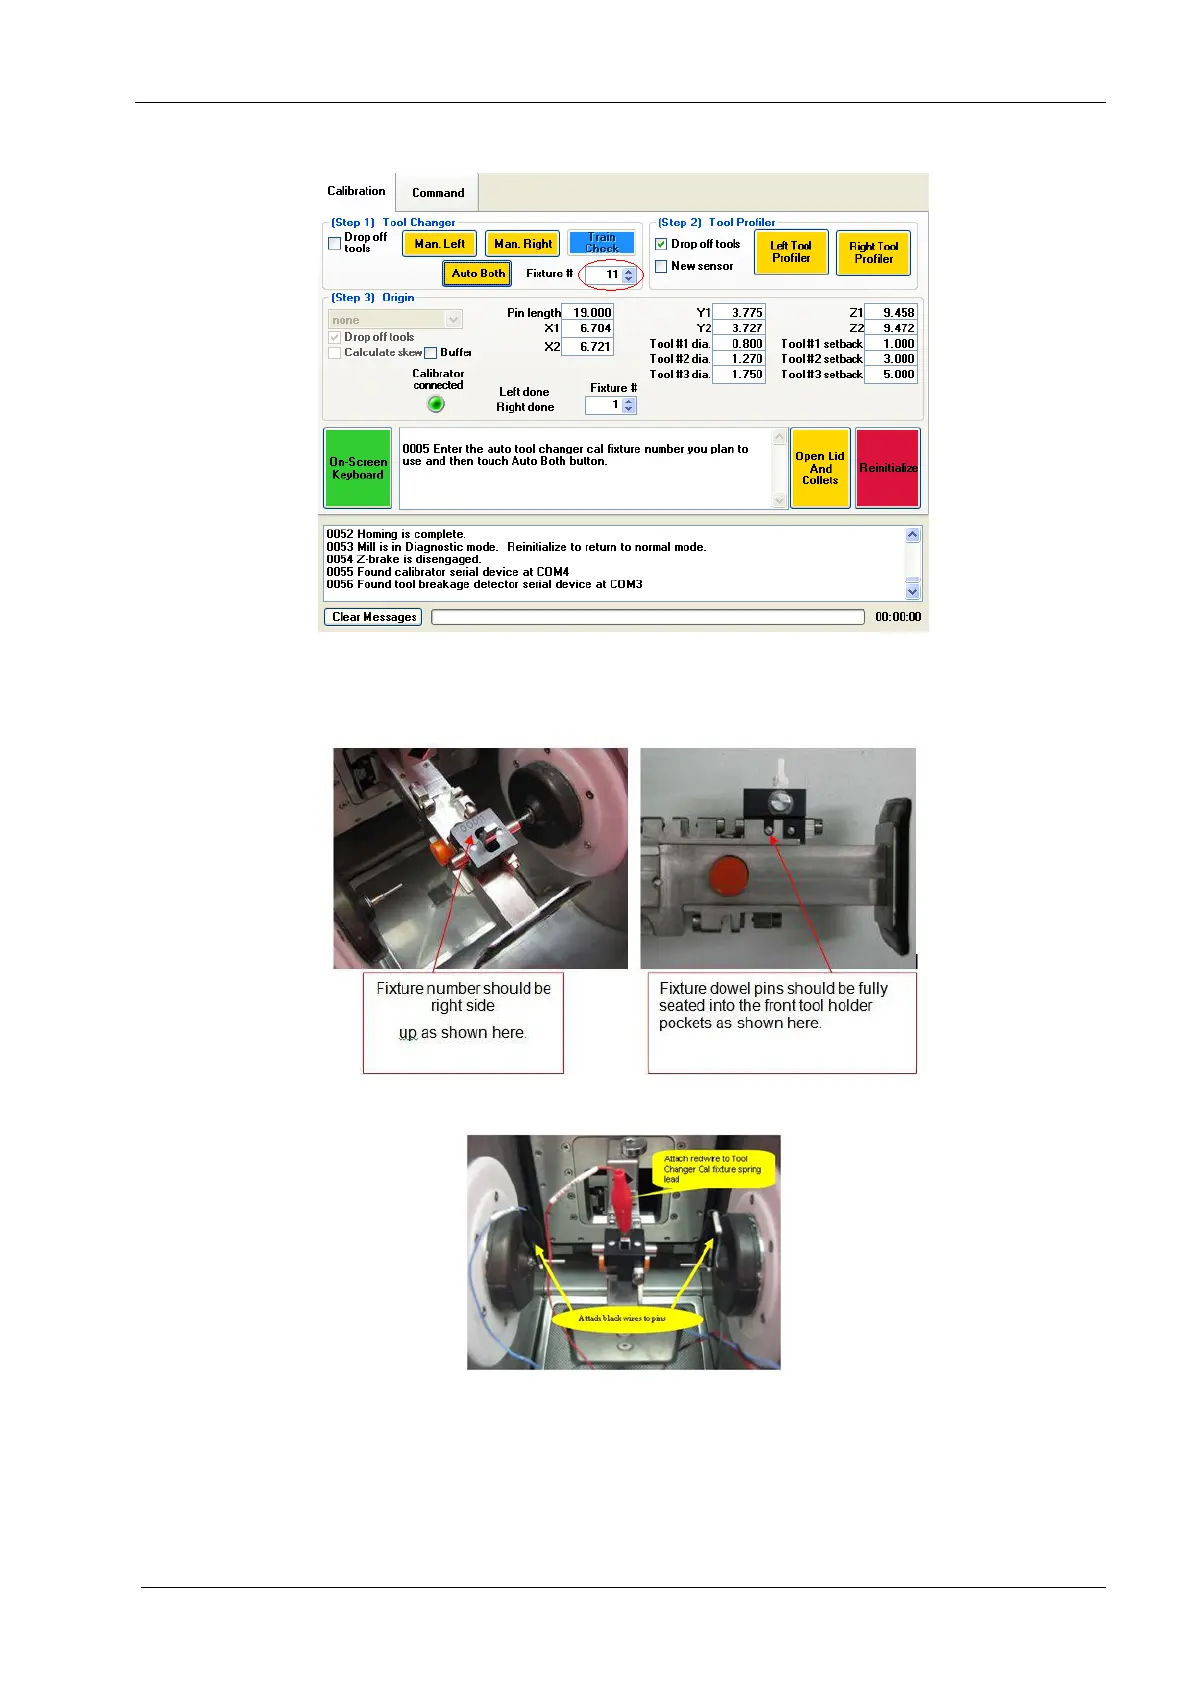
Chapter C: Calibration 2 Tool changer calibration
Technical manual Planmeca PlanMill 40 55
Figure 48: Enter Tool Holder Calibration Fixture number
15. Attach Tool Holder Calibration Fixture into the tool changer. Refer to the following
figures for attachment details.
Figure 49: Tool Holder Calibration Fixture number installation
Figure 50: Attach Calibrator Cable
16. Attach the alligator clip on red lead from the Calibrator Cable to the Tool Holder
Calibration Fixture tab in the top centre of the fixture. Attach the alligator clip on blue
lead labelled Left to calibration pin in the left collet as close to the collet as possible.
Attach the alligator clip on the black lead labeled Right to the calibration pin in the
right collet as close to the collet as possible.