Printing
QL-300 User Guide 120
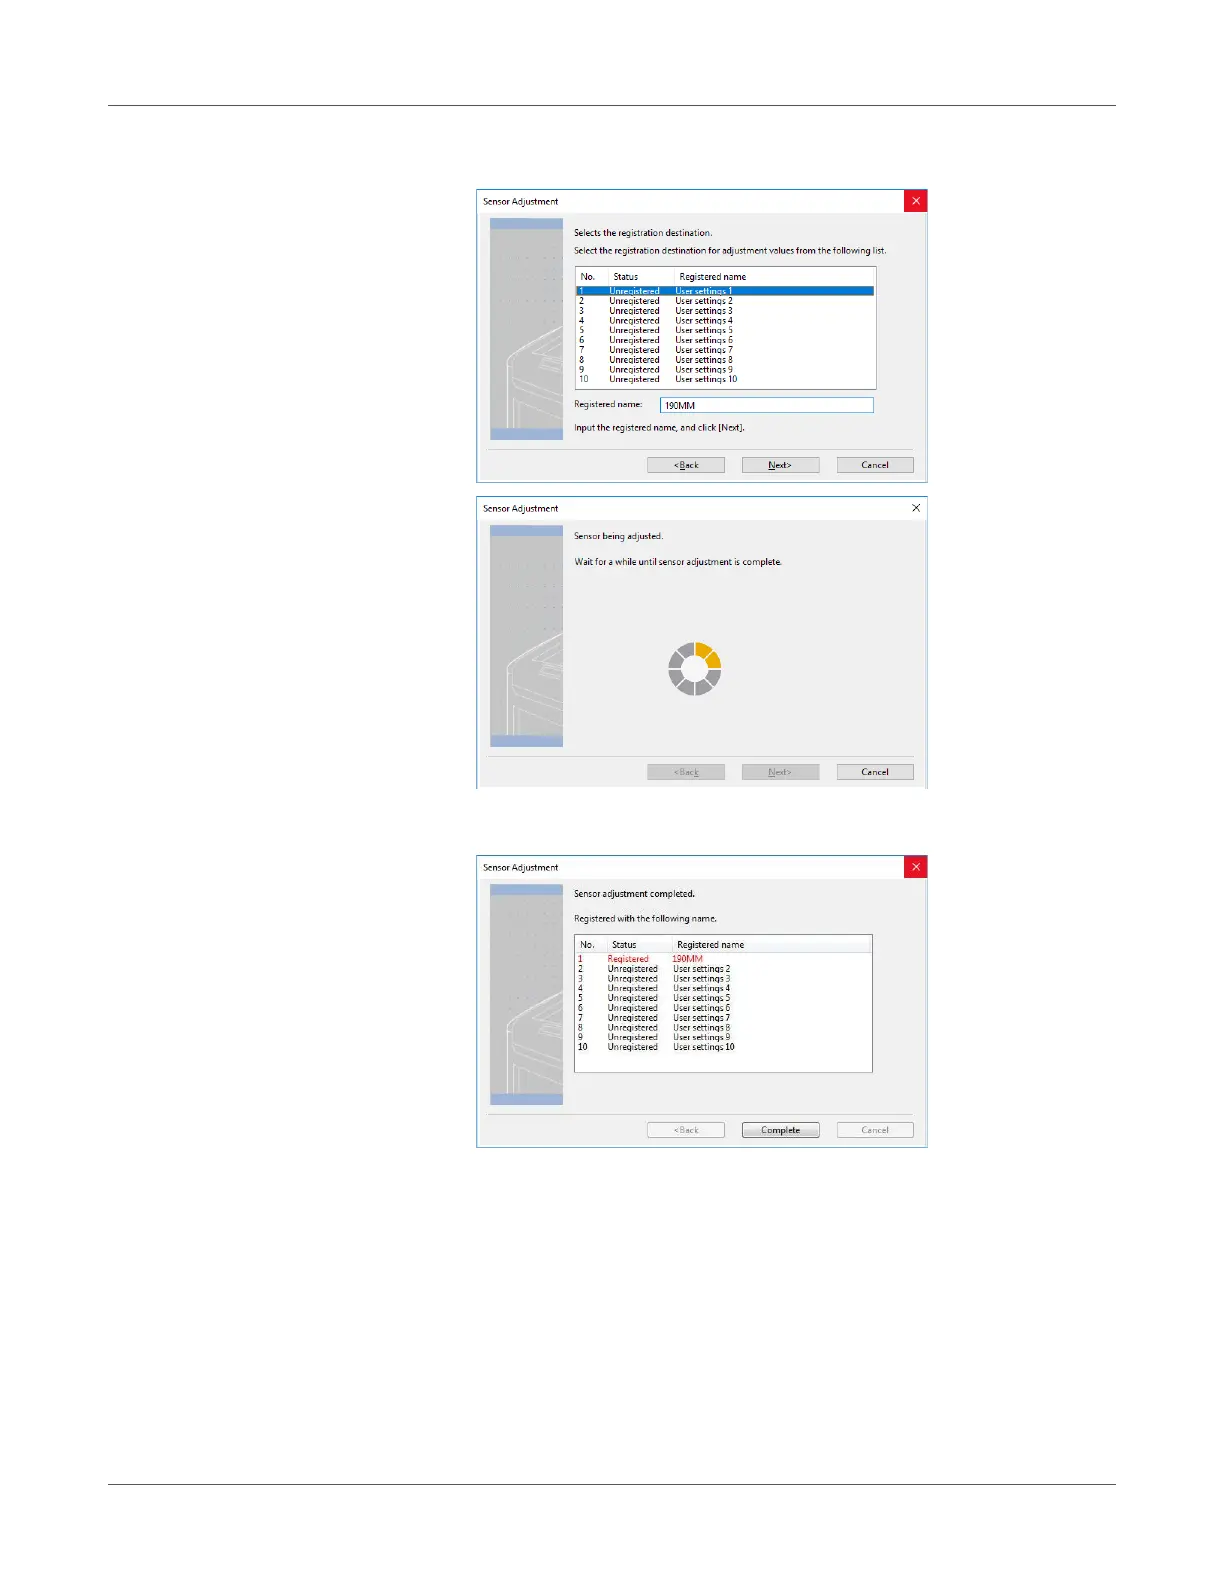
9 Click Next. This starts the sensor adjustment and displays a wait message.
10 When the completion screen appears, click Complete.
The results of adjusting the sensor are registered on the printer. In Sensor settings in
User-defined paper in the printer driver, you can specify the number registered in the
printer for the adjustment results and whether to apply it when printing. By standardizing
the registration numbers of the sensor adjustment results, you can get the same print
results by specifying the same number in Sensor settings in the printer driver for any
printer. This is useful when printing on the same media on multiple printers.
11 To register new settings, click Add or click Overwrite to select paper that is already
registered.
12 Click OK as many times as necessary to exit the “Printing preferences” screen.