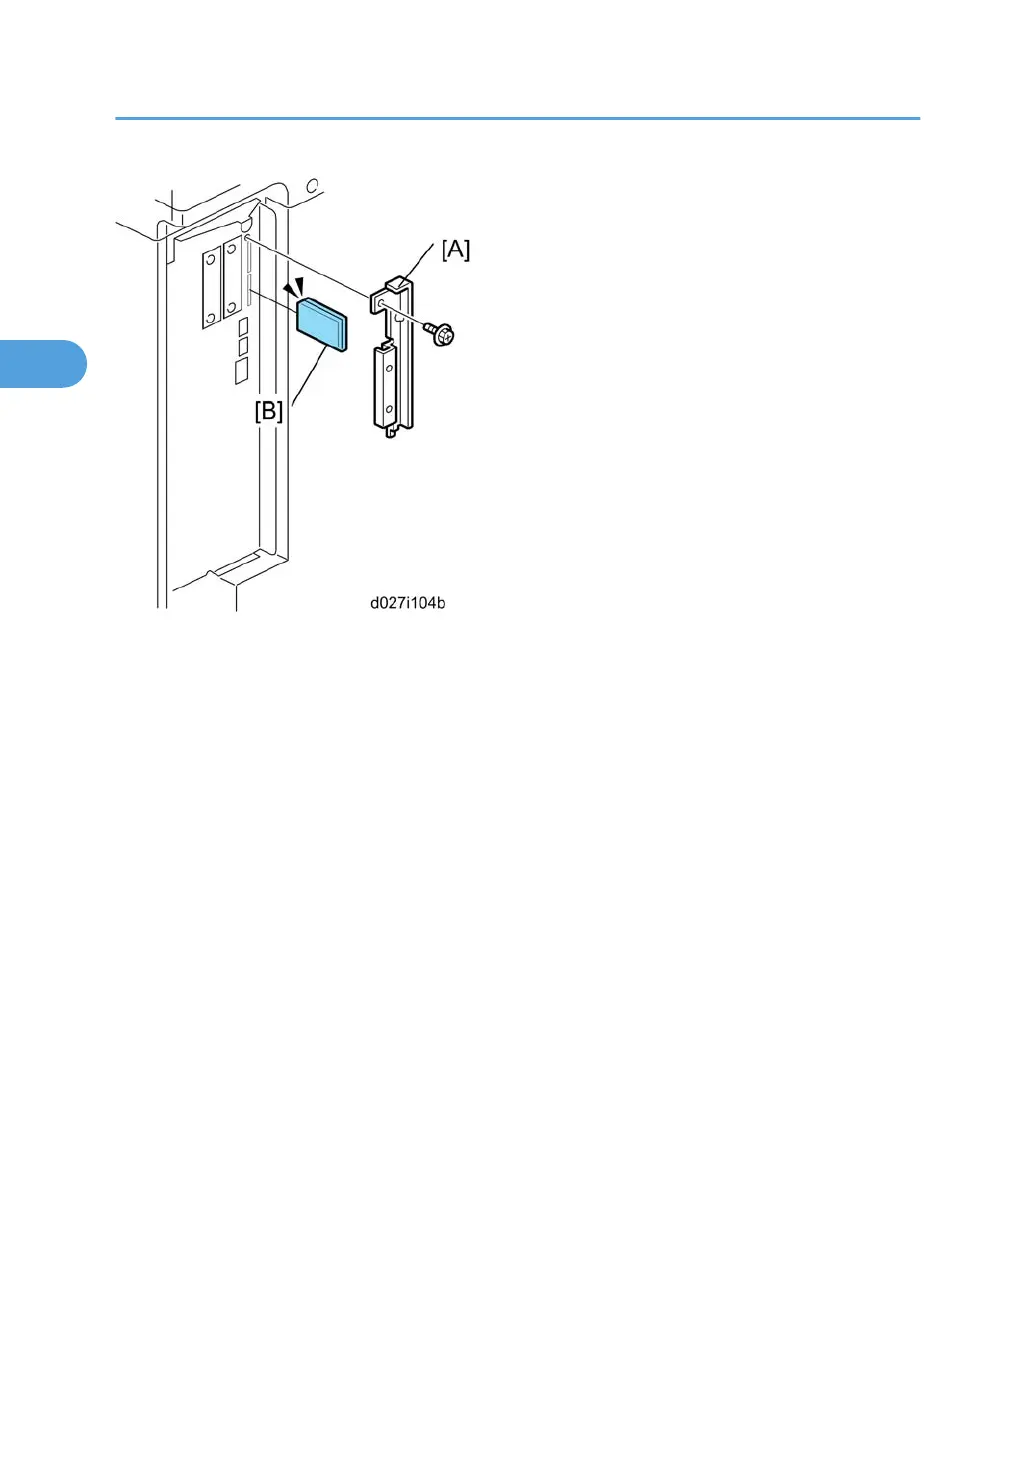
1. Remove the slot cover [A] for SD cards ( x 1).
2. Turn the SD-card label face [B] to the rear of the machine. Then push it slowly into slot 2 until you hear
a click.
3. Plug in and turn on the main power switch.
4. Push the "User Tools" key.
• If an administrator setting is registered for the machine, step 5 and 6 are required. Otherwise,
skip to the step 7
5. Push the "Login/ Logout" key.
6. Login with the administrator user name and password.
7. Touch "Extended Feature Settings" twice on the LCD.
8. Touch "Install" on the LCD.
9. Touch "SD Card".
10. Touch the "Browser" line.
11. Under "Install to" touch "Machine HDD" and touch "Next".
12. When you see "Ready to Install", check the information on the screen to confirm your previous
selection.
13. Touch "OK". You will see "Installing the extended feature... Please wait.", and then "Completed".
14. Touch "Exit" to go back to the setting screen.
15. Touch "Change Allocation".
16. Touch the "Browser" line.
2. Installation
146
 Loading...