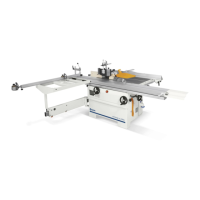
8 - USE AND ADJUSTMENT OF MORTISER
EN
Pag. 2/11 - Cap. 8 THIS MANUAL IS PROPERTY OF SCM INDUSTRIA S.P.A - ANY TOTAL OR PARTIAL REPRODUCTION IS STRICTLY FORBIDDEN
8.1 FITTING THE PARTS DEMOUNTED FOR TRANSPORT
REASONS
(fs_8-1_0.0)
For packing and transport reasons some machine members are removed.
8.1.1 MORTISER FITTING
(fs_8-1-1_0.0)
DANGER-WARNING
all fitting and demounting operations require 2 persons.
For safety reasons, before raising the mortiser, always block the cross and longitudinal table drive
as shown below.
Move the table in the direction of the arrow Z and block by tightening lever (L fig. 8.1-1) (turn to
stop first); press the two side pins all the way in and tighten the 2 knobs (V fig. 8.1-1).
NOTE-INFORMATION:
where supplied, fit the angle (K fig. 8.1-1) using the special holes (T fig. 8.1-1).
Carry out the fitting as follows:
1) Prepare the screws (A fig. 8.1-1) and the relative grommets on the base of the machine.
2) Raise the mortiser (B fig. 8.1-1) and fit the dovetail slide (C fig. 8.1-1) on the heads of screws (A fig. 8.1-1).
3) Fit levers (H and S fig.8.1-1).
Lever (S fig. 8.1-1):
- the lever (S fig. 8.1-1) is partially assembled in the factory by inserting one end in the joint (8 fig. 8.1-1);
- loosen the screws (11 fig. 8.1-1);
- insert th epin (9 fig. 8.1-1) in the hole (10 fig. 8.1-1);
- tighten the screws (11 fig. 8.1-1);
- tighten the nut (12 fig. 8.1-1) leaving as little play as possible.
Lever (H fig. 8.1-1):
- insert th elever (H fig. 8.1-1) in the joint (3 fig. 8.1-1);
- tighten the screw (4 fig. 8.1-1) in the hole (5 fig. 8.1-1) so that the lever (H fig. 8.1-1) has as little play as
possible;
- tighten the nut (6 fig. 8.1-1) on the part (7 fig. 8.1-1).
4) Screw down the screws (A fig. 8.1-1) until joining the mortising machine to the base and adjust the
parallelism of the table with respect to the bit (E fig. 8.1-1) (see "Spindle bits - assembly" par. 8.1.2) acting
on the screws (D fig. 8.1-1) and on the four grub screws (F fig. 8.1-1).
5) Check proper adjustment by moving the working table transversally, and tighten the screws (A fig. 8.1-1).
6) Ensure that the four grub screws (F fig. 8.1-1) rest on the base.
7) Reposition the pin (1 fig. 8.1-1), presser belt support, as shwon in the figure.