INTRODUCTION
NOTE: If it is difficult to readjust, heat screw with
a soldering iron (232°C (450°F)).
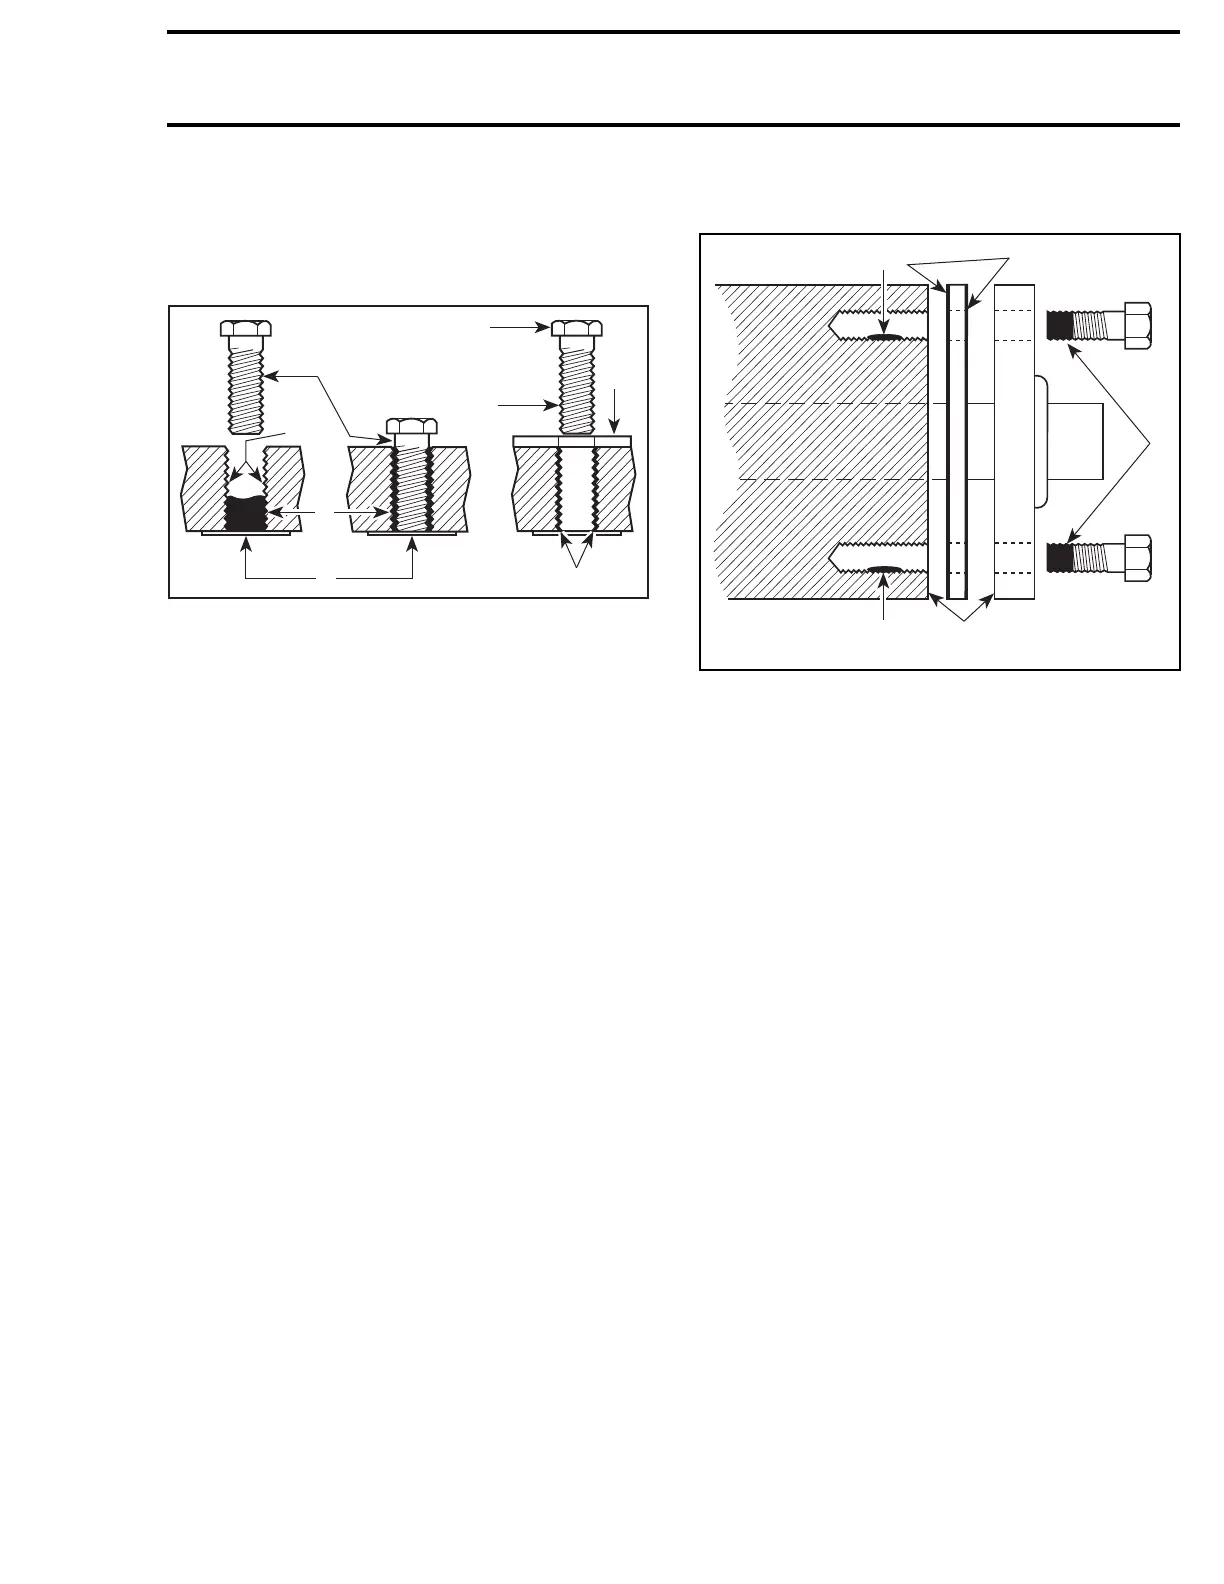
Application for Stripped Thread Repair
A00A3QA
5
8
6
7
1
2
3
4
1. Release agent
2. Stripped t
hreads
3. Form-A-Thread
4. Tapes
5. Cleaned b
olt
6. Plate
7. New thread s
8. Threadlo
cker
Standard Thread Repair
Follow in
structions on Loctite FORM-A-THREAD
81668 pac
kage.
If a plate is used to align bolt:
1. Apply release agent on mating surfaces.
2. Put waxe
d paper or similar film on the surfaces.
3. Twist bolt when inserting it to improve thread
conformation.
NOTE: NOT intended for engine stud repairs.
Repair o
f Small Holes/Fine Threads
Option 1: Enlarge damaged hole, then follow
STANDARD THREAD REPAIR
procedure.
Option 2: Apply FORM-A-THREAD on the screw
and insert i n damaged hole.
Permane
nt Stud Installation (Light Duty)
1. Use a stud of the desired thread length.
2. DO NOT a pply release agent on stud.
3. Follow
Standard Thread Repair procedure.
4. Allow 30 minutes for Loctite FORM-A-THREAD
to cure.
5. Complete part assembly.
Gasket Compound Application
21
1
3
1
lmr2007-040-006_a
1. Proper st
rength Loctite
2. Loctite Primer N and Gasket Eliminator 518
on both sides of gasket
3. Loctite P
rimer N only
1. Remove old gasket and other contaminants
using
LOCTITE CHISEL (GASKET REMOVER)
.
Use a mechanical means only if necessary.
NOTE: Av
oid grinding.
2. Clean both mating surfaces w ith solvent.
3. Spray Loctite Primer N on both mating s urfaces
and on both sides of gasket and allow to dry 1
or 2 minutes.
4. Apply
L
OCTITE 518
on both sides of gasket, us-
ing a cl
ean applicator.
5. Place gasket on mating surfaces and assemble
parts immediately.
NOTE: If the cover is bolted to blind holes, apply
proper s trength Loctite in the hole and on threads.
Tighten fastener.
If hol
es are sunken, apply proper strength Loctite
on bol
t threads.
6. Tighten as usual.
Thre
adlocker Application for Mounting
on a Shaft
Mounting with a Press
219100963-002 XVII

 Loading...


