Scanner Data (Viewing PIDs)
69
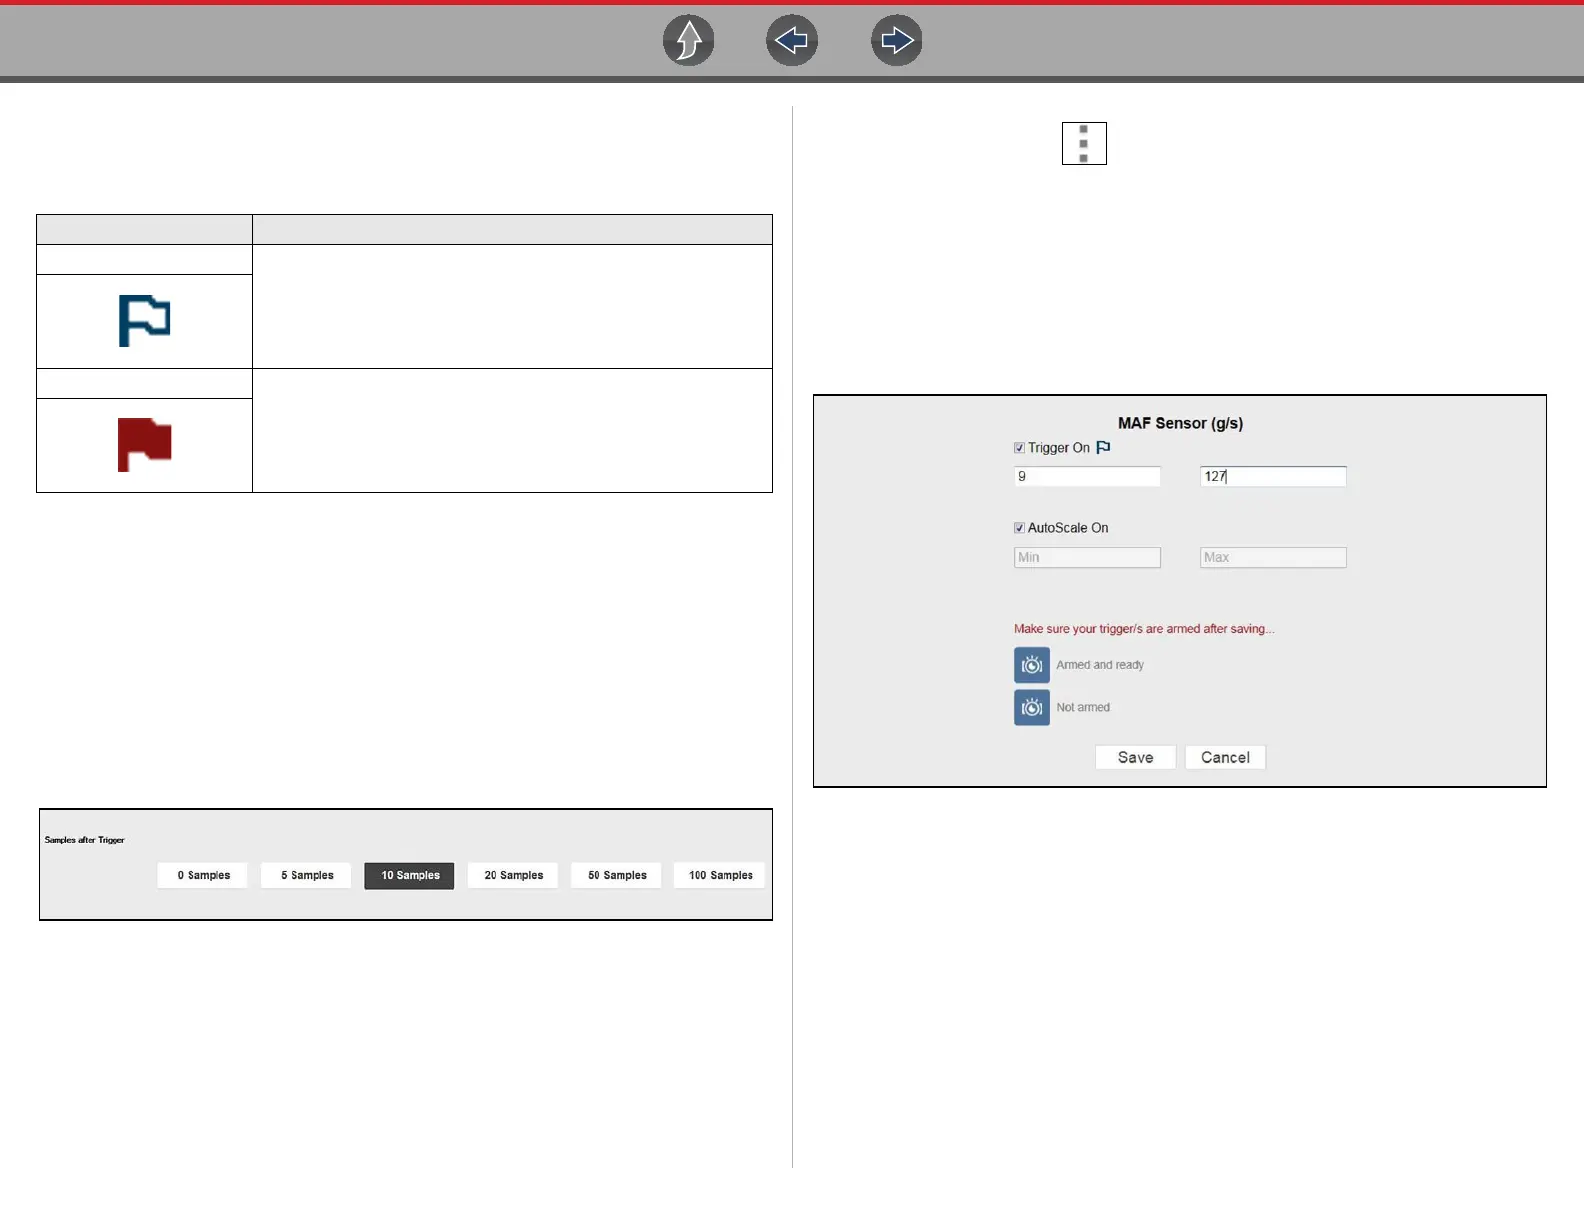
PID Trigger Status Icons
The icons (below) are used to help you quickly identify the status of individual PID
triggers:
Trigger Setup
To use triggers, they must be turned on, set (configured), and then armed. Use the
following procedures to setup PID triggers. See Trigger Arming/Disarming on
page 71 for trigger arming/disarming information.
z To adjust the amount of data collected after a trigger activates:
1. Select Properties from the toolbar.
2. Highlight one of the Samples After Trigger options (0, 5, 10, 20, 50, 100, 200,
500 or 100) (Figure 5-57).
Figure 5-57 Properties screen
3. Select Save.
z To turn a trigger on, and set upper/lower trigger limits:
1. Select the Menu icon on the PID you want to set a trigger on.
2. Select Setup.
The properties dialog box opens (Figure 5-58).
3. To turn the trigger on select the Trigger On checkbox.
4. Enter the desired upper threshold trigger limit in the Max field.
5. Enter the desired lower threshold trigger limit in the Min field.
6. Select Save.
7. To arm the trigger, see Trigger Arming/Disarming on page 71.
Figure 5-58 Typical - Trigger Max/Min settings
Icon Description
Trigger Armed
Trigger has been set (configured) and is armed.
Trigger Activated
Trigger has been activated (upper or lower limit has been met).