4.1 Powering Up/Shutting Down
4.1.1 Powering Up the Unit
1.
After installing your NetClock unit, verify that power is connected, then turn ON the unit
using the switch on the rear panel, and wait for the device to boot up.
Note: NetClock 9483 only: DC input power is not switched, so NetClock
will be powered up with DC input connected, unless you installed an
external power switch.
2.
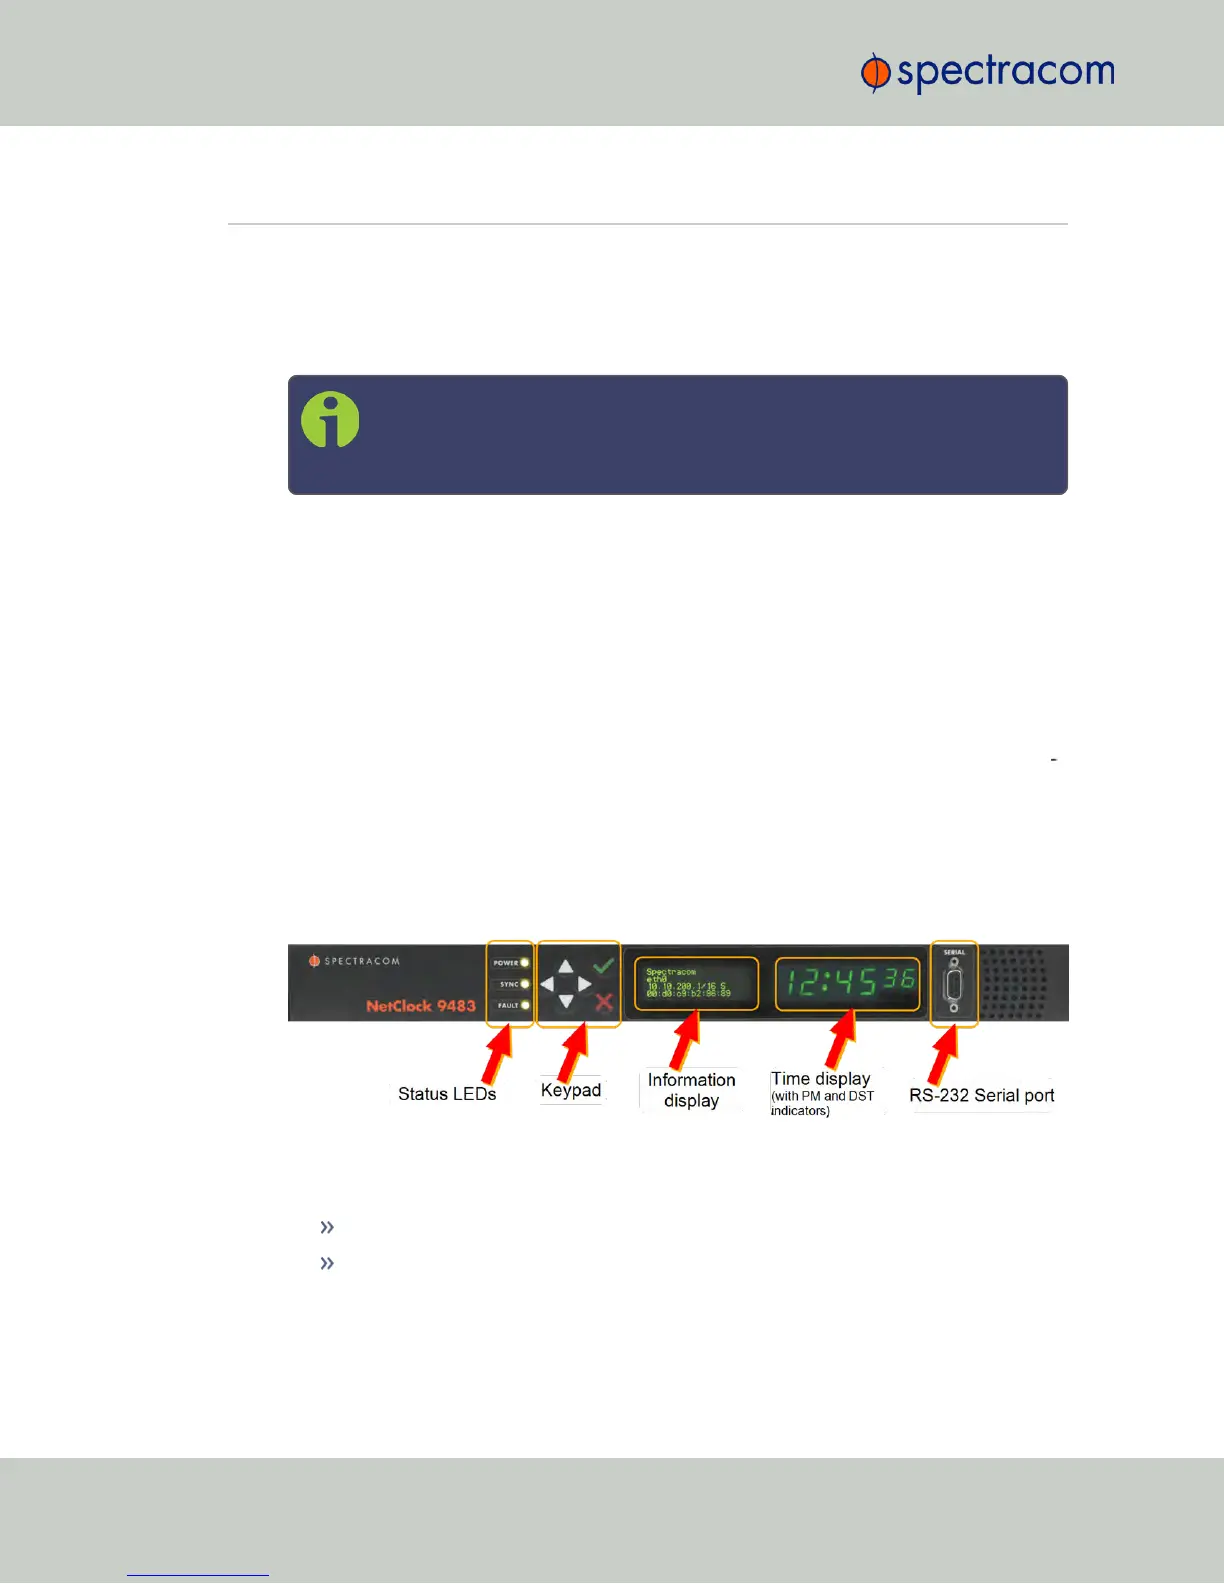
Observe that all of the front panel LEDs momentarily illuminate (the Power LED will then
stay lit) and that the Information display LCD back light illuminates. The fan may or may
not run, depending on the model year of your NetClock unit. For more information, see
"Temperature Management" on page288.
NetClock 9483 only:
The time display will reset and then start incrementing the time. About 10 seconds after
power-up, “Starting up NetClock” will be displayed in the information display. After
approximately 2minutes, the information display will then show the current network set
tings.
By default, the 4-line information display shows the unit’s hostname, IPv4 address, mask,
and gateway.
The time display shows the current time: UTC (default), TAI, GPS or local timescale, as
configured.
Figure 4-1: NetClock front panel
3.
Check the front panel status LED indicators:
The Power lamp should be solid green.
The Sync lamp will probably be red, since synchronization has not yet been
achieved.
224
CHAPTER 4 • NetClock User Reference Guide Rev. 16
4.1 Powering Up/Shutting Down