2.11.2.2 Setting Up an IP Address via the Front Panel
Note: This topic applies only to NetClock 9483 units. If you are setting up a NetC
lock 9489 unit (which does not have a front panel information display and
keypad), see "Setting Up a Temporary IP Address Remotely" on page51.
Assigning an IP address to NetClock, using the front panel keypad and information display is a
preferred way to provide network access to the unit, thus enabling you thereafter to complete
the setup process via the WebUI.
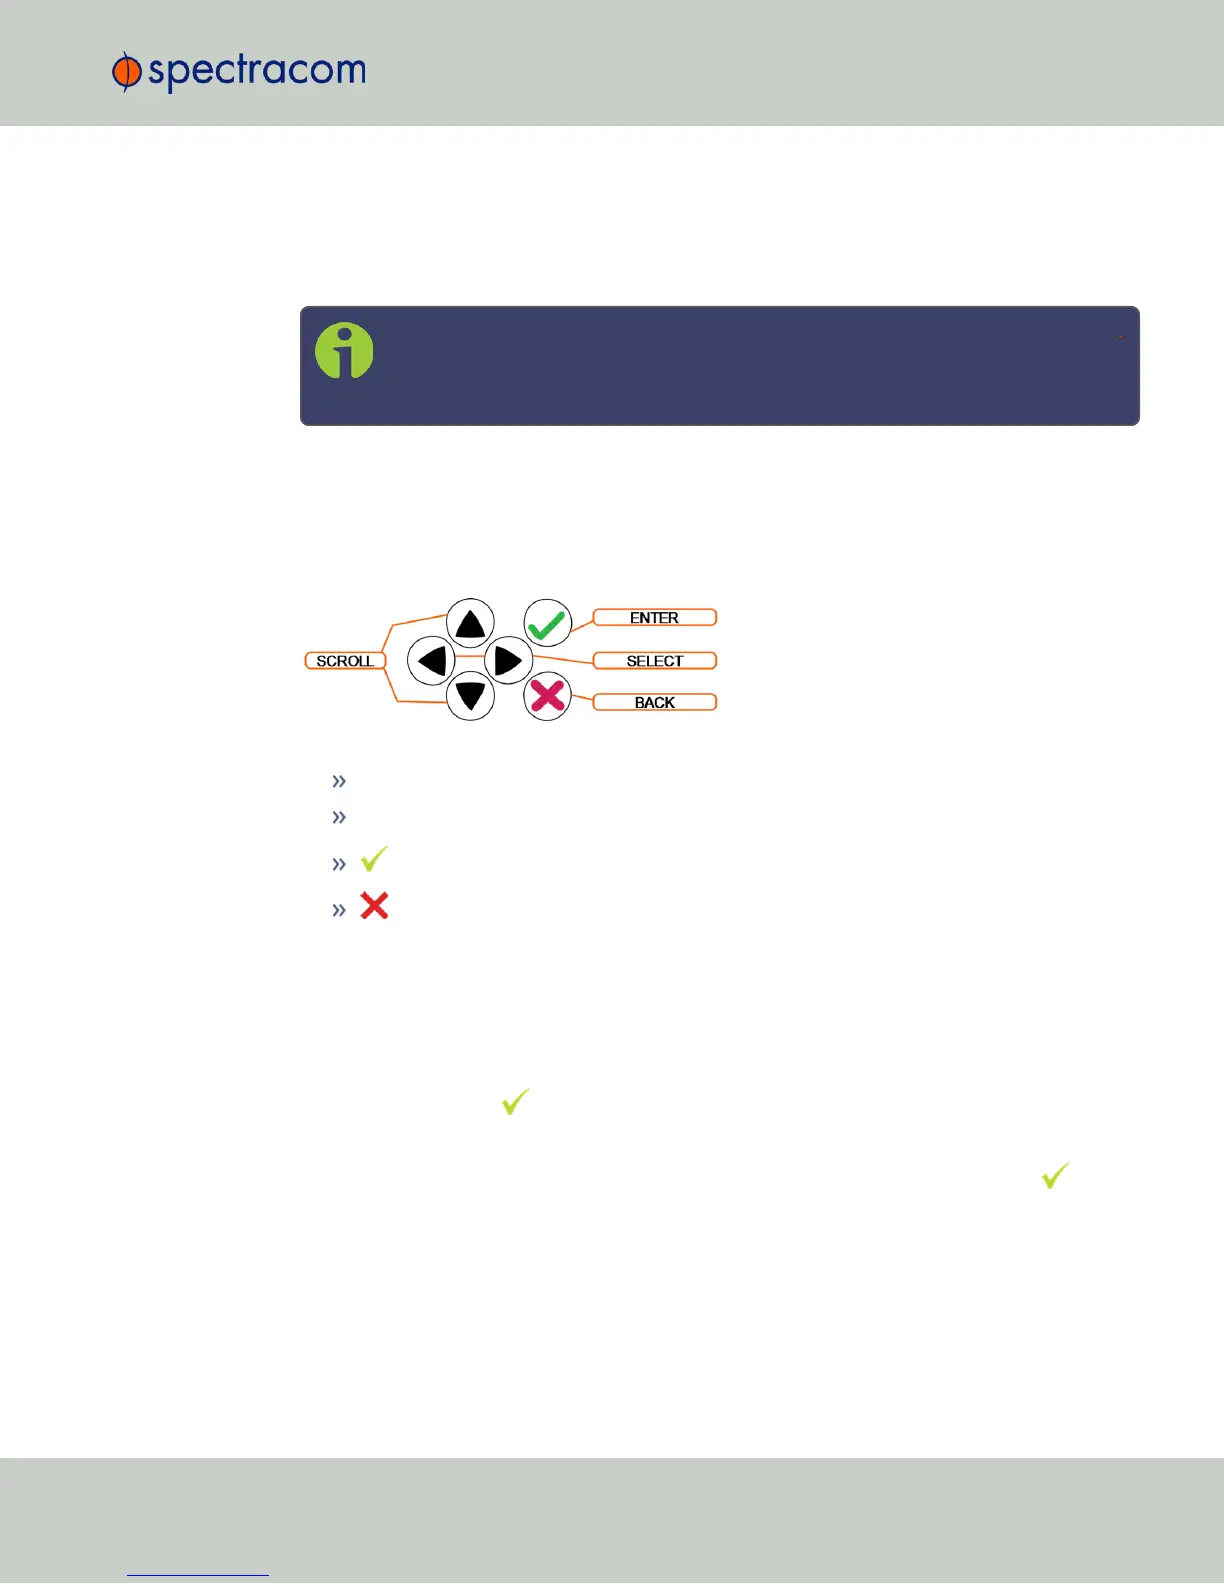
Keypad Operation
The functions of the six keys are:
< > arrow keys: Navigate to a menu option (will be highlighted)
˄ ˅ arrow keys: Scroll through parameter values in edit displays
ENTER key: Select a menu option, or load a parameter when editing
BACK key: Return to previous display or abort an edit process
An illustration showing how to navigate the front panel menu tree can be found here: "Front
Panel Keypad, and Display" on page6
IP configuration, step-by-step instructions:
A.
Disable DHCP:
1.
Press the key.
2.
Using the arrow key, select Netv4 from the menu.
(To select a menu item, highlight it using the arrow keys, then press the key.)
3.
Select the Ethernet interface for which DHCP is to be disabled, such as eth0.
4.
Select DHCP from the next menu. The display will show State=Enabled and
Action=Disabled.
(The State is the current DHCP setting and the Action is the action to take. You can
only change the Action setting.)
2.11 Setting up an IP Address
CHAPTER 2 • NetClock User Reference Guide Rev. 16
47