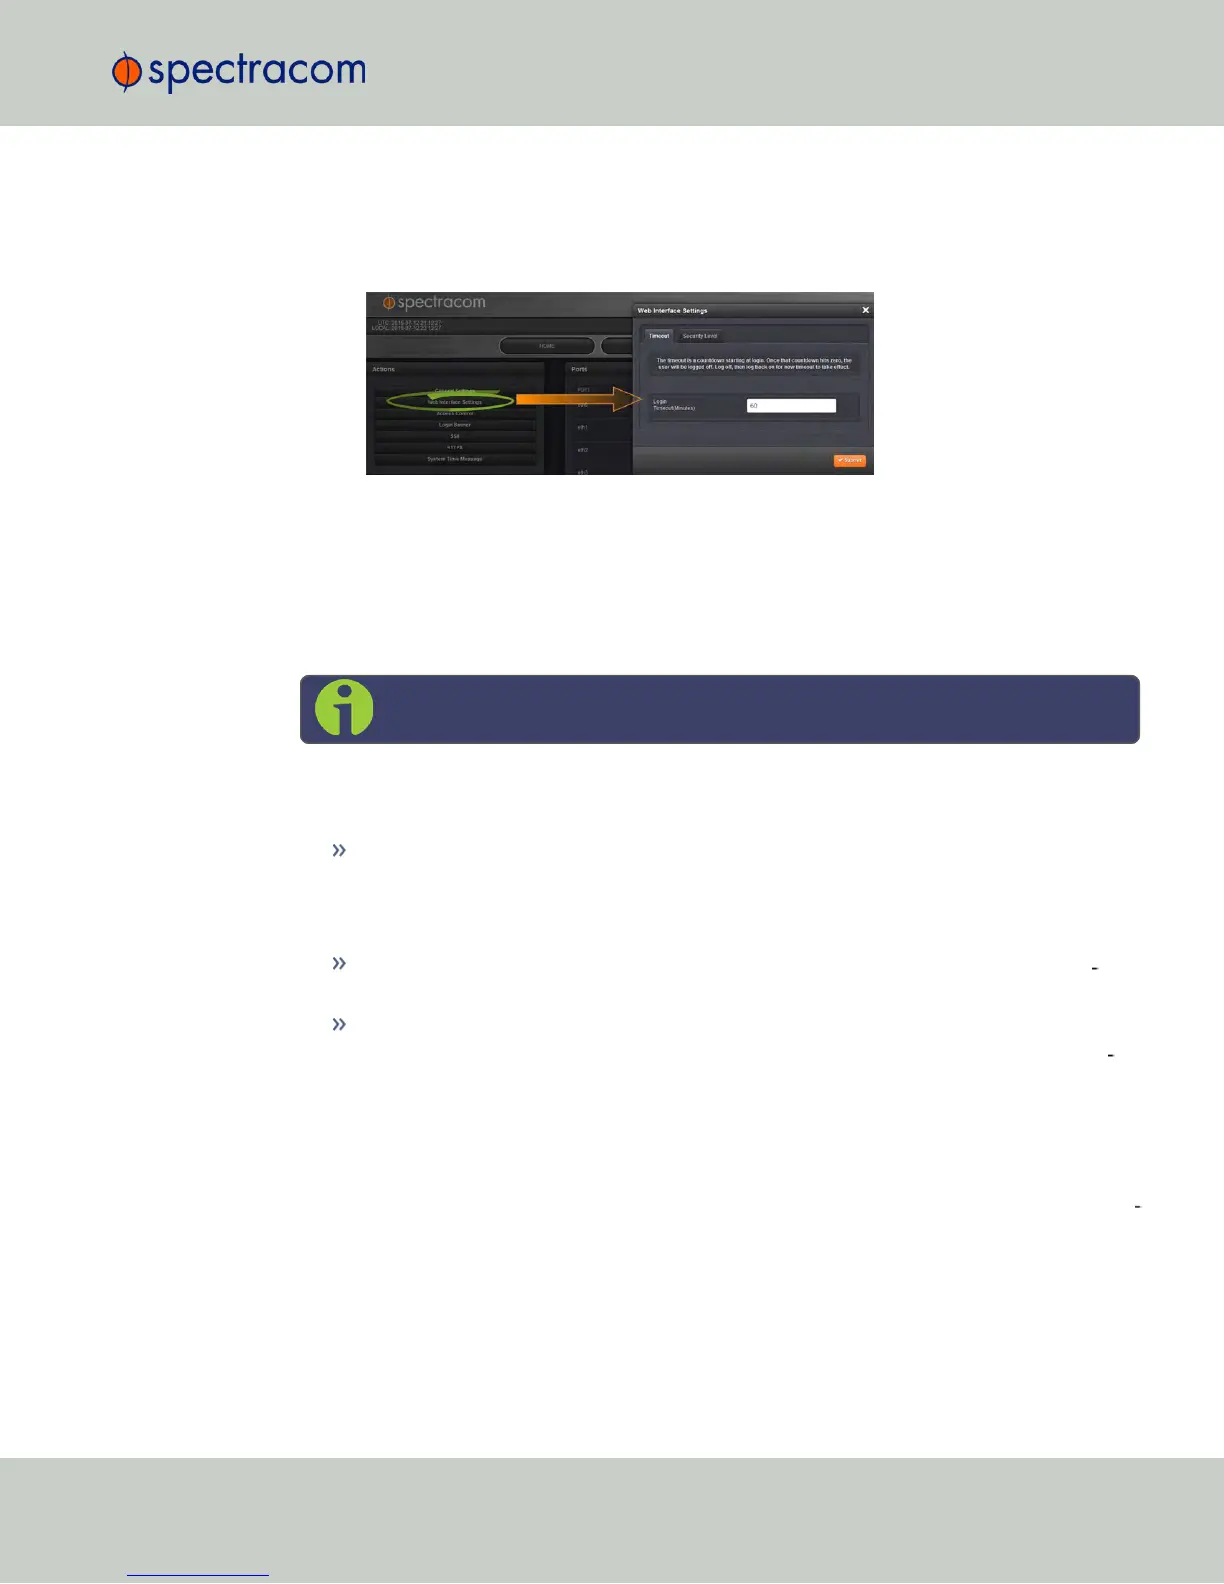
To change the time after which the WebUI will timeout:
1.
Navigate to the MANAGEMENT > Network Setup screen.
2.
In the Actions panel on the left, click on Web Interface Settings.
3.
In the Web Interface Settings window, enter the desired value in minutes.
In order for a new setting to take effect, you need to log off, and then log back in again. This
setting affects all users, i.e. not just the user changing the value.
4.4.2 Configuring the Front Panel
Note: This Section applies to NetClock 9483 only.
The front panel of the NetClock unit comprises three elements which can be configured via the
NetClock Web UI:
The keypad, which—in conjunction with the information display—can be used to access
NetClock's main functions directly via the unit's front panel. To prevent inadvertent
keypad operation, it can be locked and unlocked from the Web UI. Learn more about
front panel keypad operation: "Front Panel Keypad, and Display" on page6.
The information display: A 4-line LCD display that can be configured to display dif
ferent screens, and that is used in conjunction with the keypad.
The LED time display which can be configured to show the current time (UTC, TAI, GPS
or Local timescale) in either 12- or 24-hour format. By factory default, the LED will dis
play UTC time in 24-hour format.
Accessing the Front Panel Setup Screen
NetClock's Web UI allows you to configure the main elements on the front panel of the unit,
and to see an image of the information currently displayed on the 4-line front panel inform
ation display.
To access the front panel configuration window:
1.
Navigate to MANAGEMENT > OTHER: Front Panel.
4.4 Miscellanous Typical Configuration Tasks
CHAPTER 4 • NetClock User Reference Guide Rev. 16
257