Vista 1 Digital Mixing System
GC Operation 4-119
Document generated: 18.04.17
SW V5.3
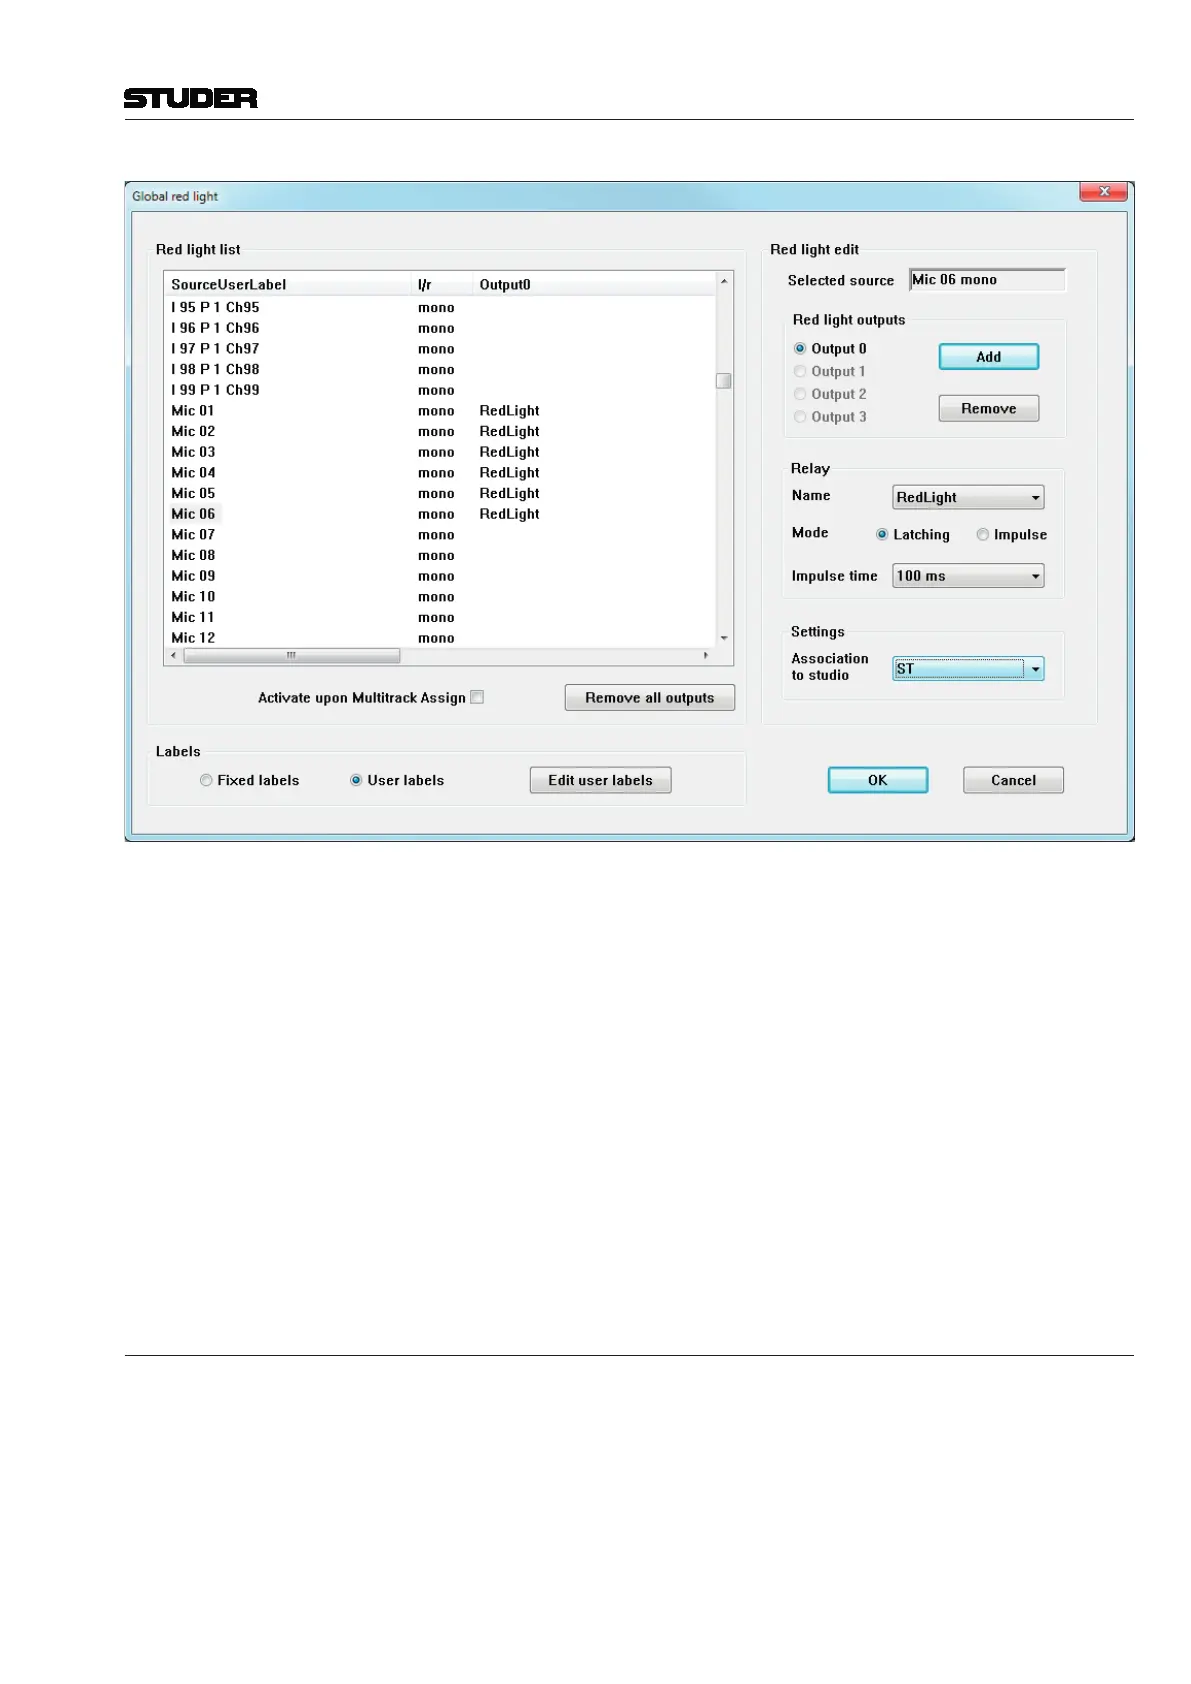
3. Now you have to select the relay itself (use the arrow button to open a list
of relays), and to determine its mode of operation to either latching (contact
closed when trigger conditions is fulfilled) or impulse (contact closed for
a short time when trigger conditions is fulfilled, and then opened again).
Impulse mode closure time can be set to 100 or 200 ms. Obviously, the actual
relay that is externally wired for Red Light must be selected.
4. In the Settings window, an association to a Studio can be set. Usually, only
one Studio is being used. If, however, more than one Studio should be present,
each may require its own Red Light relay and its configured Sources. In this
case, several relays can be configured independently. To select a Studio, click
on the arrow button, and select a studio from the list. If a Studio is associated,
the Red Light will also be shown on the Desk’s Studio monitor Unit.
You can also remove all assigned relays from the list, by clicking on the
Remove all outputs button.
4.6.1.3.1 Load Signaling Configuration
This action opens a window that allows selection from existing Signaling
Configurations to load into the Vista. The
C:\D950SYSTEMDB directory will
usually be displayed first, and a Session Configuration must be selected. The
Signaling Con figuration files have a
*.sig extension. This process will load
all saved relay assignments for both the Signaling Out and the Red Light
Con fig urations, and the relay user labels.