Installing the Hydraulic Fittings (SAE Straight Thread
O-Ring Fittings) (continued)
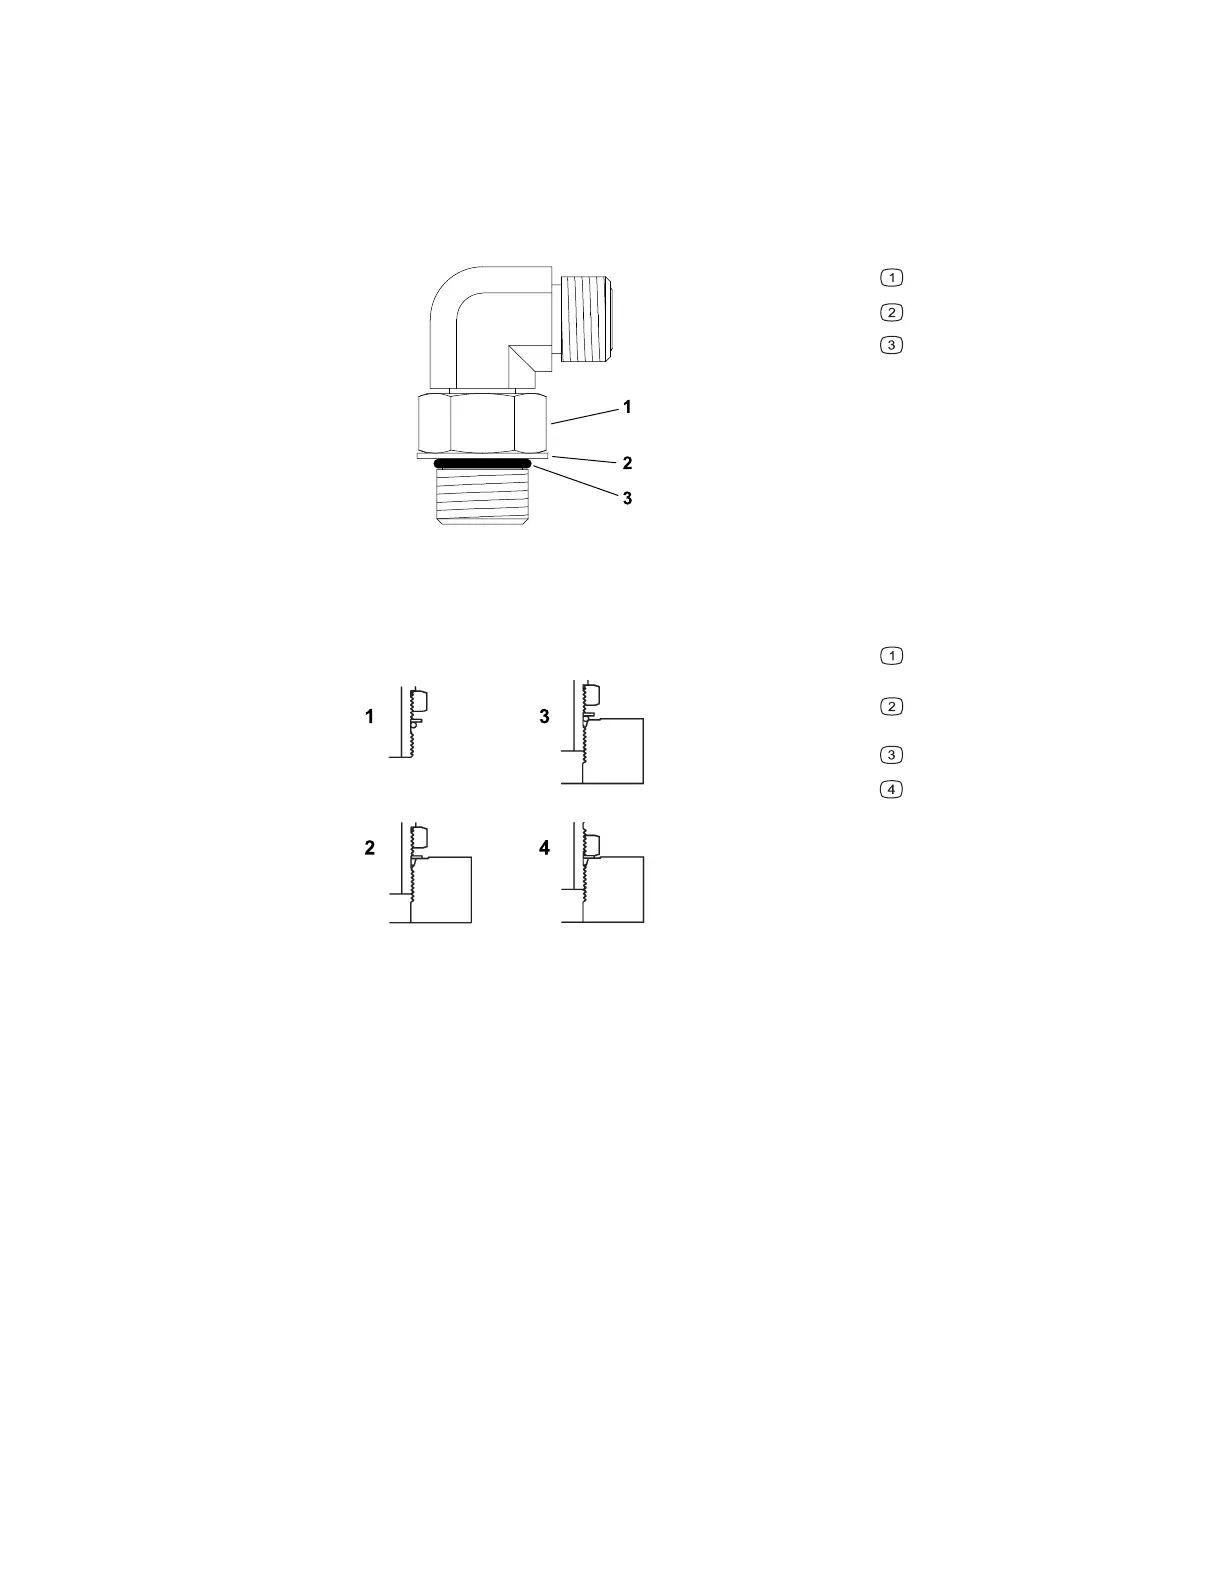
Installing an Adjustable Fitting
Figure 25
G212224
Locknut
Back-up washer
O-ring
Figure 26
G212225
Step 1: clearance the lock
nut
Step 2: seat the back-up
washer
Step 3: align the fitting
Step 3: tighten the lock nut
1. Ensure that all the threads, the sealing surfaces of fitting, and the component port
are free of burrs, nicks, scratches, or unwanted material.
2. To help prevent a hydraulic leak, replace the O-ring when you open the
connection.
3. Lightly lubricate the O-ring with clean hydraulic fluid. Ensure that the threads of
the fitting are clean with no lubricant applied.
4. Turn back the lock nut as far as possible. Ensure that the back-up washer is not
loose and it is pushed up as far as possible (Step 1, Figure 26).
5. Install the adjustable fitting into the port by hand until the washer contacts the
face of the port (Step 2, Figure 26).
6. If the adjustable fitting needs to align with another component, rotate the fitting
counterclockwise until it is aligned to the desired position (Step 3, Figure 26). Do
not rotate the adjustable fitting more than one turn counterclockwise.
4520P Page 5–13 Hydraulic System: Hydraulic Hoses
09.40003Rev 00