February, 2008
4-134
WorkCentre 5225, 5230
REP 16.2.1, REP 16.2.2
Launch Version
Repairs and Adjustments
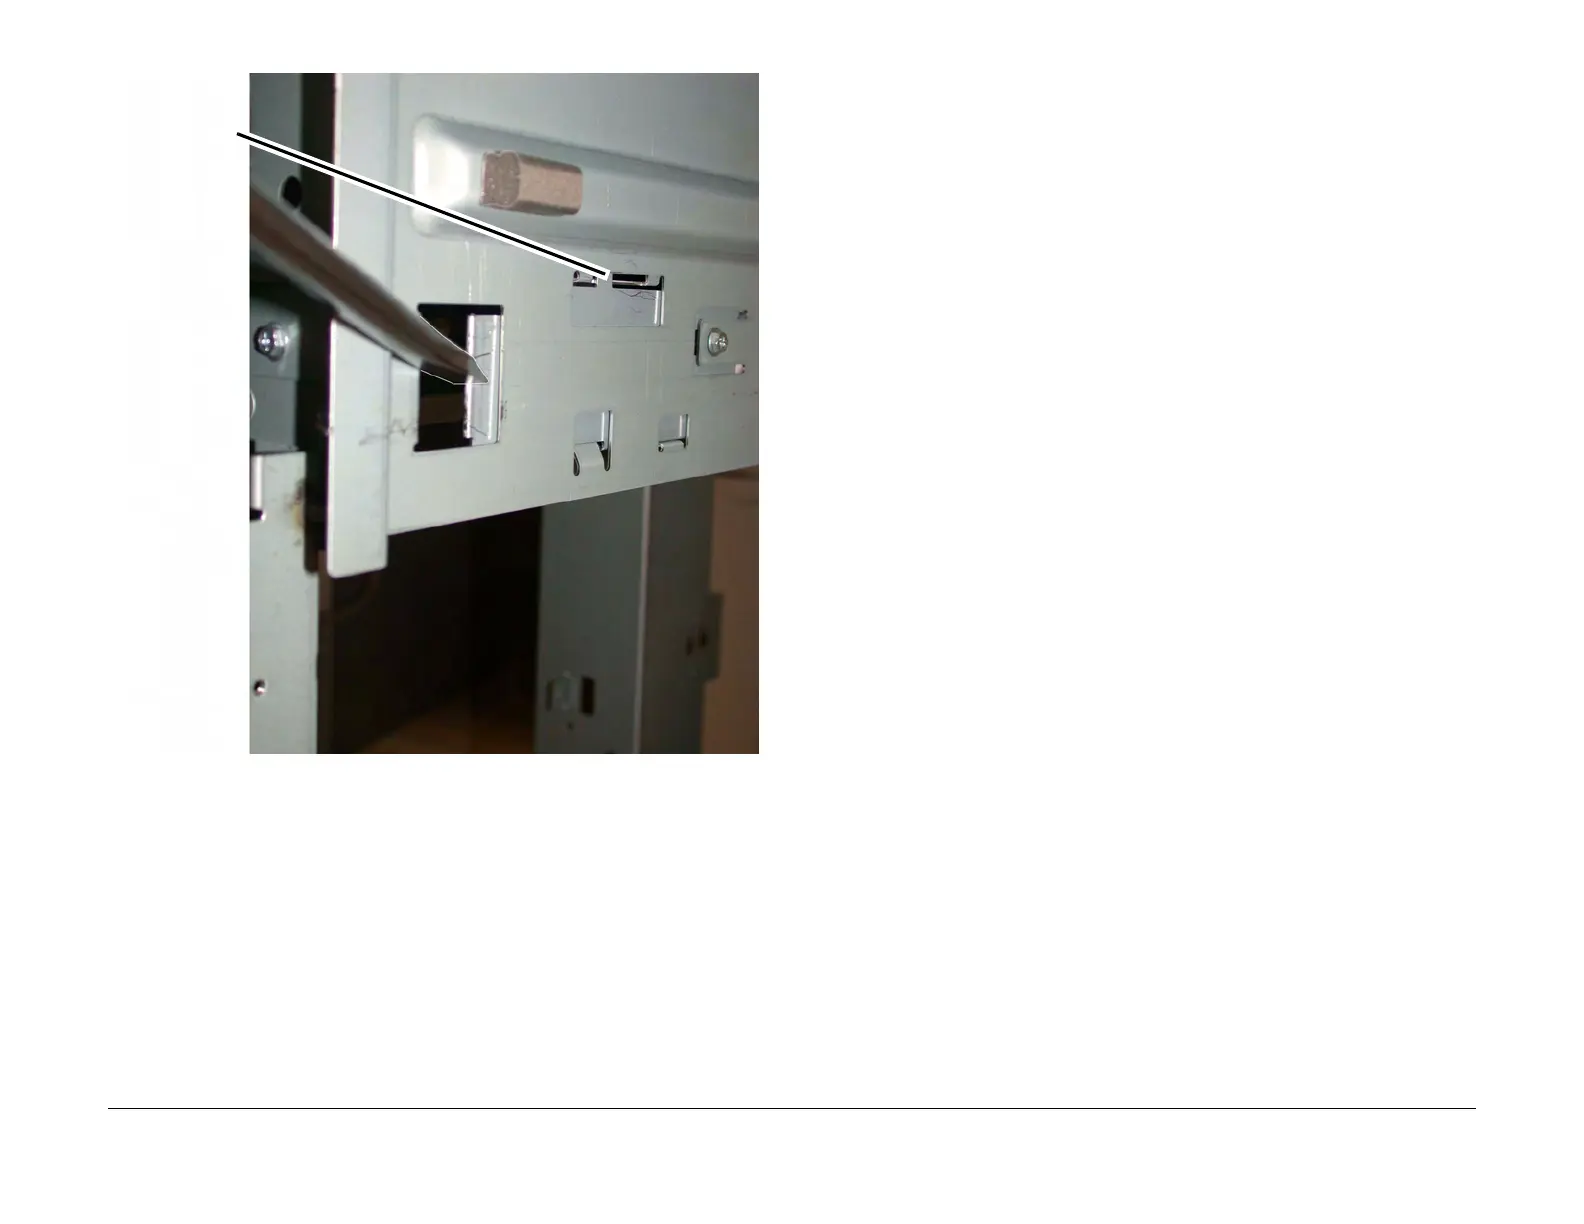
Figure 2 Releasing the docking latch (j0st41731.jpg)
Replacement
1. Align the Printer Docking Bracket with the cut outs in the Finisher Docking Bracket.
2. Mate the Printer and the Finisher until it latches.
3. Check that the Finisher is firmly latched to the Printer.
4. Perform the remainder of the replacement procedure in reverse order of removal.
REP 16.2.2 Front Cover Assembly
Parts List on PL 23.6
Removal
WARNING
To avoid personal injury or shock, do not perform repair or adjustment with electrical
power applied to the machine.
1. Undock the Finisher. (REP 16.2.1)
CAUTION
Do not drop the Booklet Maker Thumb screw into the Finisher.
2. Remove the Booklet Maker and set aside. (REP 16.3.2)
3. Open the Finisher upper Front Door.
4. Remove the screws (5).
5. Remove the Front Cover Assembly.
Replacement
1. To install, carry out the removal steps in reverse order.
1
Using a large
common screw-
driver, move the
docking latch
release toward
the front of the
Finisher
2
Docking latch
will move also