February, 2008
4-160
WorkCentre 5225, 5230
REP 16.2.26, REP 16.2.27
Launch Version
Repairs and Adjustments
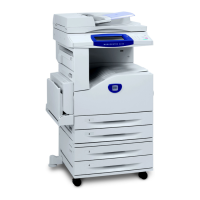
Figure 2 Removing the Compiler No Paper Sensor (j0st41735)
REP 16.2.27 Front/Rear Carriage Assembly
Parts List on PL 23.7
Removal
WARNING
To avoid personal injury or shock, do not perform repair or adjustment with electrical
power applied to the machine.
NOTE: Ensure that the Stacker Tray is in the top position.
1. Switch off the power and disconnect the power cord.
2. Remove the Finisher Front Cover. (REP 16.2.2)
3. Remove the Rear Upper and Rear Lower Covers. (REP 16.2.3, REP 16.2.4)
4. Remove the Stacker Tray. (PL 23.7)
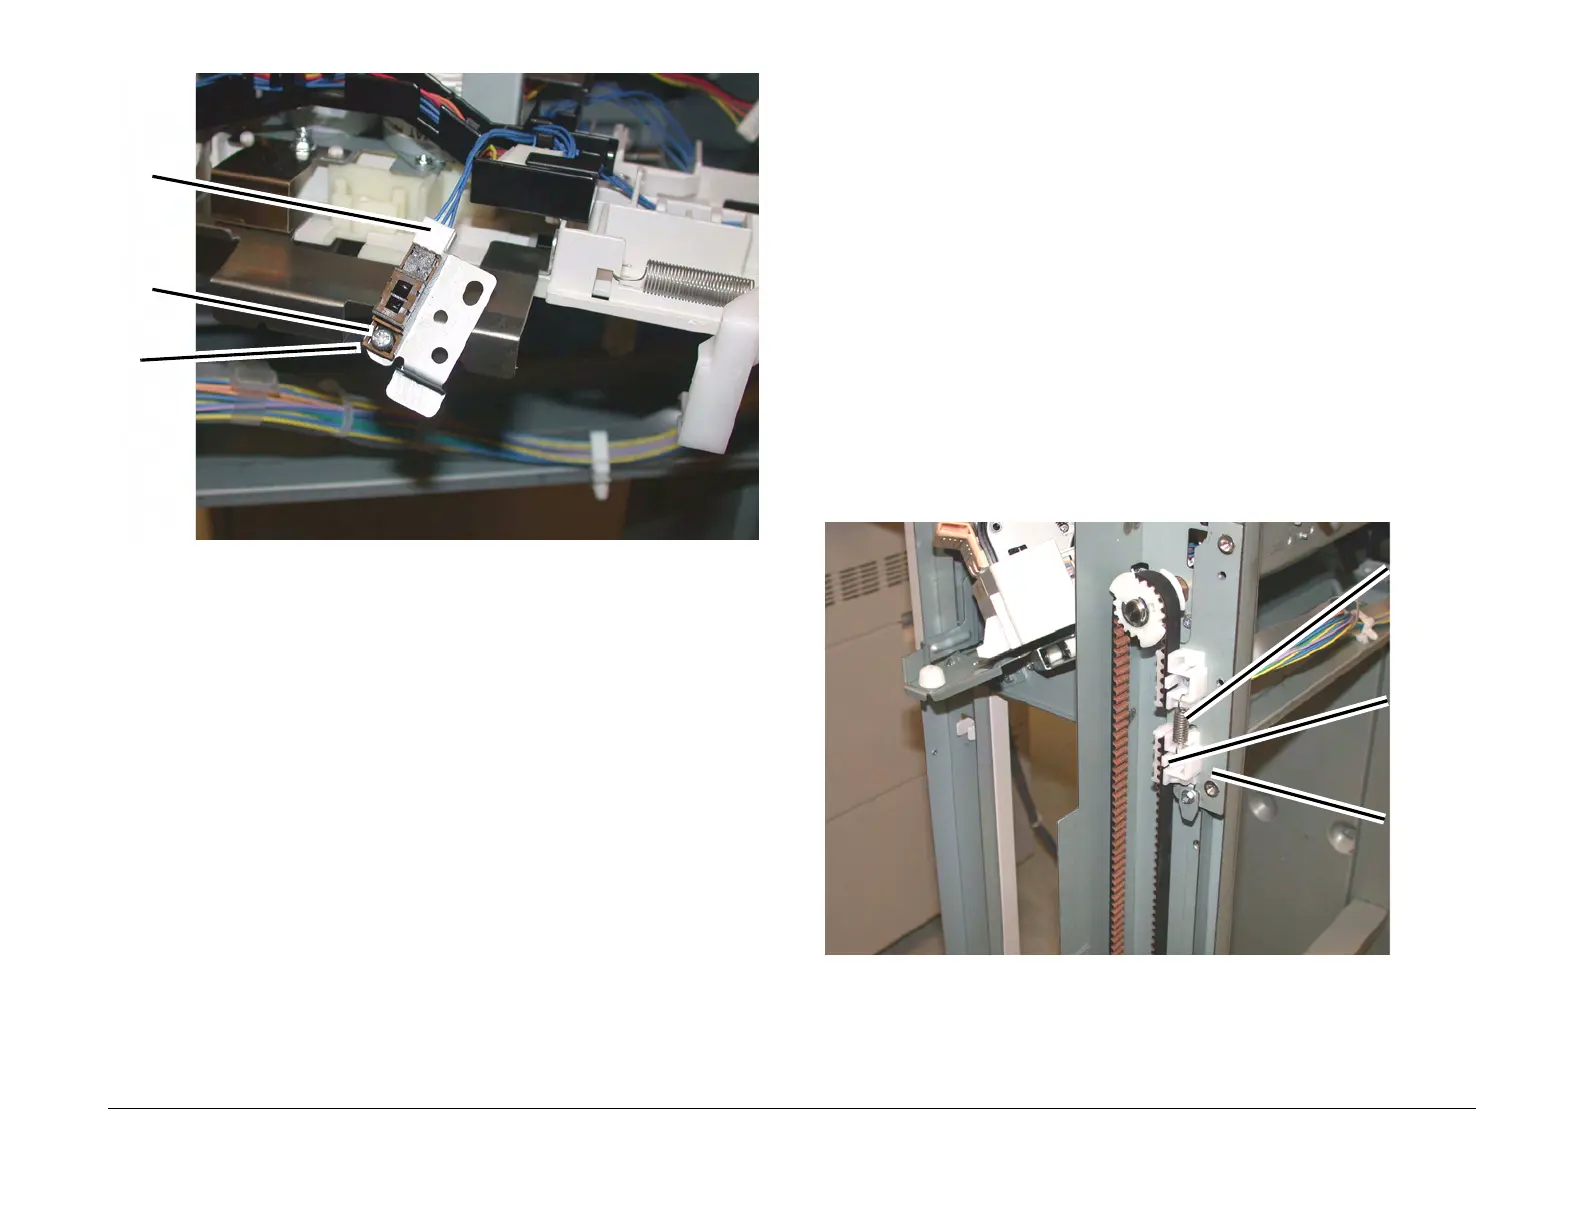
5. Removing the Carriage Assembly. (Figure 1)
a. Disconnect and remove the Spring.
NOTE: The Carriage Bearings (2 each Assembly) are not fastened to the shafts. Use care to
catch the Bearings when the Carriage Assembly is removed.
b. With a 6 inch common screwdriver, move the belt Clamp latch aside and remove the
Stacker Belt and Carriage Assembly.
Figure 1 Removing the Carriage Assembly (j0st41717)
iscon-
ect the
onnec-
or
emove
he screw
1)
emove
he Sen-
or
1
Remove
the
Spring
2
Release
latch an
remove
Belt
3
Remove
the Car
riage
Assem-
bly