157
Setup
Genuine Zebra
®
ribbons for this printer include:
• Performance Wax
• Premium Wax/Resin
• Performance Resin for synthetics (6 ips max. speed) and coated paper (4 ips
max. speed)
• Premium Resin for synthetics (4 ips max. speed)
For transfer ribbon rolls and other printing supplies, see
Important • 74 Meter Ribbons - DO NOT USE early model desktop printer ribbon cores!
The older style ribbon cores (and some Non-Zebra ribbons) can be identified by notches
on only one side of the ribbon core. These older cores are too large.
Important • DO NOT USE ribbon cores with damaged notches - rounded, frayed,
smashed, etc. The core notches should be square to lock the core on the spindle or the
core may slip causing ribbon wrinkle, poor end of ribbon sensing or other intermittent
failures.
Loading Zebra Transfer Roll Ribbon
Before following these steps, prepare the ribbon by removing its wrapping and pulling its
adhesive strip free.
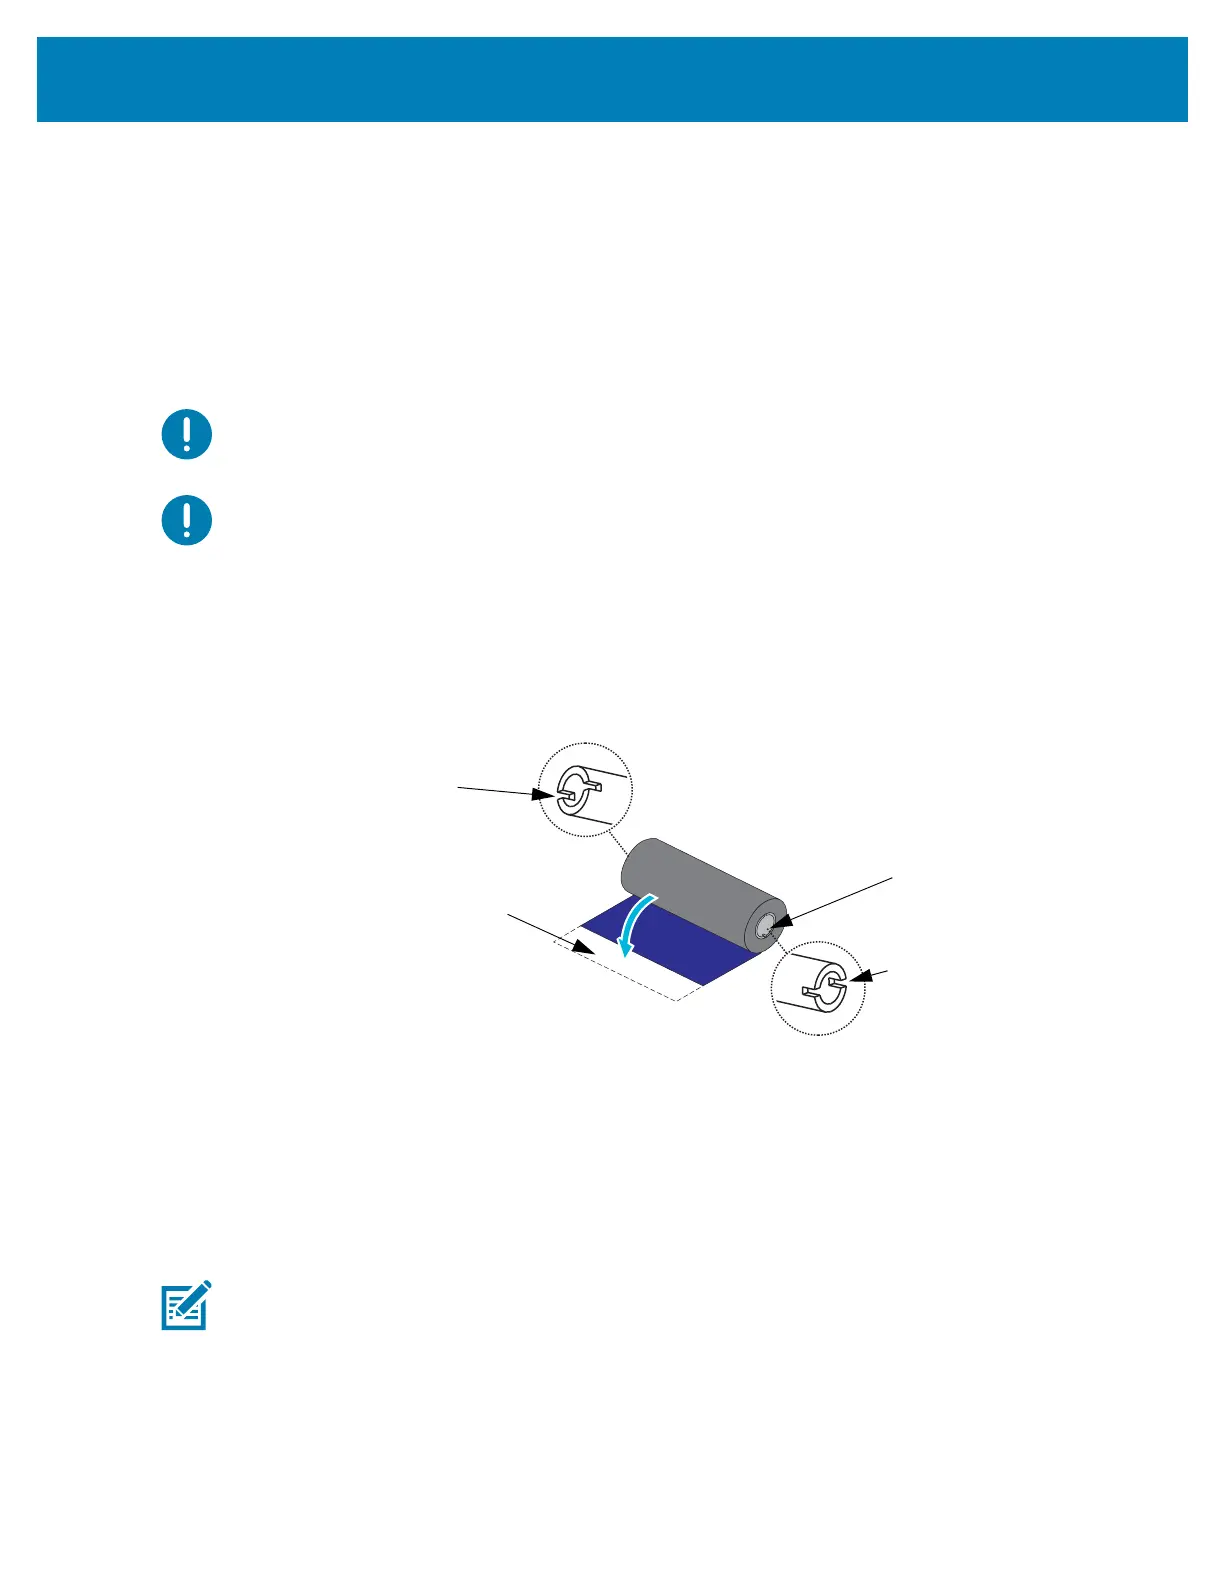
Verify that the ribbon and empty ribbon core have notches on the left side of the ribbon
cores as shown above. If they do not, see Loading Non-Zebra 300 Meter Transfer Ribbon.
3. With the printer open, place an empty ribbon core on printer’s take-up spindles. Push
the right side of the empty core onto the spring loaded spindle (right side). Align the
core with the center of the left side spindle’s hub and rotate the core until the notches
align and lock.
Note • You can find your first ribbon take-up core in the packing box. Subsequently, use
the empty supply core from the supply spindle for the next roll of ribbon.
Notch
(Required on left
side of ribbon)
Adhesive Strip
Right Side
(printer and roll)
Notches are also
on right side of the
74m ribbon