Chapter 13 Changing the Lamp on the High Power Indicator
214 Adept MV Controller User’s Guide, Rev. B
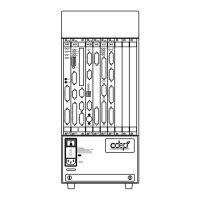
Figure 13-1. CIP Front Panel Screws
5. Carefully pull the front panel away from the body of the CIP. You will
encounter considerable resistance as there are several plug-type connectors
that you need to disconnect as you pull the front panel away from the body of
the CIP. Pull the front panel as straight away as possible.
6. Locate the lamp body on the back side of the front panel. Turn the lamp body
approximately 20° in either direction and then pull straight back.
7. The lamp body is now free. You can remove the old lamp and insert a new one.
8. Replace the lamp body by pushing it straight into the lamp housing receptacle.
Make sure the contacts on the lamp body are properly oriented. See '
(.
250mm/s 100%
STOP
MCP
®
NET
Remove these seven screws
Artisan Technology Group - Quality Instrumentation ... Guaranteed | (888) 88-SOURCE | www.artisantg.com