122
When there are more that 10 guidance swaths in
a tramline, there will be no tramline setup page
allowing you to select the first driven path. The
user will instead need to manually enter the path
number they will be starting on. Keep in mind
that the path numbers start with 0, not 1.
÷
Note!: Tramlines only work with Straight
or Identical curve guidance pattern types.
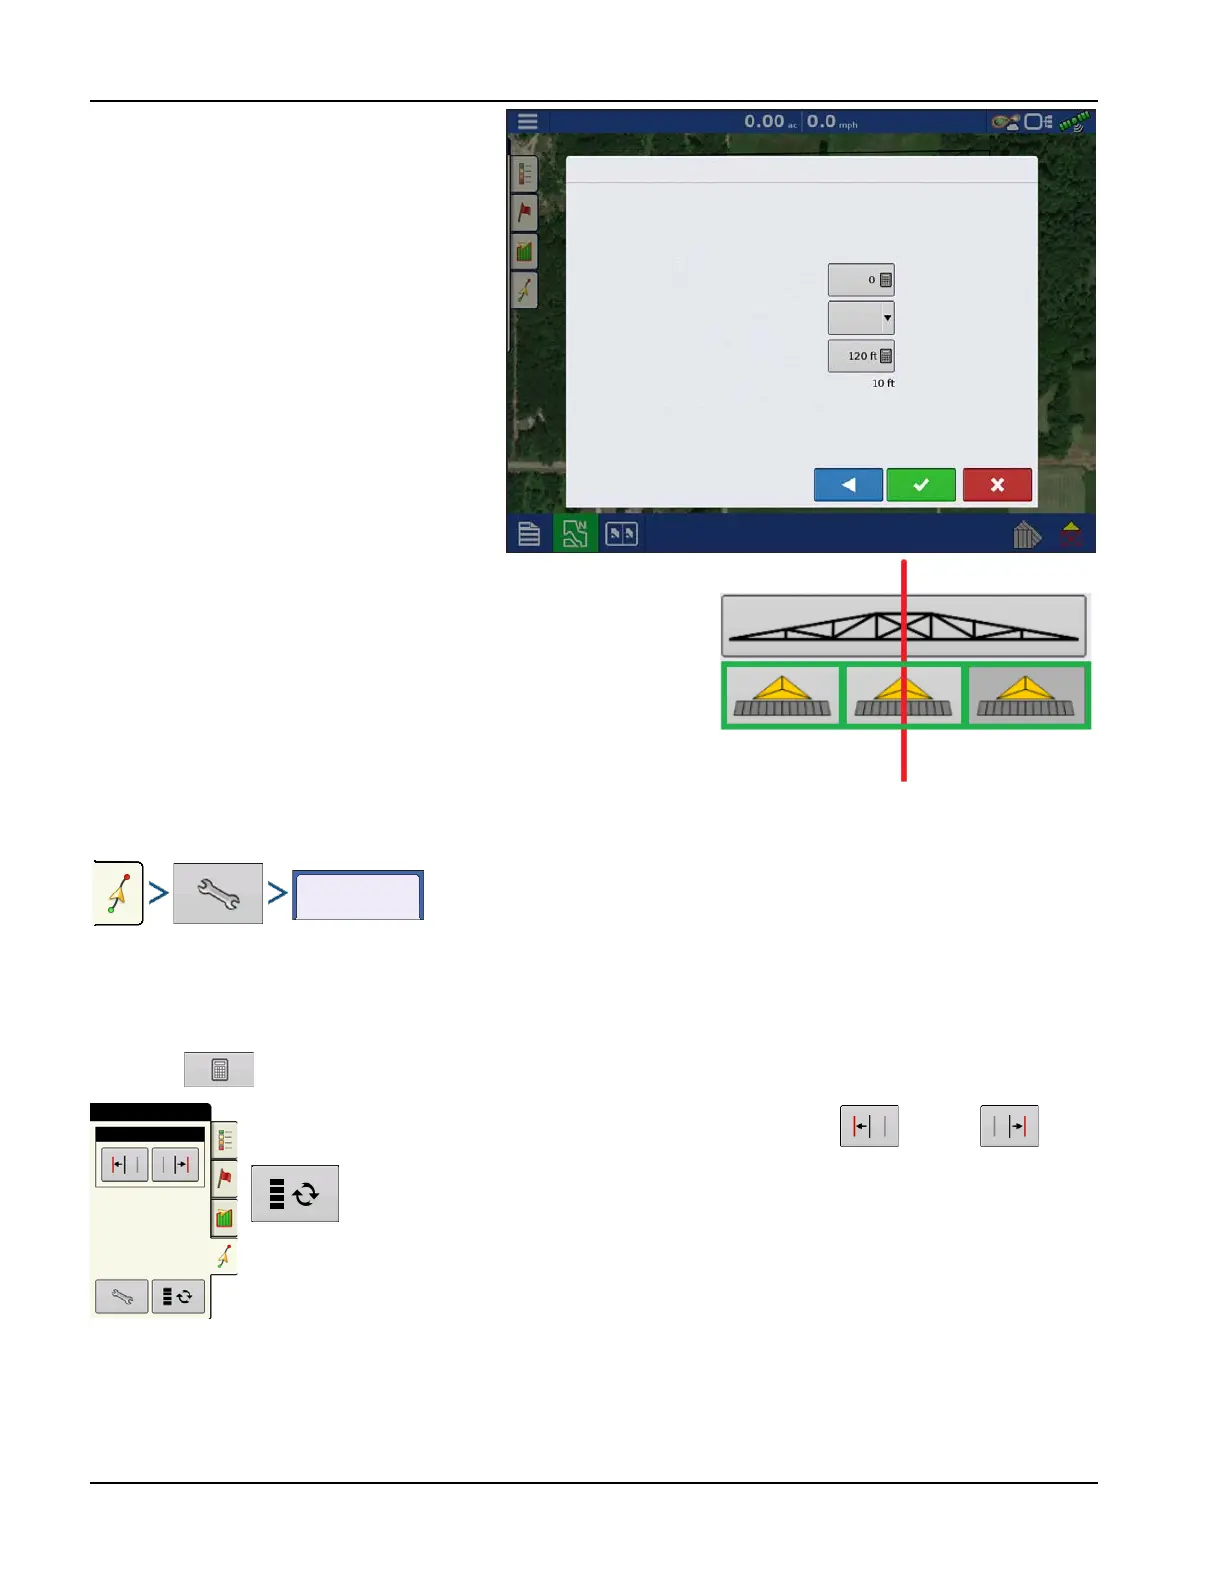
Tramline Starting Location
In the corresponding picture, the sprayer bar represents the Tramline
Swath Width, with the RED line representing the location in which the
tramline guidance pattern will be placed.
Using the GREEN boxed icons; select the current implement location
relative to the closest tramline location. The selected location will show as
a darker shaded depressed icon.
The system will then create tramlines at set intervals in both directions
based on the tramline swath width.
Tramline Adjust
• Guide To
Use the drop-down menu to choose between guidance to Paths or Tramlines.
• Tramline Swath Width
Use to enter the guidance width for the implement that will be using the tramline.
Adjust Tramline - move the placement of the tramline by one pass left or right .
Use the toggle button to switch menu between Tramline and Nudge on the Mapping
toolbox.
An audible warning is sounded to alert the operator a Tramline is reached when the vehicle is ½ a swath
width away.
Tramlines are also numbered under the Pass Number. This number will flash multiple times when the
Tramline is reached for a visual warning.
Guide To:
New Guidance Pattern
Tramline Swath Width:
Guidance Swath Width:
Paths
Paths to Start Field: