Chapter 8
8.6 Menu Calibration
the Monitor 2DOF display is automatically started in the background. Doublecheck to
verify that all markers of the angle are seen by the cameras.
Z
It is recommended to perform a room (re-) calibration on a regular ba-
sis (e.g. after a certain operating time of the tracking system) and
especially if the camera setup was subject to extreme vibrations or
changing environmental conditions e.g. due to high or low tempera-
tures).
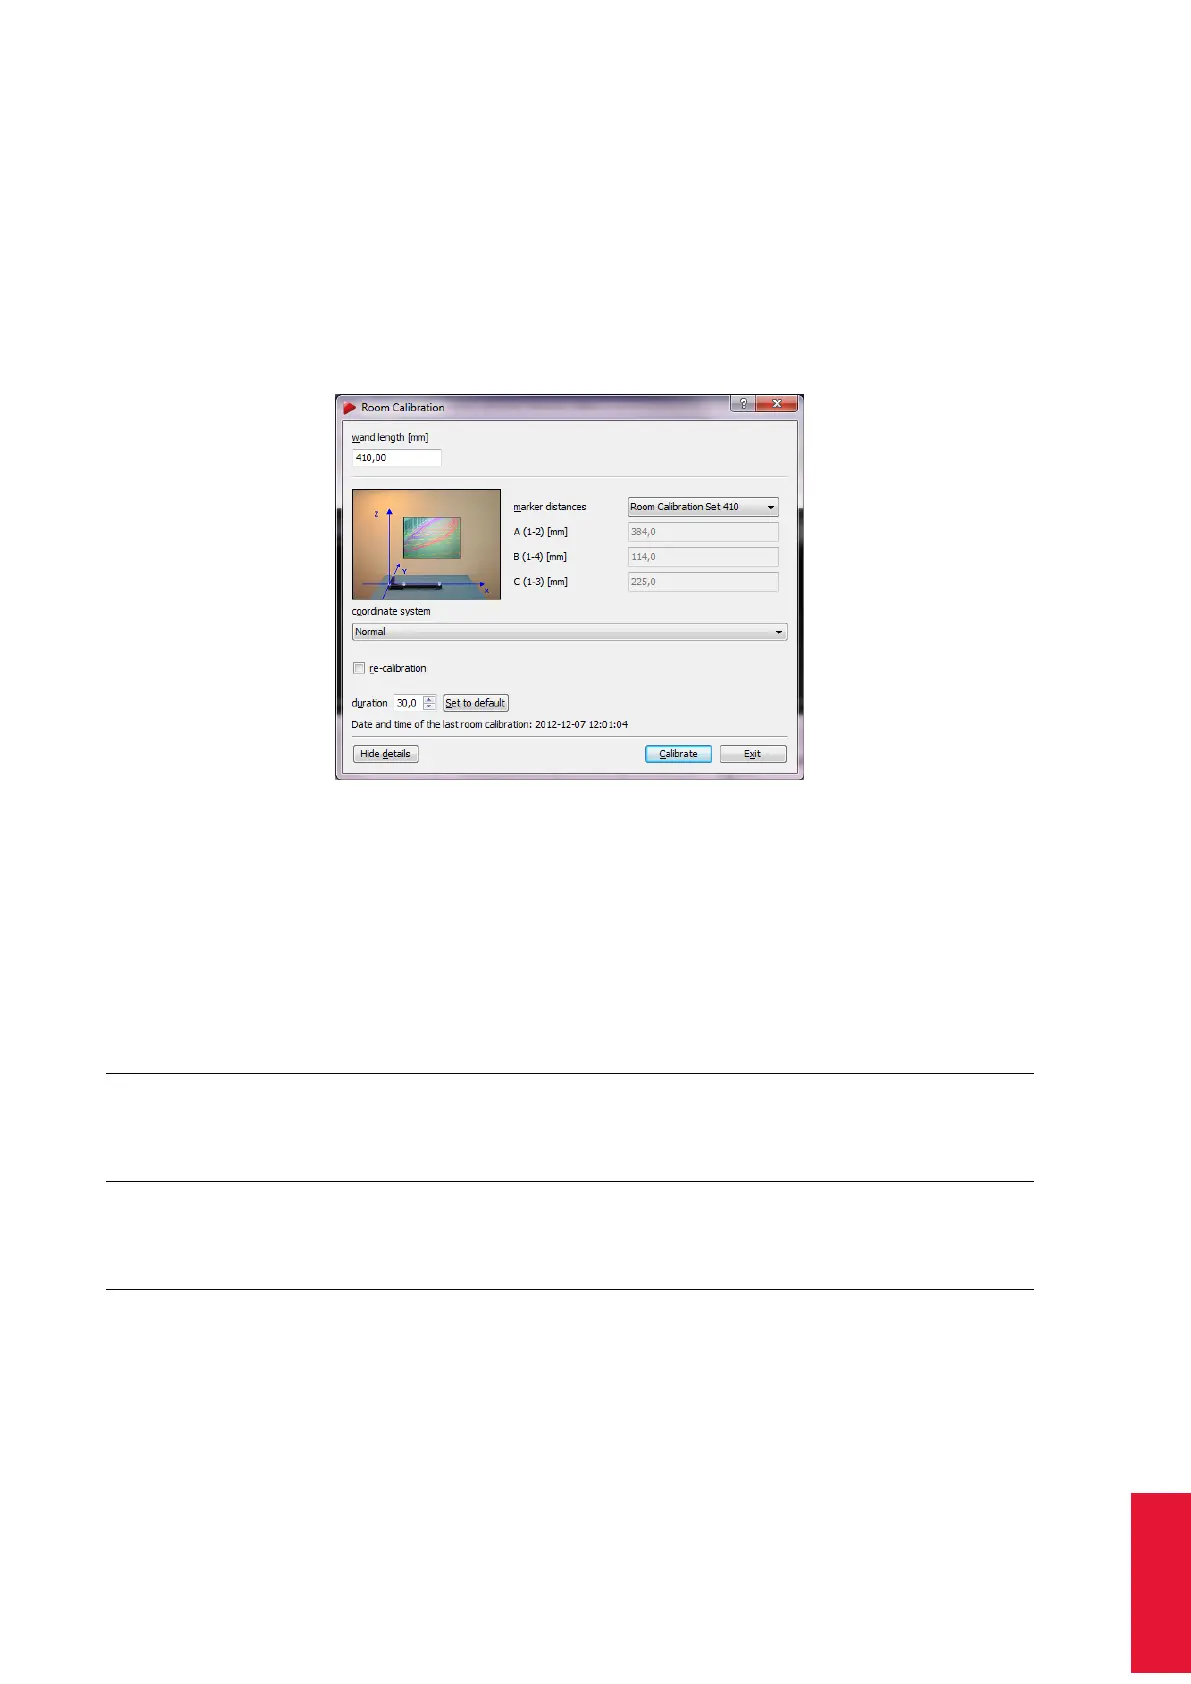
Figure 8.22: Room calibration settings (e.g. RCS 410)
i
The Show details option offers information about the date of the latest
room calibration.
Room Calibration Sets Next select from a series of predefined calibrations sets (i.e. a
pair of angle and wand representing the common ART Room Calibration Sets, see table
8.16 on page 167) using the dropdown-menu marker distances or use the expert mode.
Calibration
Set
wand
length
[mm]
marker
dia.
[mm]
height
[mm]
(see Fig.
8.23)
TRACK
PACK
ART
TRACK 2 &
3
ART
TRACK5
TRACK
PACK/E
RCS TP 410.0 20 58 ×
RCS 410 410.0 20 43 × × ×
RCS 710 710.0 20 43 × × ×
RCS 720 720.0 30 48 × × ×
Table 8.16: Overview of the ART Room Calibration Sets (RCS)
In any case please verify the wand length or enter it manually in the corresponding field
wand length. The wand length is printed on a label on the wand. Start the calibration by
pressing Calibrate. The room calibration is started with five seconds delay.
167