6 Interaction devices
Mark the respective Hand ID from row ’H1...H4’ under selected hands by left-clicking and
start the calibration by pressing the button Calibrate.
You can also load a calibration from a calibration file instead by pressing ’Load’ after
marking the corresponding Hand ID. Please refer to chapter 8.6.5.6 on page 180 for de-
tails.
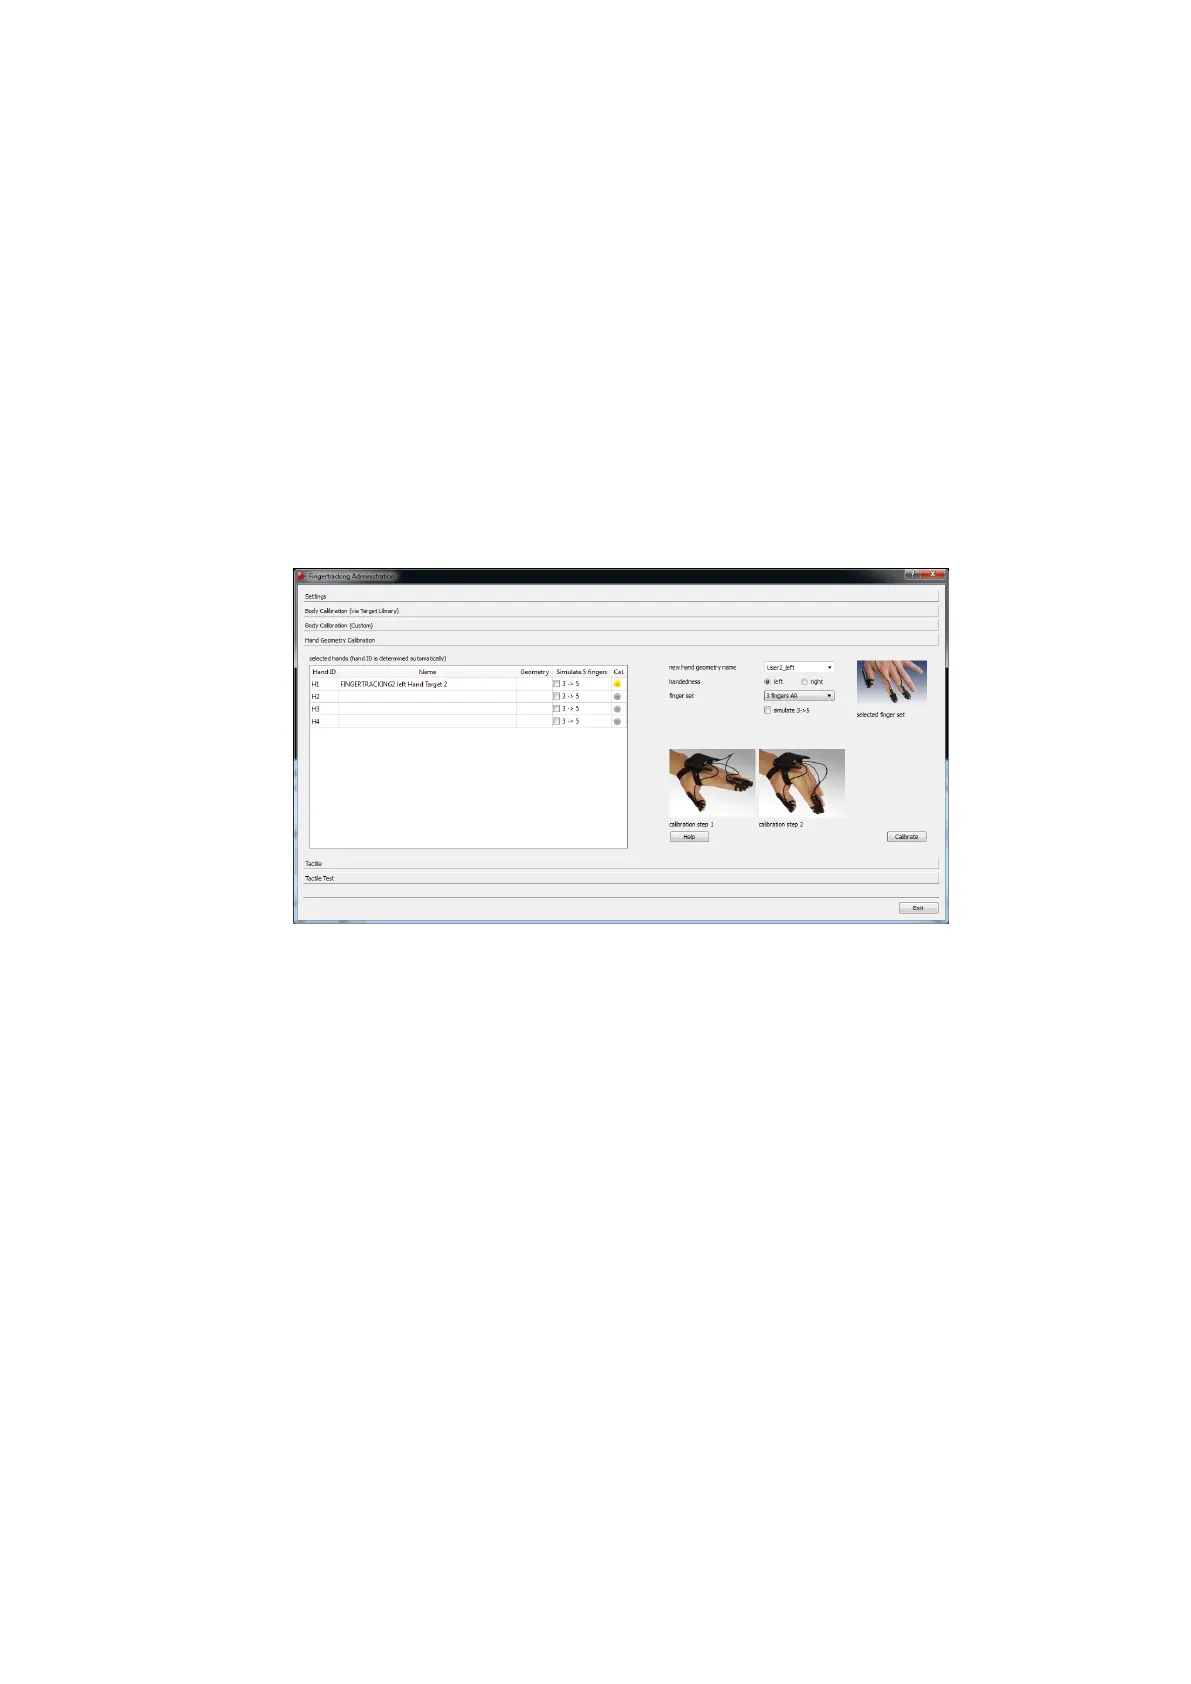
6.4.6.5 Fingertracking Hand geometry calibration
Open the sub-dialogue Fingertracking → Hand Geometry calibration to calibrate the
handedness as well as the position and orientation of the finger tips. The respective
Hand ID is selected automatically during the calibration process.
Figure 6.23: Fingertracking Administration - Hand Geometry Calibration
The hand geometry calibration is performed the following way:
• enter a meaningful name for the geometry (e.g. username-left) in the field new hand
geometry name
• select the handedness by ticking the corresponding radio button for left or right hand
• select the appropriate thimble set from the dropdown-menu fingerset
• (optional) activate the 5 finger simulation (only available for 3-finger thimble sets) by
ticking the checkbox 3 -> 5
• press Calibrate to start the a two-step calibration process
i
In order to identify the correct hand target under available hand ge-
ometries and assign it to the corresponding hand geometry please
use meaningful names for the ’geometry’ and double-check the col-
umn ’Available for hand ID’.
96