5 ART Tracking Controllers
Connection of ARTTRACK1 , ARTTRACK2 or ARTTRACK3 cameras (backwards
compatible systems) All sync signals are transferred via BNC connections. When con-
necting the synchronization cables it is important to correctly chain the cameras on the
sync cable (see chapter 9.4 on page 195). There must be one continuous signal line ter-
minated on both ends with 75Ω resistors, with the cameras and the synccard inserted by
tee connectors. Do not extend the connection between the tee-connector and the camera
nor branch the signal line (star wiring).
Typically all cameras are connected to the syncgroup #1 (’OUT1’) of the synccard. If the
cameras have to be grouped into different syncgroups, in order to avoid blinding, two or
three BNC chains are used with syncgroups #1 and #2 or #1, #2 and #3 of the ART Sync-
card3 (compatibility ports) respectively.
Z
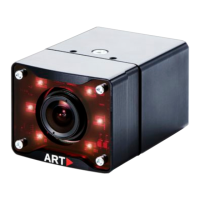
ARTTRACK2 and ARTTRACK3 cameras have to be connected via any
external ethernet switch or via the ART PoE+ switch for larger sys-
tems. They shall not be connected directly to the PoE+ ports of the
ART Synccard3. Please refer to chapter 5.2 on page 60 for more de-
tailed information.
5.1.3 Dynamically adding / removing of cameras
You can (dis-)connect additional cameras to the ART Controller without the need of
restarting the controller. Please refer to chapter 8.4.4 on page 145 for details.
Z
DTrack2 is able to operate when cameras have been added or removed;
for best performance it is highly recommended to perform a recalibra-
tion
5.1.4 Connection to local network LAN
The controller uses the ’LAN network port’ (1000 Base-TX) for data output to the remote
PC or to any PC within the local network. Figure 5.4 on page 59 shows two possibilities of
connecting the controller to a local network. You may either use the controller as a DHCP
client within your network (figure 5.4(a)), i.e. the tracking data is transmitted directly via
your local network. Or in case of security restrictions (e.g. company guidelines, that do
not allow to connect the controller to your network), you may install two network cards in
your remote PC - one is connected to the controller and the other one is connected to
your local network (figure 5.4(b)). In this case, the DTrack2 Frontend will act as a router
for the tracking data.
By default the controller is set up to support DHCP. Therefore, it will acquire an IP address
automatically given that a DHCP server is running.
Double-check that the cameras are connected properly to the controller (in case of ART-
TRACK1 , ARTTRACK2 or ARTTRACK3 verify that they are powered up), connect the
’LAN network port’ to your local network and connect the power plug of the ART Controller
to a power socket. Flip the power switch to ’I’ on the front of the controller. Finally, start
58