6. Click on the backup to be restored (2). Additional information is displayed in the table.
7.
Select the
Next
button (3).
The following window will be displayed.
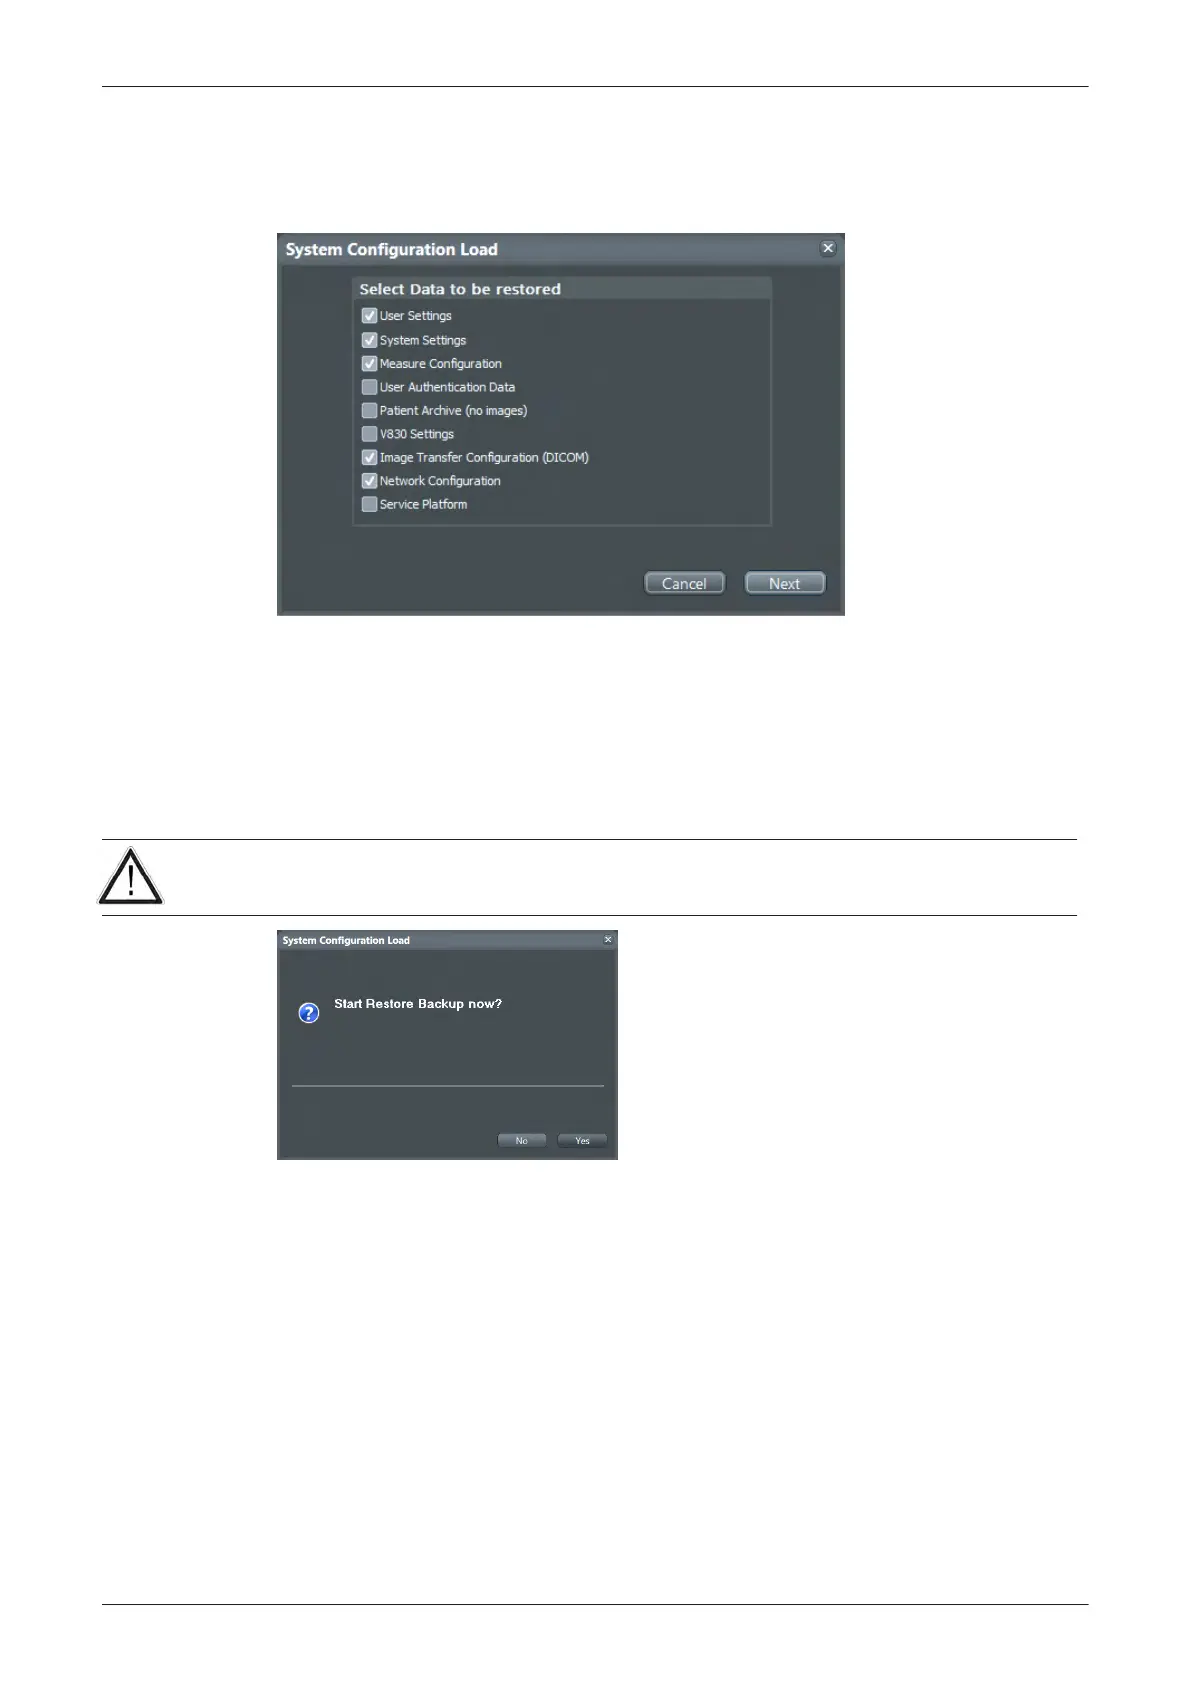
Figure 4-17 Select data to be restored
8. Select the data to be restored to the Voluson E-Series system.
Note
For description of the check box names see Section 4.4.3 on page 4-15 .
Note
When User Authentication Data is checked, a dialog asking for the system administration password appears.
Enter the correct password and click OK. Select Cancel to close the dialog. (The User Authentication Data
check box becomes unchecked.)
9. Click the
Next
button and then select
Yes
to start, or
No
to cancel the restore procedure.
Caution
When clicking
Yes
, the current data on the system will be permanently replaced by the data of the backup
and can not be restored!
Figure 4-18 Start Restore Backup now?
After restoring the data, the Voluson E-Series reboots and the application starts again.
Functional Checks
4-18
Voluson E-Series Service Manual
5539550APB Revision 6