3.3 Preparing for Setup
3.3.1 Verify Customer Order
1.
After unpacking, it is important to verify that all items ordered by the customer have been received.
Compare all items listed on the packing slip (delivery note) with those received.
Note
It is recommended to keep and store the shipping cardboard and all other packing materials (including the
support foams, anti-static plastic cover, etc.), in case the system has to be moved to a different location.
Unpack the system such a way that packaging can be reused. For warranty purposes, storage of the above
is required for one year from date of purchase.
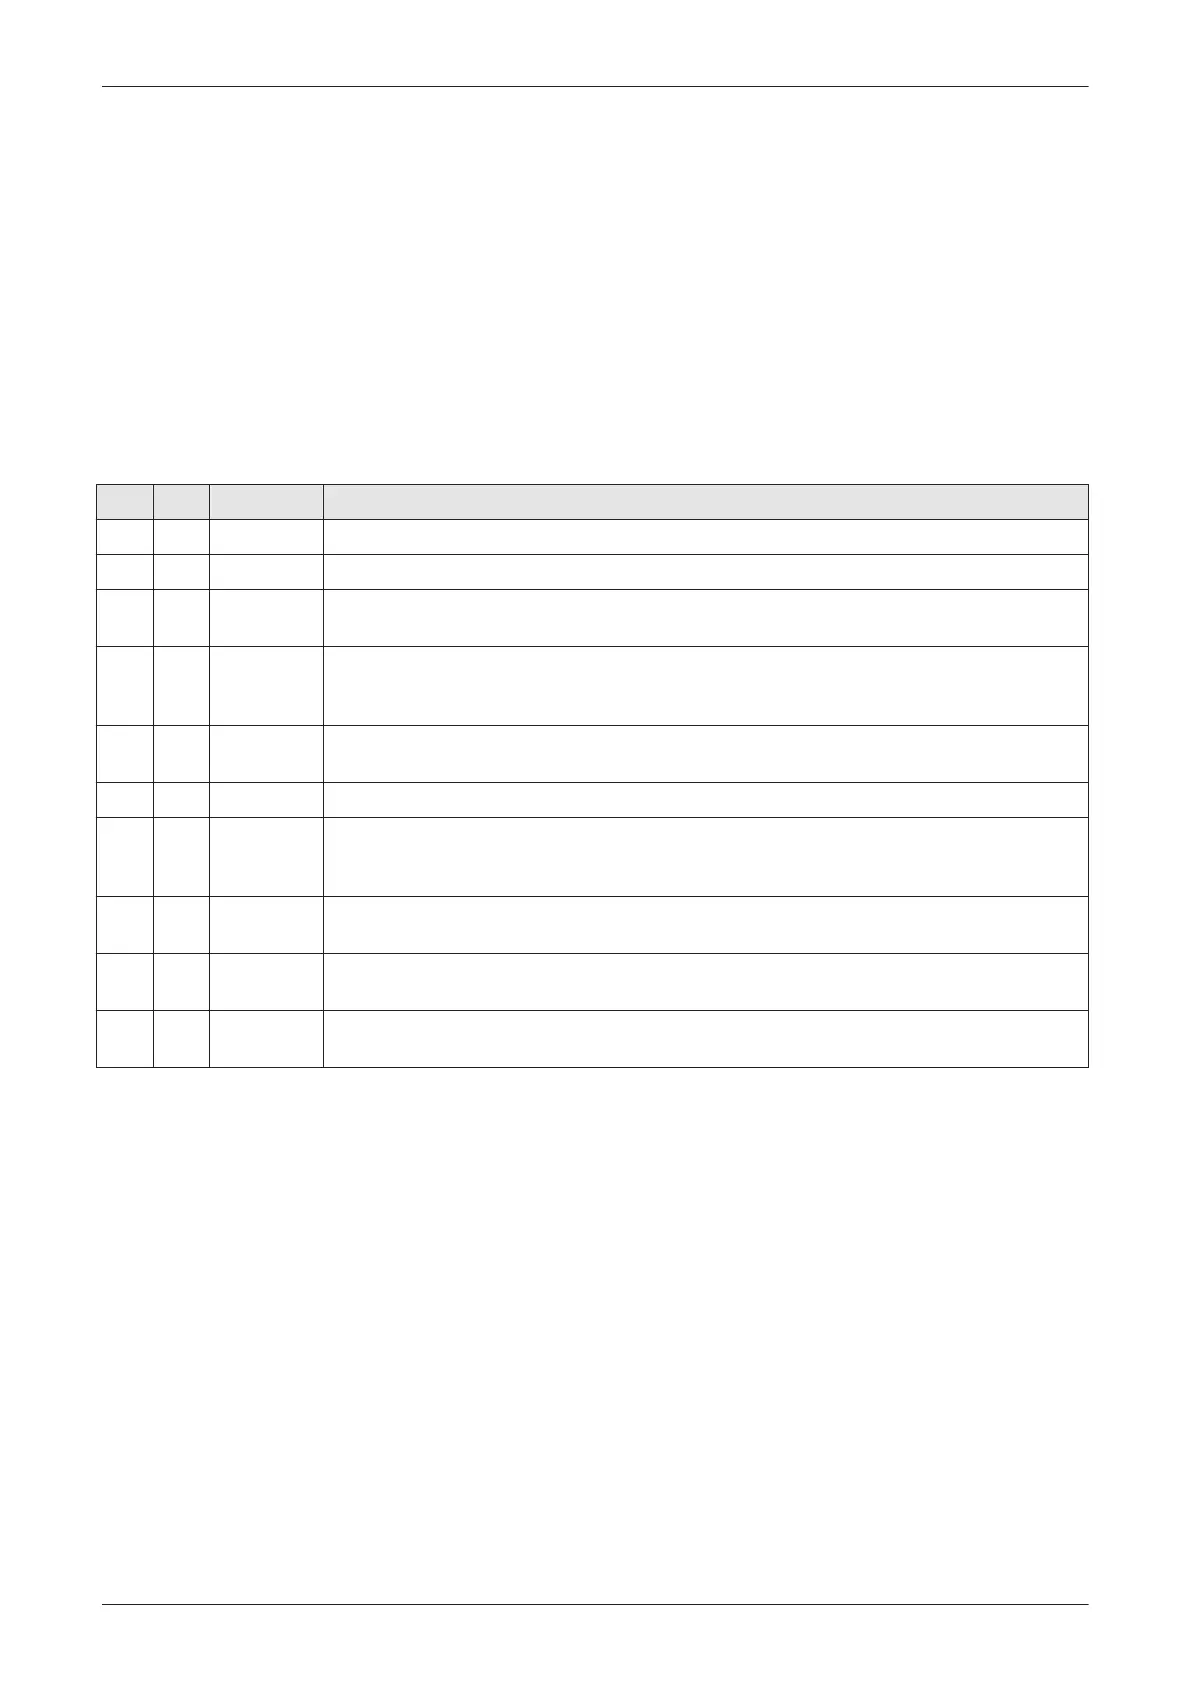
2. Visually inspect the system components using the following checklist.
Table 3-5 Damage Inspection Checklist - Voluson E-Series system
✓ Step Item Recommended Procedure
1 Rating Plate Enter Serial Number: _________________________ (printed on rating plate, see:
Figure 1-1 on page 1-23
)
2 System Verify that the Voluson E-Series system is switched OFF and unplugged. Clean the system.
3 Control
Console
Physically inspect the control console for missing or damaged items. After switching on the system, verify
the proper illumination of all the control console buttons.
4 Probes Check all probes for wear and tear on the lens, cable, and connector. Look for bent or damaged pins on
the connector and in the connector socket on the system. Verify that the EMI fingers around the probe
connector socket housing are intact. Check the probe locking mechanism and probe switch.
5 LCD Display Clean the LCD display by gently wiping with a dry, soft, lint-free non-abrasive folded cloth. Inspect the
monitor for scratches and raster burn.
6 Fans Verify that the system's cooling fans and peripheral fans are operating.
7 Rear Panel Check the rear panel connectors for bent pins, loose connections and loose or missing hardware. Screw
all the cable connectors tightly to the connector sockets on the panel. Verify that the labeling is in good
condition.
8 Covers Check that all screws are tightly secured in place, that there are no dents or scratches and that no internal
parts are exposed.
9 Peripherals Check and clean the peripherals in accordance with the manufacturer's directions. To prevent EMI or
system overheating, dress the peripheral cables inside the peripheral cover.
10 Power Cord Check the power cord for cuts, loose hardware, tire marks, exposed insulation, or any deterioration. Verify
continuity. Replace the power cord, as required.
Note
Report any items that are missing, back-ordered, or damaged, to your GE Healthcare Austria GmbH & Co
OG sales representative. The contact address is shown in "Contact Information" on page 1-26 .
Setup Instructions
Voluson E-Series Service Manual
5539550APB Revision 6
3-7