4-27
Using the ProCurve Web Browser Interface
Tasks for Your First ProCurve Web Browser Interface Session
.
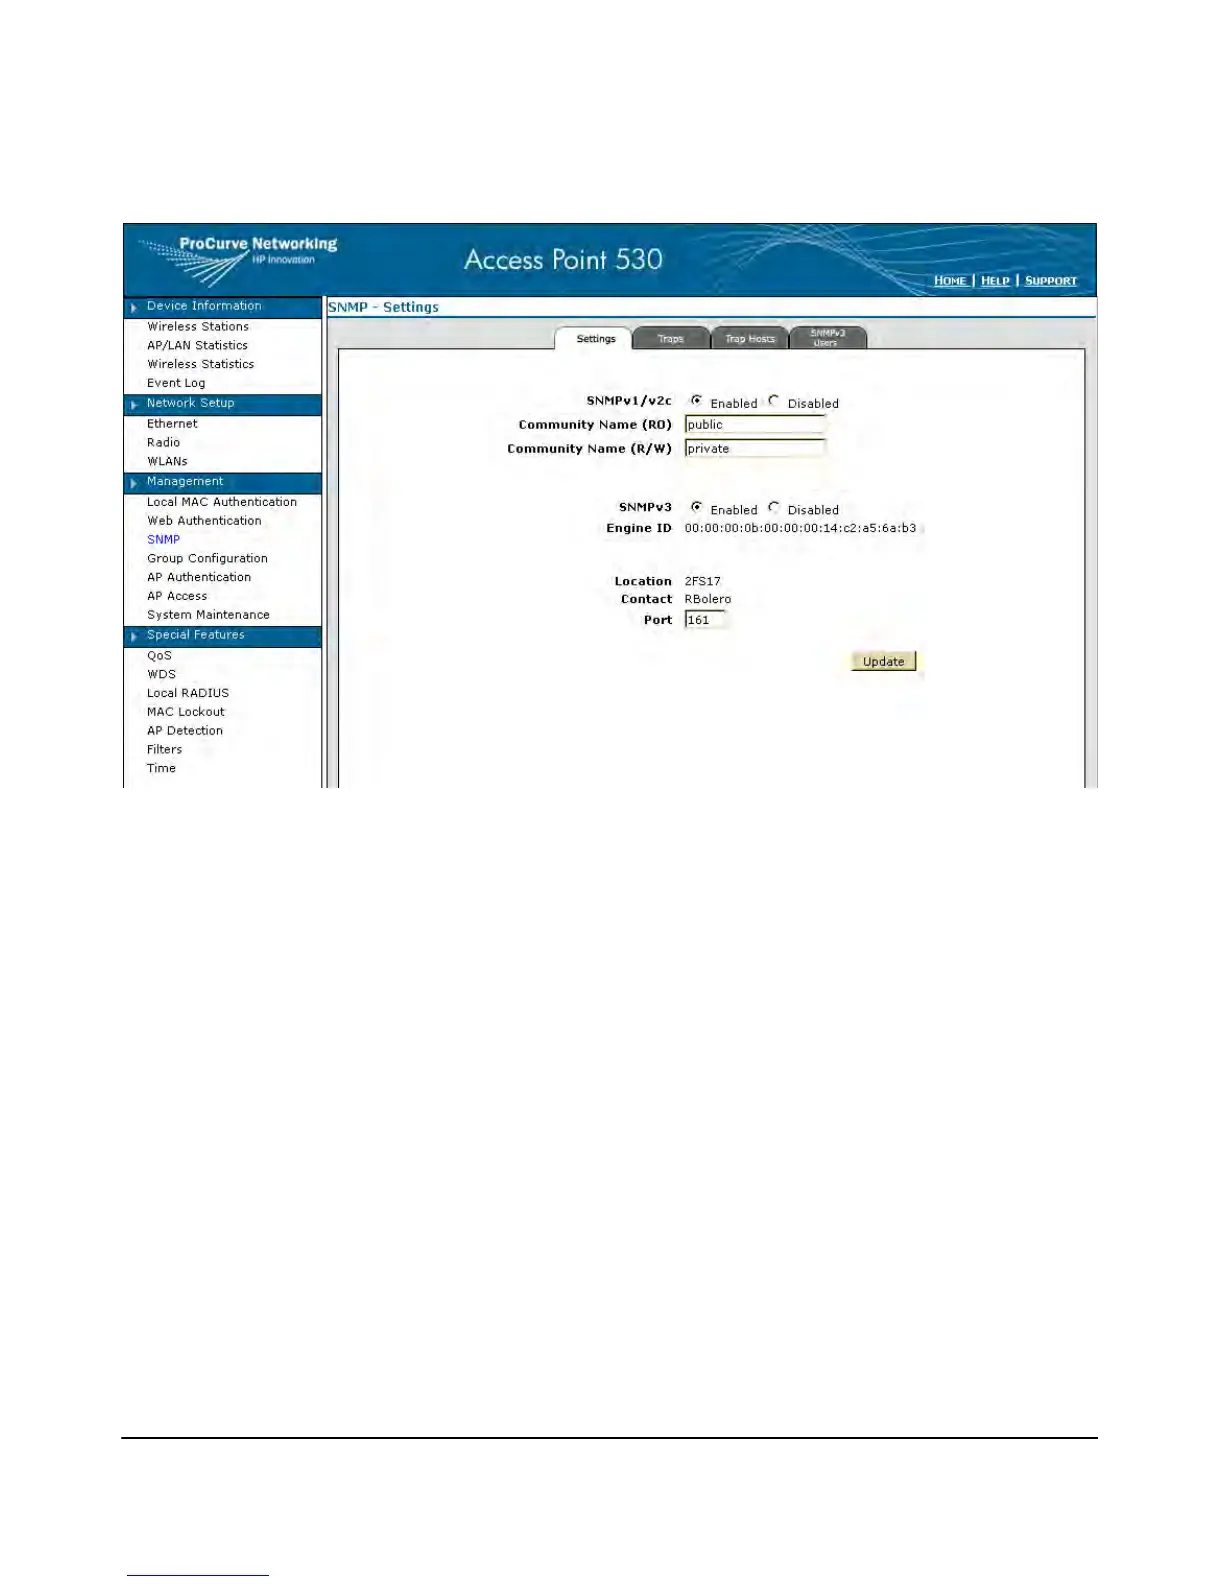
Figure 4-15. Setting SNMP Community Names
To Change A Default SNMP Community Name:
1. Click Management > SNMP and select the Settings tab.
2. To activate the SNMP feature on the access point, click SNMPv1/v2c Enabled.
3. To establish a public read-only SNMP community, type a name text string
to replace the default community name (public) in the Community Name
(RO) field.
4. To establish a private read-write SNMP community, type a name text string
to replace the default community name (private) in the Community Name
(R/W) field.
5. To activate SNMPv3 functions on the access point, click SNMPv3 Enabled.
6. Click [Update] to activate the new SNMP community name.

 Loading...