990400 Rev C 2010 May 1
C-5
Quick Reference Guide
Ceph Screen
1. Right click blank screen and select Tag Airways. This generates a 3D view of the
airways for the patient in the blank view. In addition, the tagged airway data is
displayed in the view at the bottom center of the Ceph screen.
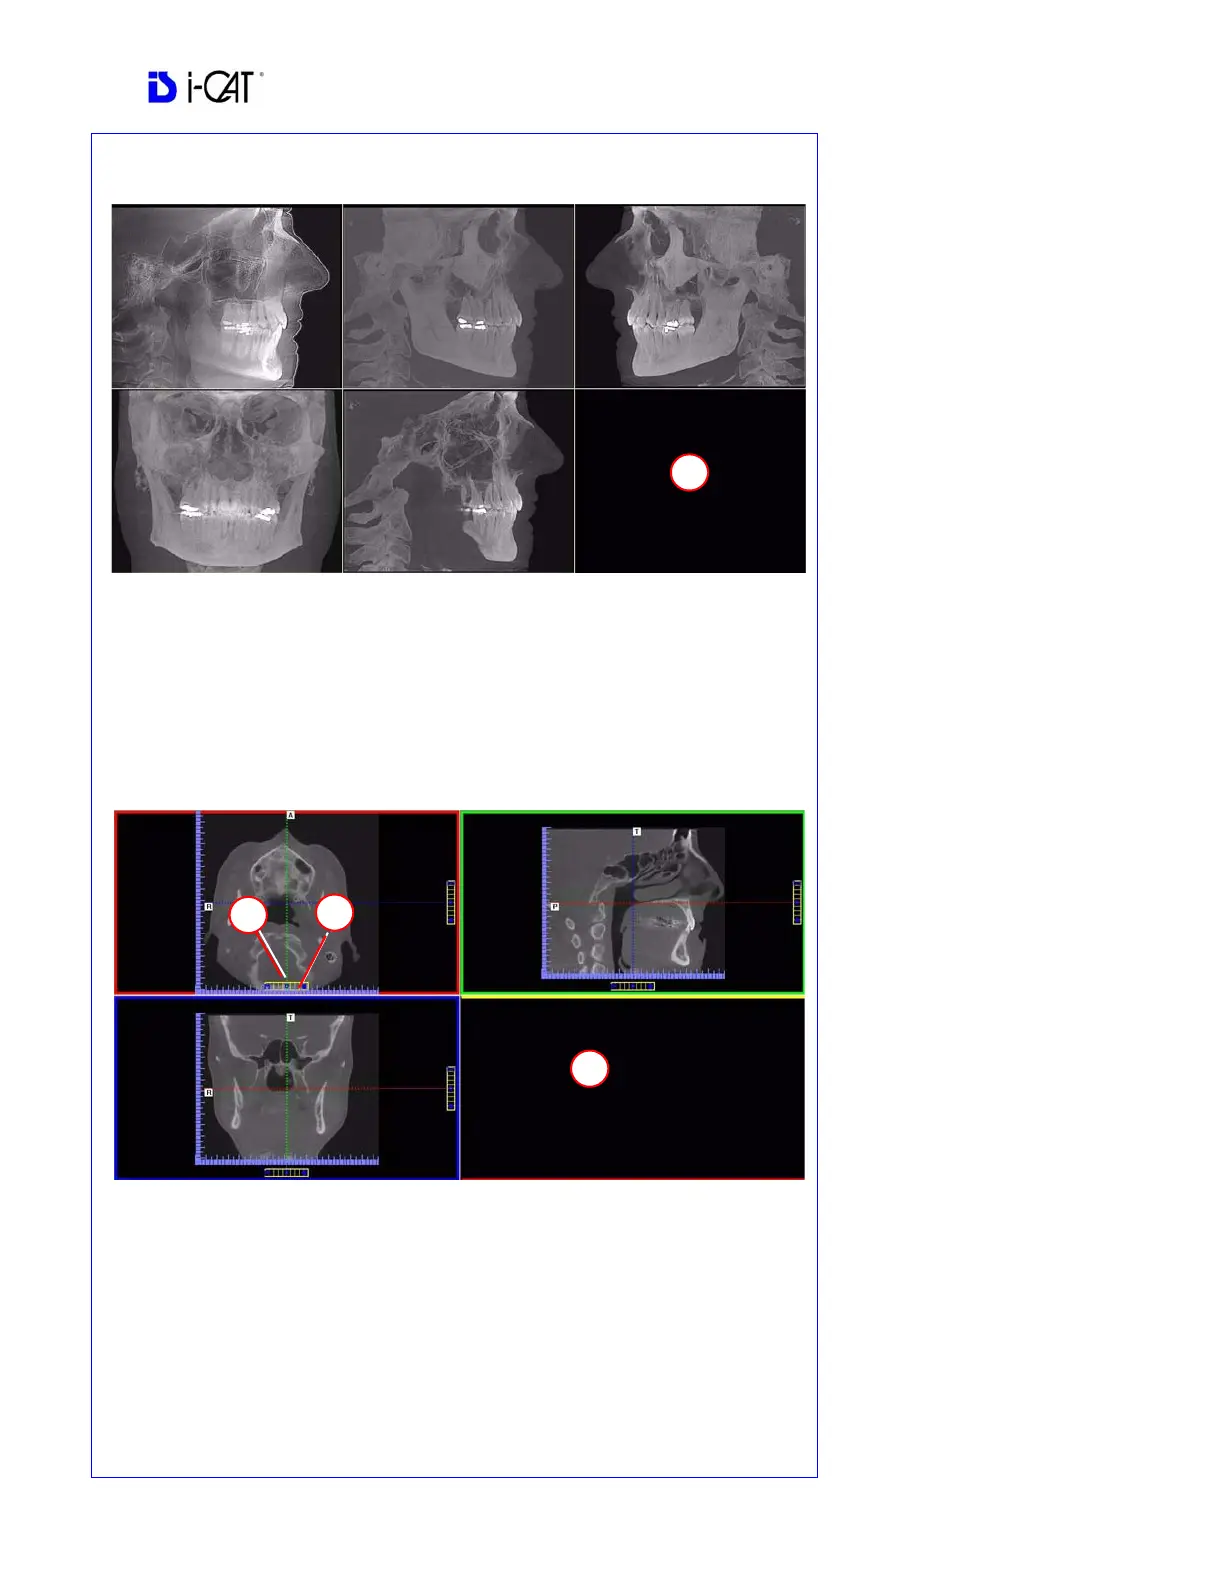
MPR Screen
1. Drag center tools from any view to move slice location. The views are colored coded
to correlate which view will adjust.
2. Drag tool to the right for horizontal and bottom for vertical bars to adjust slice
thickness of the corresponding color coded view.
3. Right click any of the 3 views and select Irregular, Line, or Explore for additional
cut planes to be displayed in the blank area.
REMINDER
Ceph Screen is acquired by double
clicking Sagittal View from Preview
window or selecting it from the
Screen menu.
DISPLAYED VIEWS
The Ceph Screen displays the
Lateral Cephs in Radiographic and
MIP mode as well as a Coronal
View and a Mid Sagittal Slice
(15mm thick).
CURSOR TOOLS
All views have Brightness/Contrast,
Zoom and Pan.
POP UP MENUS
Right click to display the Pop Up
menu to select:
• Set Filters
• Save as JPEG
• Open Output Folder
REMINDER
MPR Screen is acquired by double
clicking Coronal View from
Preview window or selecting it from
the Screen menu.
DISPLAYED VIEWS
The MPR Screen allows scrolling
through the Axial, Sagittal, and
Coronal Slices. Mouse scroll wheel
is active to scroll through slices.
CURSOR TOOLS
All views have Brightness/Contrast,
Zoom and Pan.
POP UP MENUS
Right click to display the Pop Up
menu to select:
• Irregular
• Line
• HU Statistics
• Distance
• Explore
• Explore Speed
• Set Filters
• Save as JPEG
• Open Output Folder
• Reset Volume Rotation