17-19 Operators’ Manual
990400 Rev C 2010 May 1
16-4
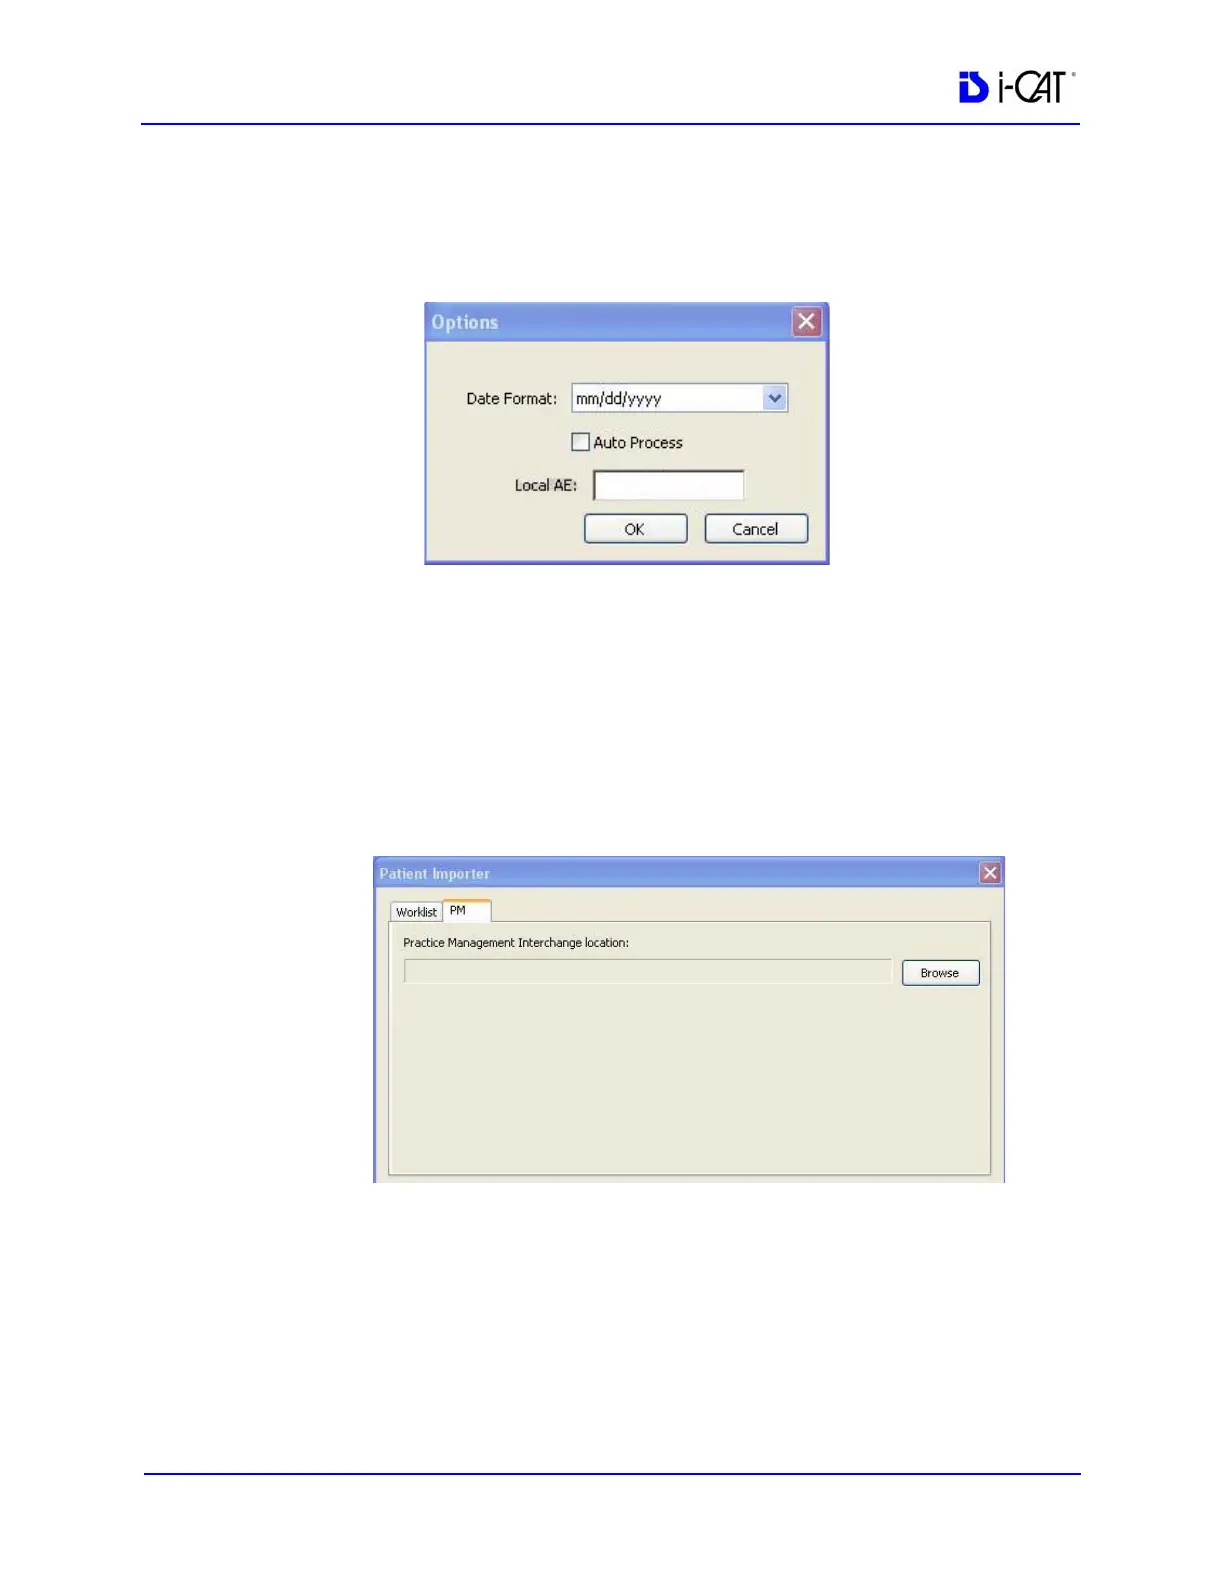
NOTE: The Options button on the Patient Importer window enables
setting of the date format and the AE title for the local Acquisition
computer, and enables auto process. These settings are optional and
do not have to be changed.
Set Up Practice Management Interface
1. Start VisionQ.
2. From the VisionQ Main menu, select File > New Patient.
3. Click Import. The Patient Importer screen is displayed.
4. Click the PM tab.
5. Click Browse and browse to the PM Interchange location. This
is the location where an XML file, generated by the PM server,
is saved.
6. Click Cancel on Patient Importer to close window.