990400 Rev C 2010 May 1
C-6
17-19 Operators’ Manual
REMINDER
TMJ Planning Screen is acquired by
double clicking Axial View from
Preview window or selecting it from
the Screen menu.
DISPLAYED VIEWS
TMJ Screen enables condyle
mapping and creating
corresponding coronal slice views.
CURSOR TOOLS
All views have Brightness/Contrast,
Zoom and Pan.
POP UP MENUS
Right click to display the Pop Up
menu to select:
• Set Filters
• Save as JPEG
• Open Output Folder
HINT
It may be necessary to first drag the
Axial (SMV) view down in the
window to see the condyles. Move
the cursor to the lower left of the
SMV (axial) view until displayed is
the “P” for pan tool to drag the
image downward.
NOTE:
Make sure to Save Workups before
attempting to burn to a CD,
Install Case
Studies from CDs
The program will auto-run when the
CD is inserted into the computer
drive. The User can choose to install
the program and the case(s)
Permanently or Temporarily. Once
installed, the program opens and the
new case is highlighted in the study
list and ready to be loaded. Just click
the patient name.
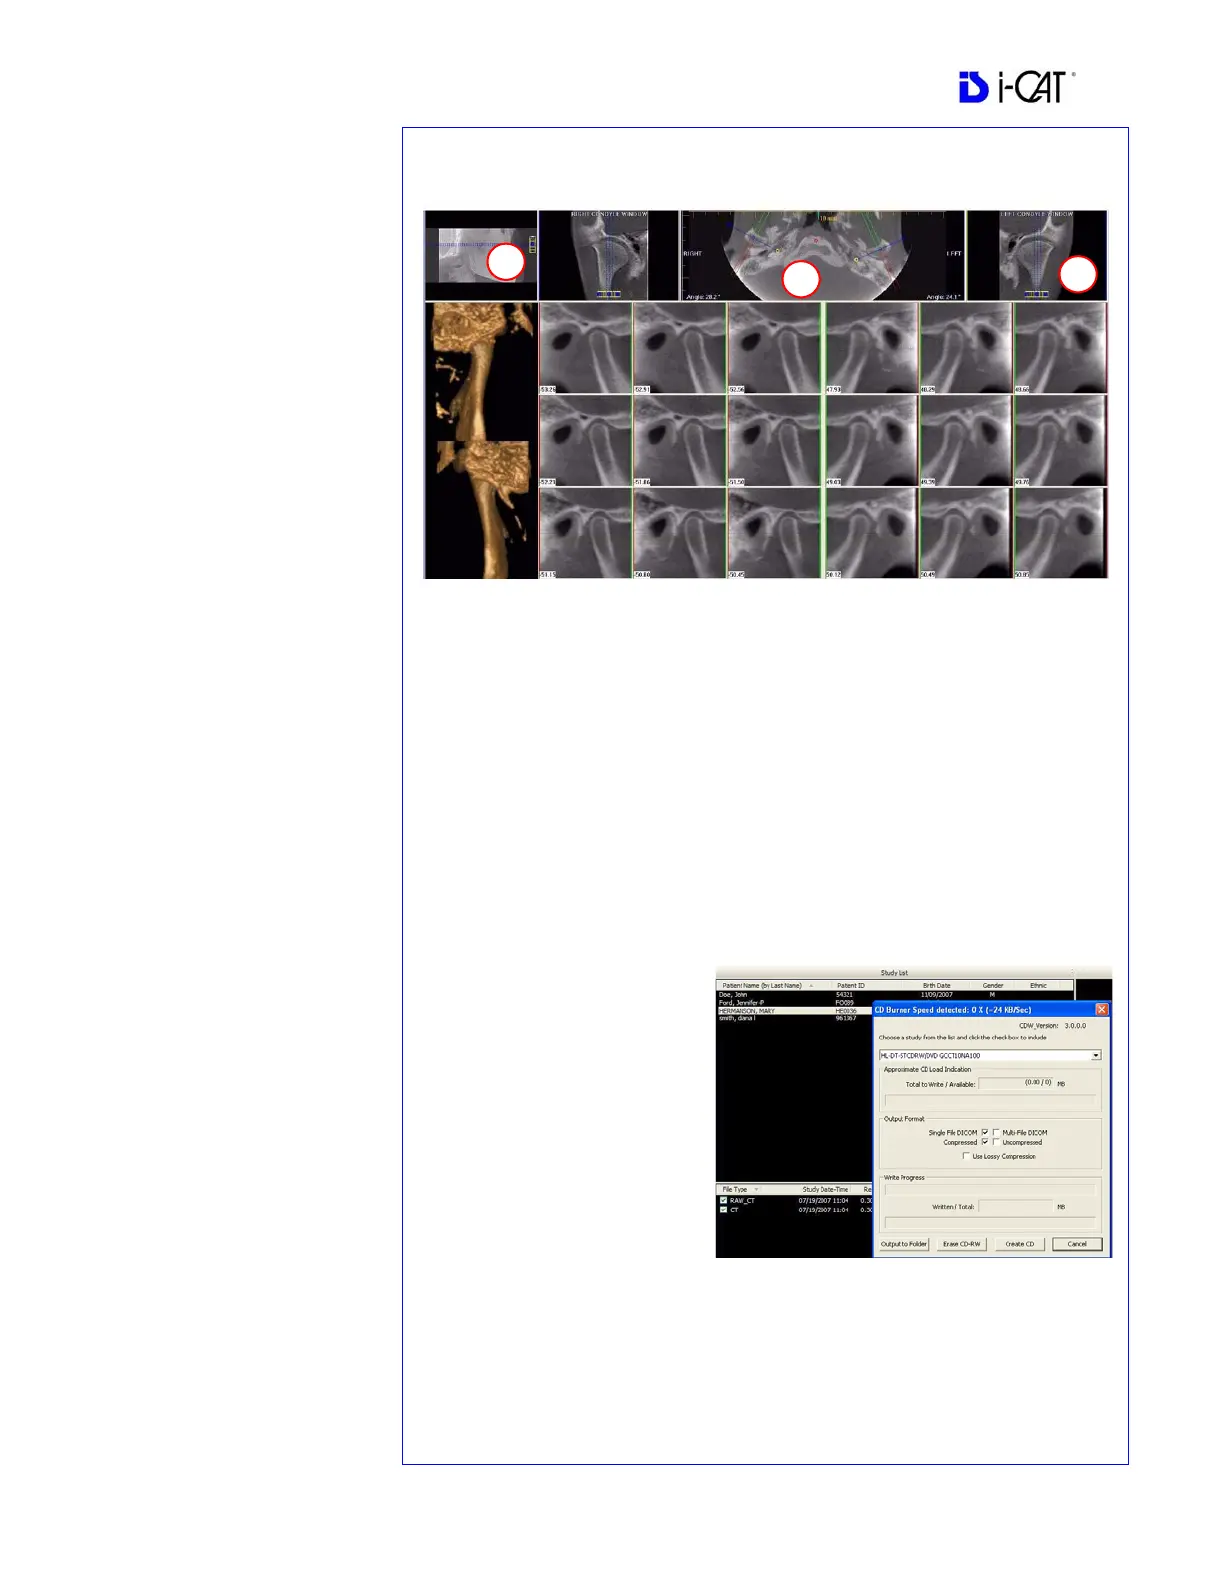
TMJ Planning Screen
1. Drag center tool to scroll up and down Sagittal view to locate condyles in the Axial
view to display condyles properly for mapping.
2. Create Lateral Slices:
Drag center blue circles to move condyle map (do this for each condyle)
Drag yellow and blue end circles to adjust the angle of each condylar map.
Green markings indicate anterior to condyle.
Red marking indicate posterior of condyle.
Create Coronal Slices: Click red circle on either end map to create Coronal views.
3. Horizontal Tool Bar: Drag center tool left to right to move slice location of Cross
Section views. Drag tool right to change slice thickness of Cross Section views
Create Export CDs
1. From the top Main menu,
select Tools > Create Export
CD.
2. If you have multiple CD
drives, select the hardware
from the drop down list. If
using a CD-RW and need to
erase data, choose Erase CD-
RW.
3. Click the patient for burning to
CD. If selecting multiple
patients, hold down the CTRL
key and click on additional patients. All highlighted patients are copied to the CD.
4. Click Create CD in CD burner window. A message is displayed when the burn
is complete and the CD ejects.