990400 Rev C 2010 May 1
Managing Patient Data
5-7
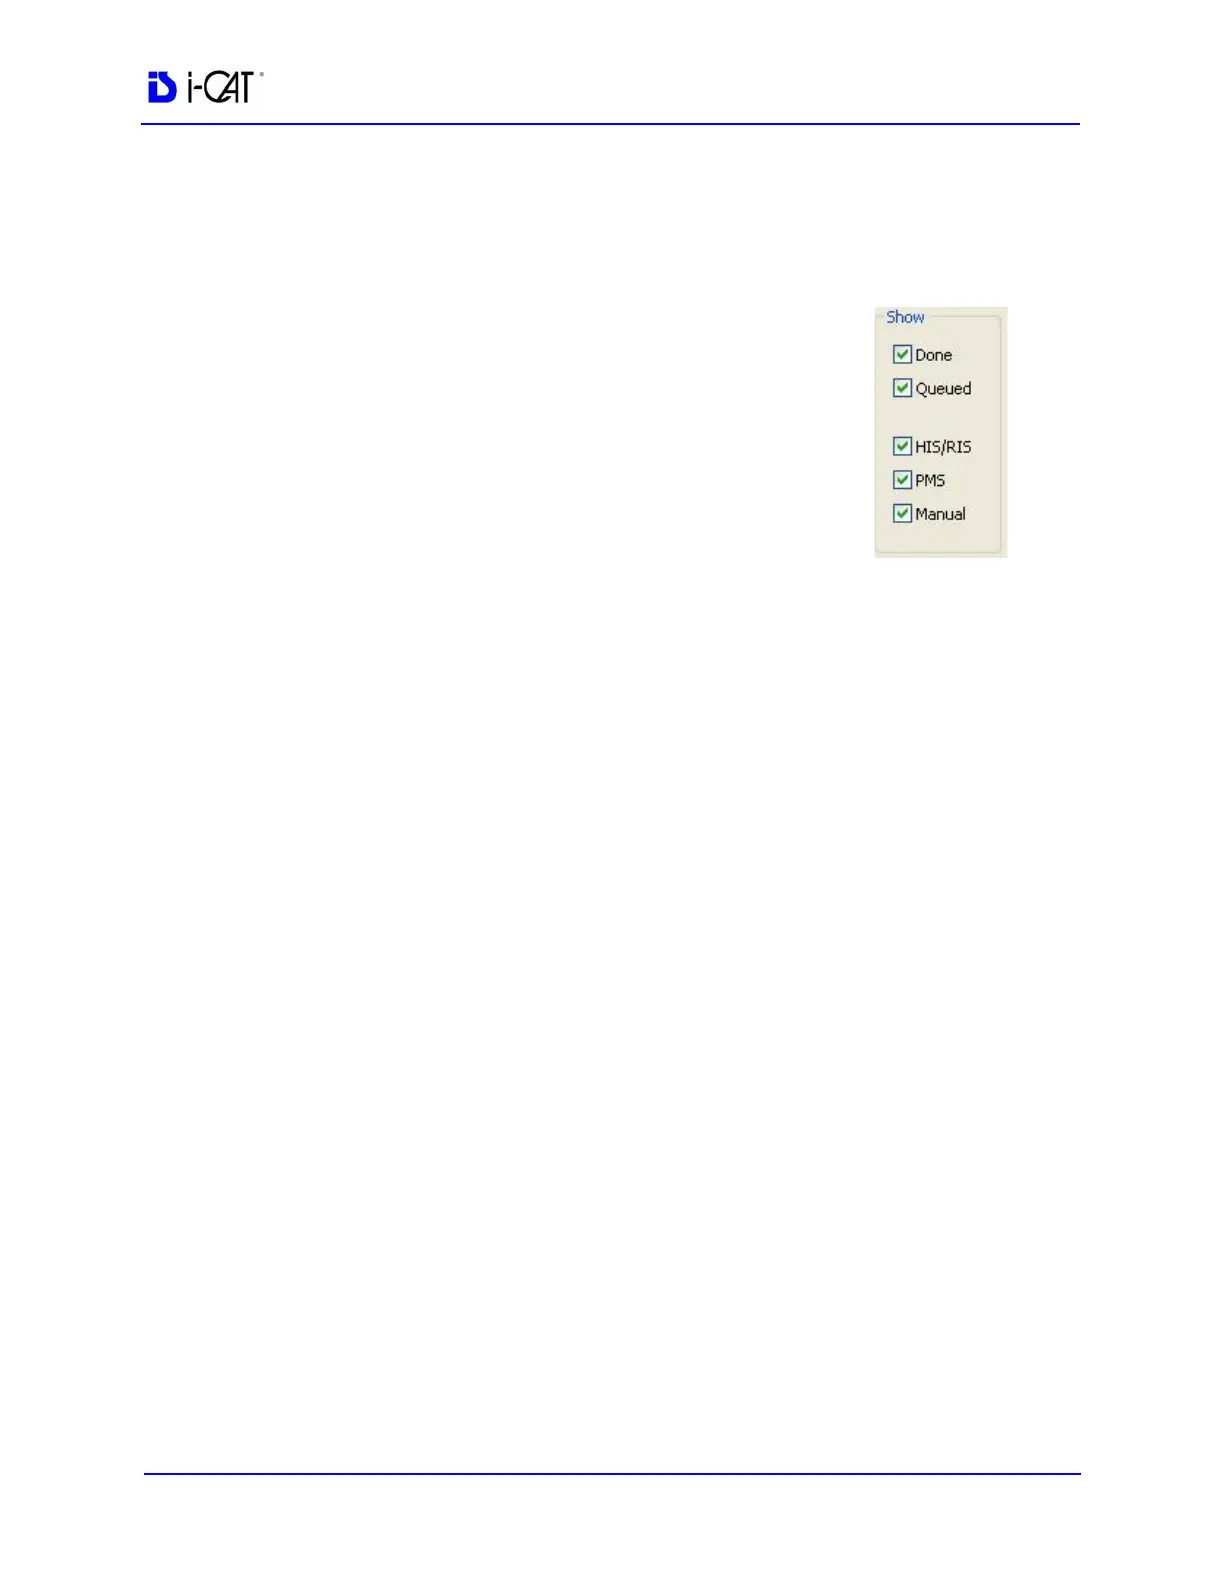
2. If desired, limit the number of Patients listed by using the check
boxes in the Show area at the lower right side of the dialog box.
Only Patients whose data matches the selected criteria are
displayed.
• Done - Patient Data entered and scanned
• Queued - Patient Data entered but not
scanned
• HIS/RIS - (Hospital Info System/Radiology
Info System) imported Patient Data
• PMS - (Practice Management System)
imported Patient Data
• Manual - Patient Data entered manually
3. Click (highlight) the Patient to modify.
4. Click Edit.
NOTE: The Enter Patient Information screen may have additional
tabs for entering names in Standard (Single Byte), Ideographic, or
Phonetic characters. For setup instructions, see DICOM Character
Set for New Files
.
5. Modify Patient data as desired.
6. Click OK to update Patient data.
7. Click Cancel to close the dialog box or click OK to access the
acquisition screen to start the patient scan.
Access Patient Data
Access Patient Details to be Scanned:
1. From the Main menu, select File > New Patient.
2. Highlight the Patient to be scanned and click OK or just double
click the patient line.
3. The Acquisition screen is displayed for the selected patient.