2MN/2N1
1-3-98
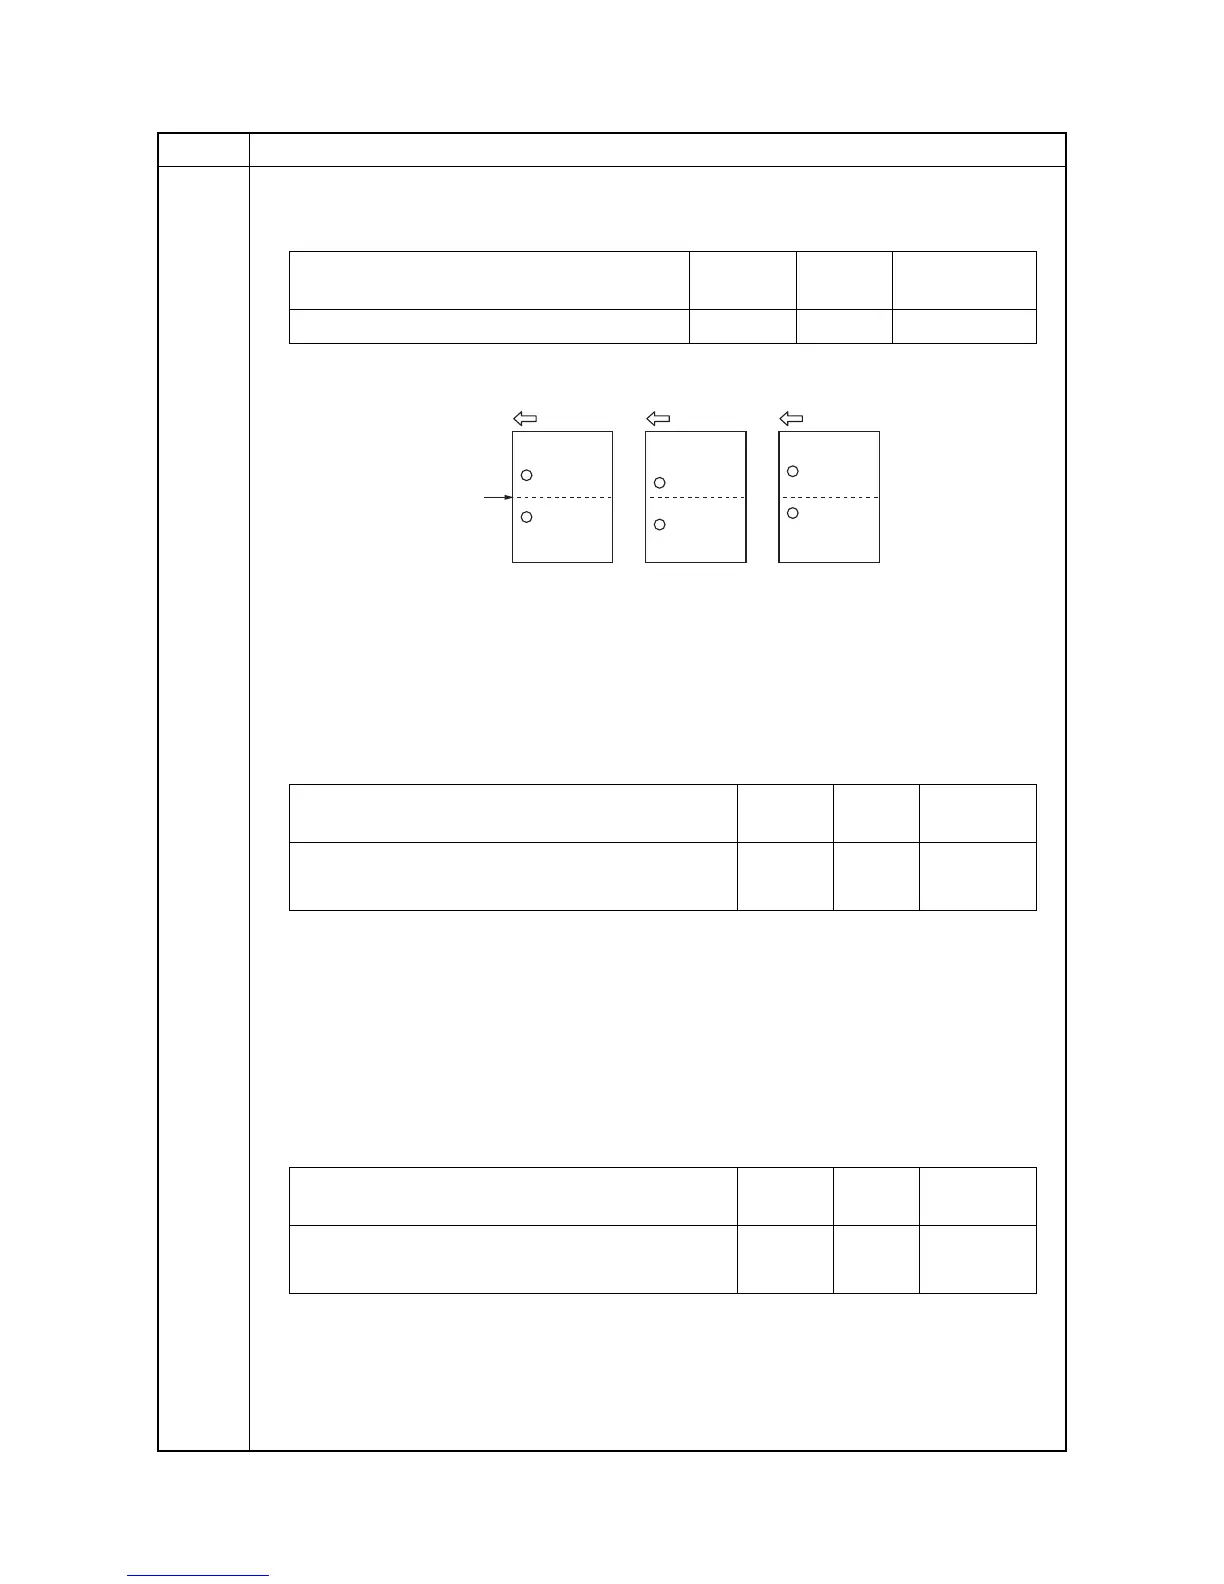
U246 Setting: [Punch Width]
1. Select [Punch Width].
2. Change the setting value using the numeric keys.
If the punch hole is too close to the front of the machine, increase the setting value. If the
punch hole is too close to the rear of the machine, decrease the setting value.
Figure 1-3-9
3. Press the OK key. The value is set.
Setting: [WidthFront HP/WidthTail HP]
1. Select [Width Front HP] or [Width Tail HP].
2. Change the setting value using the numeric keys.
3. Press the OK key. The value is set.
4. Press the Back key. The screen for selecting a maintenance item No. is displayed.
5. Enter maintenance mode U240 and select [Motor], then [Width Test(A3)].
The width guides of the middle tray will move to A3-size position.
6. Pull the middle tray, insert paper between the guides and check that paper is abut the guides.
7. Repeat the above adjustment until paper is properly in position.
Setting: [ShiftFront HP/ShiftTail HP]
1. Select [Shift Front HP] or [Shift Tail HP].
2. Change the setting value using the numeric keys.
3. Press the OK key. The value is set.
4. Press the Back key. The screen for selecting a maintenance item No. is displayed.
5. Enter maintenance mode U240 and select [Motor], then [Sort Test].
6. Repeat the above adjustment until eject paper is properly in position.
Item No. Description
Description Setting
range
Initial
setting
Change in
value per step
Adjustment of the punch center position timing -4 to 4 0 0.52 mm
Center line
(within ± 0.5 mm)
Sample 1 Sample 2
Description Setting
range
Initial
setting
Change in
value per step
Adjustment of front side registration home position -15 to 15 0 0.19 mm
Adjustment of rear side registration home position -15 to 15 0 0.19 mm
Description Setting
range
Initial
setting
Change in
value per step
Adjustment of front shift home position -15 to 15 0 0.19 mm
Adjustment of rear shift home position -15 to 15 0 0.19 mm
 Loading...